

Just using the primary spark table. I set the decel values to 1* BTDC and my fuel table uses a 1 value for VE in the same cells. I never hit these while driving so it only happens when I'm off throttle. Overrun kicks in after 5 seconds and the noise stopsRay wrote:
Where is the overrun table in there? Does that affect your startup or on throttle driving? That's hilarity.
My Build Thread: Project "Rain Cloud"

Re: My Build Thread: Project "Rain Cloud"
Re: My Build Thread: Project "Rain Cloud"
3 weeks of updates (started 3 weeks ago, only a couple days of actual work though).
Still was fighting that bull**** overheating issue which led to buying a 2nd fan from Silicone Intakes and wiring that in parallel with the other fan already in the car. Both fans use the stock plug for easy removal:

Tried to loom it nicely:

I think I have some split loom laying around that I can clean it up with.
Also removed the hard line that went to the HCV which I deleted long ago. It seems I was getting a steam pocket here since the line was higher than the overflow.

No pictures, but got the car ALL buttoned up two weeks ago. Drove to Advance Auto to get some Water Wetter and the line going to the oil cooler exploded. Dumped about a gallon of coolant in their lot. R&R'd the line there and filled up with coolant. Probably one of the best spots to have the line go so no complaints. Cleaned up with Speedy Dry they provided so overall, not bad
Also, swapped the tensioner for my alternator from the fender to the bracket like Ray had done. I noticed some stress fractures around the bolt in the fender and this is a bit cleaner. Should have done it this way from the start:
Onto updates from today. Going to a huge cruise tomorrow and going to attempt 100' drags if the weather holds. Buddy in his 78 Malibu thinks it would be fun to line up...his car has a built 496... I will SOOO lose, but going to be fun either way and I'm curious how bad it will be.
So, in prep for the show part gave the car a full wash/clay/wax and interior detail which I haven't done all year. Also, freshened up the calipers since the paint was pretty faded and chipped in some spots. Also, painted the rotor hats since they seem to rust WAY too easy. Not sure what brand they are. All I know is they are 300mm SVTF rotors.


The bit of overspray on the pad is from some touchup done after I had everything buttoned up and chipped it putting the wheel on. Should wipe off since the pads have a good layer of brake grease on them.
Also put the stock water pump pulley on and cleaned that up. The large Esslinger pulley just underdrives the pump too much to keep temps in check at idle. I may look into a Flowkooler pump and then swap back to this pulley, but not really worth it for the bling factor. Car doesn't need the extra 2-3hp. Also cleaned up the power steering pulley and re-painted the charge piping and filter heatshield:
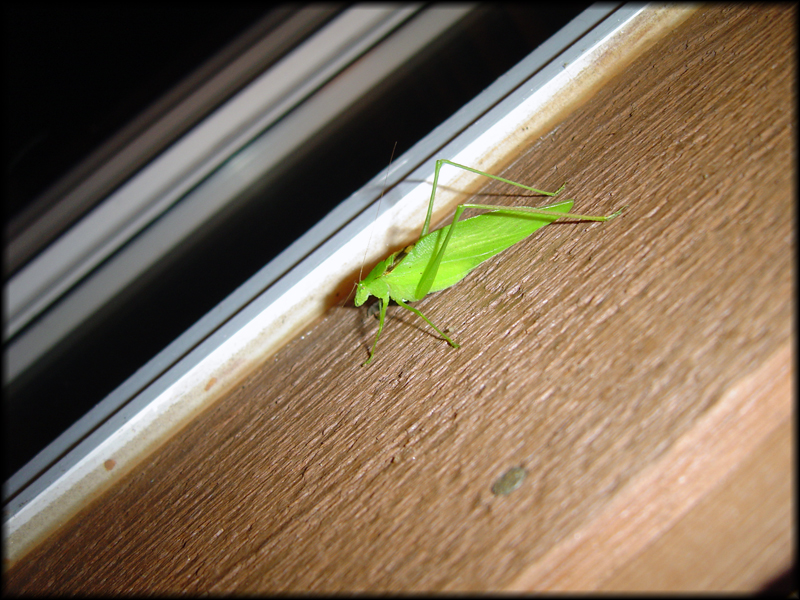
And my helper for the evening. Going to miss summer
Also related to two weekends ago. Had two friends in the car and got the OH HEY thumbs-up from a Mk4 Supra on the highway coming into Hartford. Better than the WTF look I normally get. Also, realized the sidepipe REALLY belches flames so took a video this evening. I promise it's more obnoxious in person. Unfortunately the camera didn't pick up the fire at the end with the launch control. I feel like such a ricer, but I'm ok with it
http://www.youtube.com/watch?v=Cv24XoipRcI
Still was fighting that bull**** overheating issue which led to buying a 2nd fan from Silicone Intakes and wiring that in parallel with the other fan already in the car. Both fans use the stock plug for easy removal:
Tried to loom it nicely:
I think I have some split loom laying around that I can clean it up with.
Also removed the hard line that went to the HCV which I deleted long ago. It seems I was getting a steam pocket here since the line was higher than the overflow.
No pictures, but got the car ALL buttoned up two weeks ago. Drove to Advance Auto to get some Water Wetter and the line going to the oil cooler exploded. Dumped about a gallon of coolant in their lot. R&R'd the line there and filled up with coolant. Probably one of the best spots to have the line go so no complaints. Cleaned up with Speedy Dry they provided so overall, not bad
Also, swapped the tensioner for my alternator from the fender to the bracket like Ray had done. I noticed some stress fractures around the bolt in the fender and this is a bit cleaner. Should have done it this way from the start:
Onto updates from today. Going to a huge cruise tomorrow and going to attempt 100' drags if the weather holds. Buddy in his 78 Malibu thinks it would be fun to line up...his car has a built 496... I will SOOO lose, but going to be fun either way and I'm curious how bad it will be.
So, in prep for the show part gave the car a full wash/clay/wax and interior detail which I haven't done all year. Also, freshened up the calipers since the paint was pretty faded and chipped in some spots. Also, painted the rotor hats since they seem to rust WAY too easy. Not sure what brand they are. All I know is they are 300mm SVTF rotors.
The bit of overspray on the pad is from some touchup done after I had everything buttoned up and chipped it putting the wheel on. Should wipe off since the pads have a good layer of brake grease on them.
Also put the stock water pump pulley on and cleaned that up. The large Esslinger pulley just underdrives the pump too much to keep temps in check at idle. I may look into a Flowkooler pump and then swap back to this pulley, but not really worth it for the bling factor. Car doesn't need the extra 2-3hp. Also cleaned up the power steering pulley and re-painted the charge piping and filter heatshield:
And my helper for the evening. Going to miss summer
Also related to two weekends ago. Had two friends in the car and got the OH HEY thumbs-up from a Mk4 Supra on the highway coming into Hartford. Better than the WTF look I normally get. Also, realized the sidepipe REALLY belches flames so took a video this evening. I promise it's more obnoxious in person. Unfortunately the camera didn't pick up the fire at the end with the launch control. I feel like such a ricer, but I'm ok with it
http://www.youtube.com/watch?v=Cv24XoipRcI
Last edited by hEaT on Fri Jun 22, 2018 11:23 pm, edited 1 time in total.
Re: My Build Thread: Project "Rain Cloud"
R&R'd water pump. Car overheated again, blew upper rad hose. Replaced hose, refilled coolant (have lost about 6 gallons between West Hartford, autocross, 84 in Vernon and various other places), bleeding system, rev'd motor and it stalled. Will not restart. Have fuel and spark. Yanking the head when I actually give a {%@.


Re: My Build Thread: Project "Rain Cloud"
Ugh
Jon
06 Subaru Outback 2.5i, black steelies (DD)
06 Subaru STI, light bar, built EJ257 w/ 2618, GTX3582r .82, meth (nights)
95 Jeep XJ, 5 speed, 2.5" OME lift, 31" MT's (alt. DD)
99 Jeep XJ, NP242 auto, 2.5" OME lift, 31" MT's (radios)
89 Merkur XR4Ti, Megasquirt, DP, cam, meth (Sunday cruiser)
06 Subaru Outback 2.5i, black steelies (DD)
06 Subaru STI, light bar, built EJ257 w/ 2618, GTX3582r .82, meth (nights)
95 Jeep XJ, 5 speed, 2.5" OME lift, 31" MT's (alt. DD)
99 Jeep XJ, NP242 auto, 2.5" OME lift, 31" MT's (radios)
89 Merkur XR4Ti, Megasquirt, DP, cam, meth (Sunday cruiser)
Re: My Build Thread: Project "Rain Cloud"
Lovely, pulled the filter/intake and charge piping this weekend. No sign of coolant/water anywhere or in the intake manifold. Put in new plugs (Autolite 764's), have solid white/blue spark, plugs covered in fuel when I remove (42psi of pressure at the rail under cranking and injectors obviously working), cam and crank in time, MS shows readings from all sensors and logging cranking shows nothing unusual. Got the car to fire once for a half second when cranking, but that was it.
Compression test last year:
Cyl 1: 160 psi
Cyl 2: 145 psi
Cyl 3: 150 psi
Cyl 4: 155 psi
Yesterday:
Cyl 1: 65 psi
Cyl 2: 100 psi
Cyl 3: 70 psi
Cyl 4: 70 psi
Both were done on a cold motor FWIW, but seems like the head is warped/cracked and a possible toasted gasket. Hoping it's not the rings
Compression test last year:
Cyl 1: 160 psi
Cyl 2: 145 psi
Cyl 3: 150 psi
Cyl 4: 155 psi
Yesterday:
Cyl 1: 65 psi
Cyl 2: 100 psi
Cyl 3: 70 psi
Cyl 4: 70 psi
Both were done on a cold motor FWIW, but seems like the head is warped/cracked and a possible toasted gasket. Hoping it's not the rings
Re: My Build Thread: Project "Rain Cloud"
Some updates:
______________________________________________________________________________________________________
Timing had jumped previously....re-timed and good compression. Car fired just breathing on the key. Crank is in time in this picture. Mark to the right of the 12* retard SHOULD be in the center of the 3 inner cover marks...

New door cards:

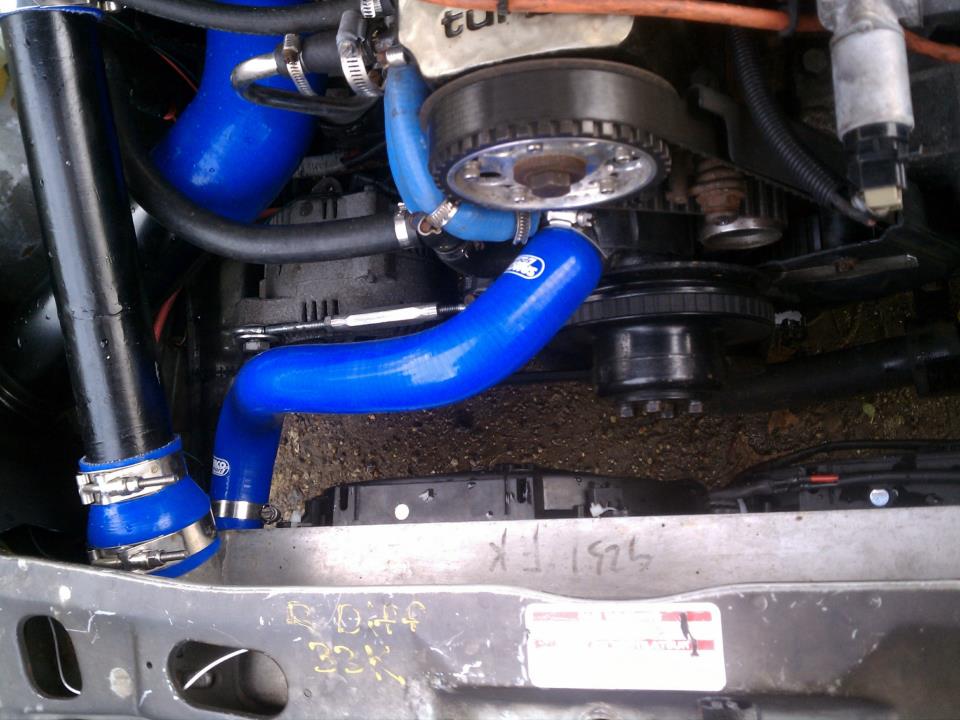
Figured out the overheating. Belt wasn't getting enough bite on the Essy crank pulley with the alt relocate. Bypassed power steering and tripled the bite on the crank and water pump. No more over heating driving maybe 20-30 miles, temp gauge doing the normal thing and STRONG burn your ass out of the car heat.

Clean.

______________________________________________________________________________________________________
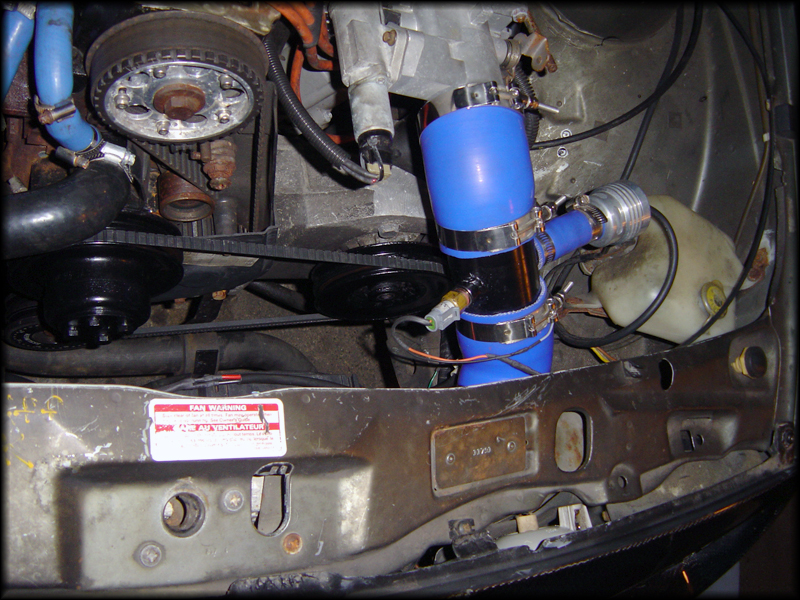
Samco upper hose in from Mike:
______________________________________________________________________________________________________
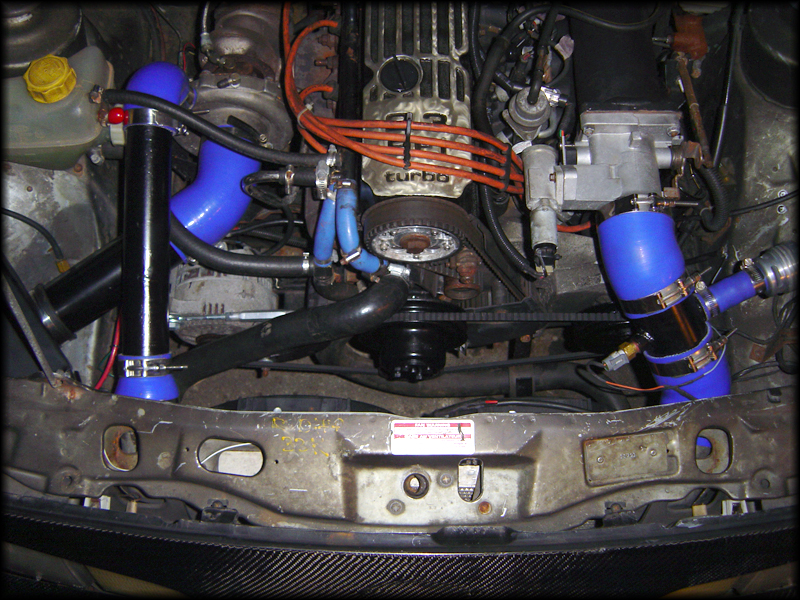
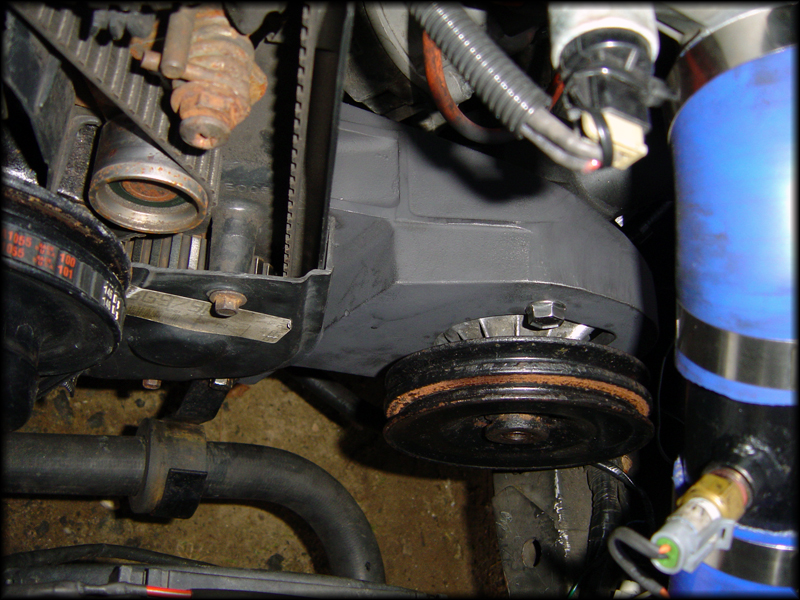
P/S bracket cleaned up and painted as well as the hardware. Replaced the soft return line from the cooler loop to the pump as well.
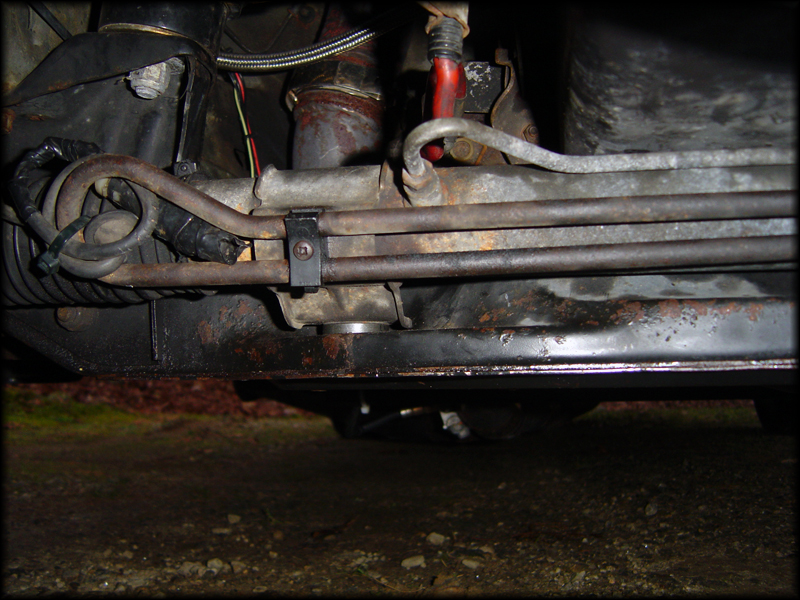
Since the pump and lines were out, thought it was a good time to replace the rack bushings as well with some nylon units from mc2racing.
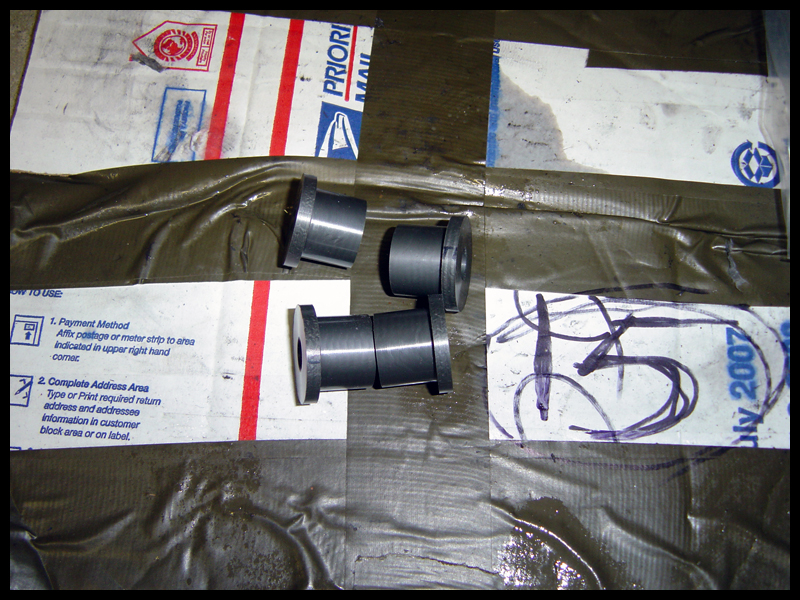
OEM came out VERY easily with a 2-jaw puller and install wasn't too bad. A c-clamp would have made it cake, but had to make do with the puller again.
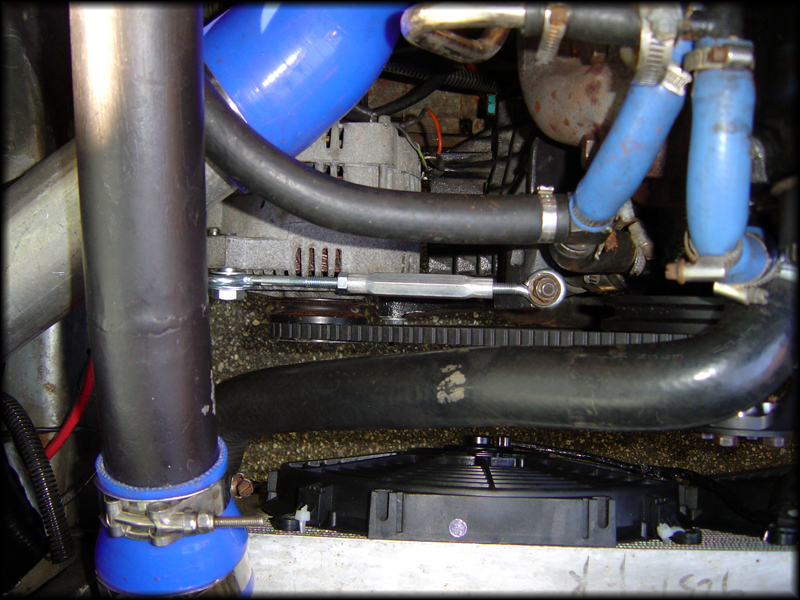
Because of the tiny Essy crank pulley, 3g alt and a single belt, running the belt around all 4 causes it it to slip on the crank and lose cooling and the alt. Plan is to use a spare Focus idler I have and run a second belt around the crank, water pump and power steering and create a tensioning bracket against the back of the belt with the idler.
______________________________________________________________________________________________________
Timing had jumped previously....re-timed and good compression. Car fired just breathing on the key. Crank is in time in this picture. Mark to the right of the 12* retard SHOULD be in the center of the 3 inner cover marks...
New door cards:
Figured out the overheating. Belt wasn't getting enough bite on the Essy crank pulley with the alt relocate. Bypassed power steering and tripled the bite on the crank and water pump. No more over heating driving maybe 20-30 miles, temp gauge doing the normal thing and STRONG burn your ass out of the car heat.
Clean.
______________________________________________________________________________________________________
Samco upper hose in from Mike:
______________________________________________________________________________________________________
P/S bracket cleaned up and painted as well as the hardware. Replaced the soft return line from the cooler loop to the pump as well.
Since the pump and lines were out, thought it was a good time to replace the rack bushings as well with some nylon units from mc2racing.
OEM came out VERY easily with a 2-jaw puller and install wasn't too bad. A c-clamp would have made it cake, but had to make do with the puller again.
Because of the tiny Essy crank pulley, 3g alt and a single belt, running the belt around all 4 causes it it to slip on the crank and lose cooling and the alt. Plan is to use a spare Focus idler I have and run a second belt around the crank, water pump and power steering and create a tensioning bracket against the back of the belt with the idler.
Last edited by hEaT on Mon Jun 25, 2018 10:26 pm, edited 2 times in total.

Re: My Build Thread: Project "Rain Cloud"
How does it feel driving without power steering? I've always hated power steering and have contemplated removing it entirely. Creating some sort of loop system between the two sides of the rack.
Was there ever a manual rack made for the XR or any cars like it?
Was there ever a manual rack made for the XR or any cars like it?
88 5-speed, Red XR
86 5-speed, 4x2 Toyota Pickup 22R
75 F-250, 4x2 w/390
2010 Impreza (wifes car)
86 5-speed, 4x2 Toyota Pickup 22R
75 F-250, 4x2 w/390
2010 Impreza (wifes car)
Re: My Build Thread: Project "Rain Cloud"
It's awful. Once moving it's ok, but I cannot autox with the current setup. If I pulled the rack apart and removed the P/S seals and filled it with grease it would probably be decent. Looping the lines would be marginally better than what I have now.
There was a manual rack for the Sierra which bolts in with the correct extension from the steering column to the rack. Unfortunately, it has something absurd like 4.3 turns to lock. The current rack I have in the car is a TRW 2.5ish turns to lock, not the slower and more common 3.5 to lock so I really don't want to ruin it and replacement ZF quick ratio rack isn't cheap.
I believe the Fieros used a similar rack and they swap in our racks to have power steering. I believe the GT was 3 turns to lock, unsure if it was manual or not. The Mk3 Golfs use a similar rack, but the attachment points look too different to work easily.
Re: My Build Thread: Project "Rain Cloud"
Good to know. lol. Maybe I'll just keep it how it is for now.
88 5-speed, Red XR
86 5-speed, 4x2 Toyota Pickup 22R
75 F-250, 4x2 w/390
2010 Impreza (wifes car)
86 5-speed, 4x2 Toyota Pickup 22R
75 F-250, 4x2 w/390
2010 Impreza (wifes car)
Re: My Build Thread: Project "Rain Cloud"
Yeah. The only reason I would consider permanently removing it would be to remove some clutter. With no readily available alternatives though, I'll stick with my power steering.
Re: My Build Thread: Project "Rain Cloud"
lol who knows how long the flimsy (for whatever reason bendy) steering wheel would stand up to it either.
Anyway I'll stop hyjacking your build thread. haha. Looking good BTW!
Anyway I'll stop hyjacking your build thread. haha. Looking good BTW!
88 5-speed, Red XR
86 5-speed, 4x2 Toyota Pickup 22R
75 F-250, 4x2 w/390
2010 Impreza (wifes car)
86 5-speed, 4x2 Toyota Pickup 22R
75 F-250, 4x2 w/390
2010 Impreza (wifes car)
Re: My Build Thread: Project "Rain Cloud"
Haha, no worries and thanks!
I ditched the flappy wheel last year and haven't looked back. I really did not like driving with the captains wheel.
I ditched the flappy wheel last year and haven't looked back. I really did not like driving with the captains wheel.
Last edited by hEaT on Mon Jun 25, 2018 10:28 pm, edited 1 time in total.

Re: My Build Thread: Project "Rain Cloud"
Nice door cards!
The rest of your interior is begging for some updates - i'm thinking black carpet, black seats, blue inserts on the seats (katskinz?) ala focus RS.
The rest of your interior is begging for some updates - i'm thinking black carpet, black seats, blue inserts on the seats (katskinz?) ala focus RS.
-Ray
1985 Ford F150 - Tow Missile
1985 Merkur XR4Ti -#141 CP "Miss Daisy"
2005 Subaru LGT
http://www.cartct.com
1985 Ford F150 - Tow Missile
1985 Merkur XR4Ti -#141 CP "Miss Daisy"
2005 Subaru LGT
http://www.cartct.com
Re: My Build Thread: Project "Rain Cloud"
Definitely my plan or all black seats. Maybe a set of reclining Recaro/Corbeau seats.
-
Camaro5690
- Level 5

- Posts: 568
- Joined: Tue Jul 28, 2009 7:40 pm
- Location: Leland NC
Re: My Build Thread: Project "Rain Cloud"
Just saw a pic of the front end of you car on some Camaro forums. How was Uconn? Get any pics?
Adam Wilson