Page 7 of 11
Re: My Build Thread: Project "Rain Cloud"
Posted: Mon May 06, 2013 8:35 am
by hEaT
Thanks Ray, that's the plan anyway. If this all works and with the turbo as high up as it is, it should be doable to R&R in 5 minutes and not have to touch any gaskets or lose much coolant.
Re: My Build Thread: Project "Rain Cloud"
Posted: Tue May 07, 2013 6:27 pm
by MercMike
Are you adding a support bracket from the motor to the turbo ?
I was just thinking it would be a shame to crack that 90 deg. log/turbo adapter.
Some insurance could be a benefit ?
Re: My Build Thread: Project "Rain Cloud"
Posted: Tue May 07, 2013 11:24 pm
by hEaT
MercMike wrote:Are you adding a support bracket from the motor to the turbo ?
I was just thinking it would be a shame to crack that 90 deg. log/turbo adapter.
Some insurance could be a benefit ?
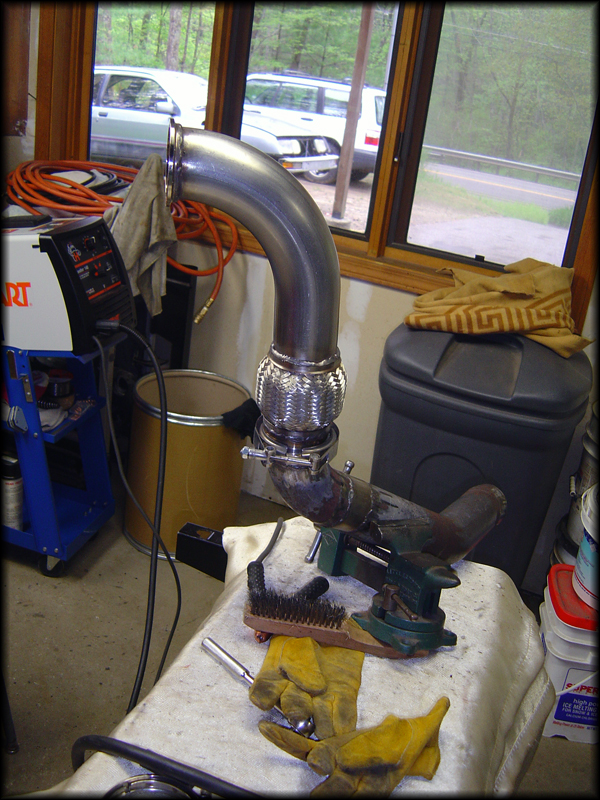
Yup, just haven't had a chance to design it yet. Trying to find the most suitable place to brace it to and incorporate some rod ends to add tension. The 90* elbow is 11ga so it's pretty beefy and the downpipe has a flex, but would rather not test it.
Re: My Build Thread: Project "Rain Cloud"
Posted: Sat May 11, 2013 11:07 pm
by hEaT
Re: My Build Thread: Project "Rain Cloud"
Posted: Sun May 12, 2013 6:14 am
by Ray
What did you use to pressurize the line for testing?
I like this progress.

Re: My Build Thread: Project "Rain Cloud"
Posted: Sun May 12, 2013 9:59 am
by hEaT
Thanks Ray. And I just used an air fitting. Quick disconnect on one end and 1/4" female NPT on the other. Threaded in the distribution block and then terminated with a spare gauge I had (used the old brass fitting off the turbo which goes from -4AN to 1/8" NPT). After that, just used the regulator on the compressor.
Re: My Build Thread: Project "Rain Cloud"
Posted: Sun May 12, 2013 11:21 pm
by hEaT
A lot is still temporary like oil feed routing, battery, coolant bottle, no charge piping, but made good progress today.


Worst welds of the project here. Figured it was a good spot to practice different ways to weld pipe since it's hidden. Tried repeatedly tacking and then seeing how far I could seam before the puddle would start to burn through.

Yanked the tank to replace the feed and return lines. Hardest part were the clips, which wasn't that hard after learning how the non-duckbill style clip works (prevents you swapping the feed and return lines on the fuel hat).

Out! Cleaned off the tank and rust while it was out.

This is why I had to yank the tank. This was down just below the fuel filter inlet front of the DS rear tire.

And now this is able to run. Coolant bottle is propped up on a box of bolts, no hose clamps, battery is sitting on the tray, IAT is plugged in (forgot this for the first start), but no need for the charge piping to be hooked up yet.

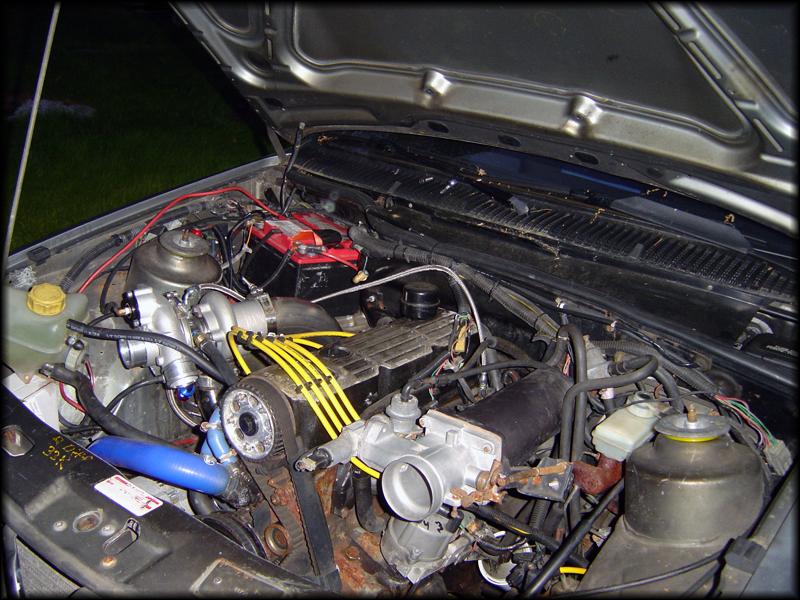
First time cranking after priming. Not bad

Realize after I had two vacuum leaks (old BOV reference and rotted vacuum cap), no o2 sensor reference, and no IAT.
http://www.youtube.com/watch?v=Ld263fGkHuU
Proof.
In short, this was a busy Sunday.
- Removed all the manifold parts and installed gaskets, torqued
- Made a temporary EWG block plate and installed
- Installed turbo and plumbed
- Installed downpipe
- Installed radiator and IC
- Oil change, cheap oil to break in the turbo
- Redneck coolant bottle solution to let car come up to temp
- R&R'd fuel tank and replaced both nylon fuel lines
- Trimmed alt bracket to fit manifold
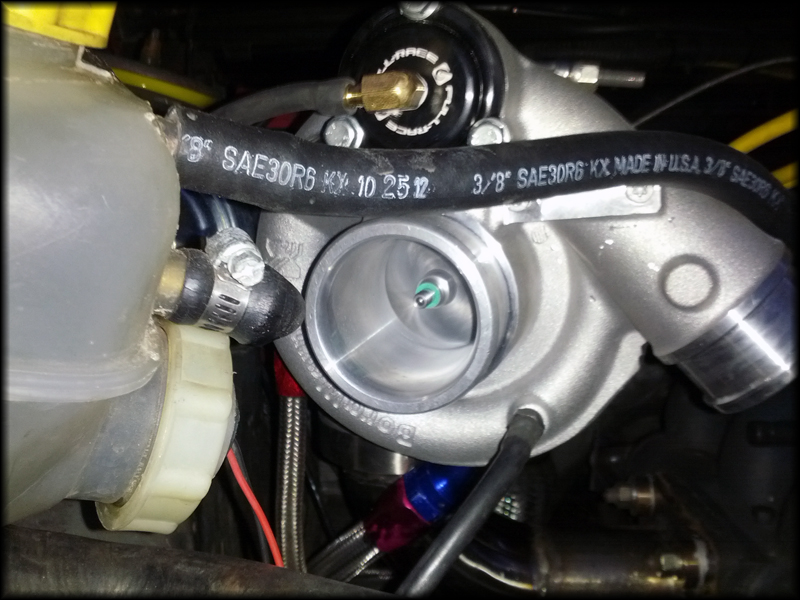
- Primed turbo, cranking for about a minute, was surprised how long it took to build pressure through the CHRA
Still to do:
- Install a proper EWG block plate
- Chase exhaust leaks
- Clean up alt bracket, possible relocate back to driver's side
- Build hot side charge pipe and block compressor housing
- Build turbo brace, turbine clamp bolts to TB studs
- Build inlet, using a Green filter from FSWerks
- Relocate battery and wire purchase gell cell for in car mounting
- Build coolant bottle, will go in battery tray, plumb
- Tune
And, because ricer.
http://www.youtube.com/watch?v=gJJkLzq7_cQ
Re: My Build Thread: Project "Rain Cloud"
Posted: Sat May 25, 2013 11:33 pm
by hEaT
Few more things done. Big things remaining are the battery relocate (Braille B2317) and building the coolant jug. I have all the fittings for the jug, but AL sheet won't be in until later this week which pushes me back a few weekends. I have the battery and terminals, but need to touch base with Ray on the wiring part.
Friend lasered a nice EWG block-off plate for me:

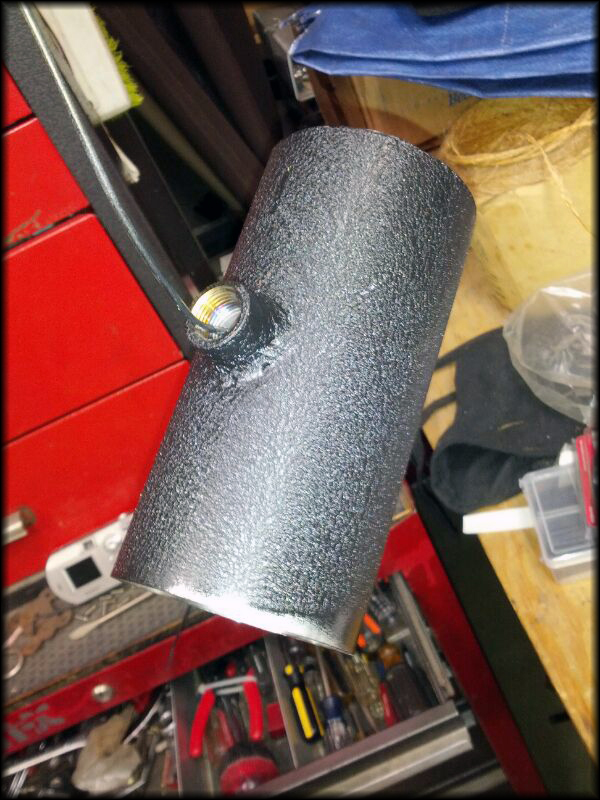
Mocking up the hot side pipe:


Cold side painted:
Both in:

Intake will be done tomorrow, temporary for now. I'd like to extend it into the fender eventually. Filter is from the FSWerks 13+ ST intake kit:

Had a rattle from the top end, and it was what I thought...two rivets had come out of the baffles. Found one on the head, other is who knows where. Tapped for some spare M5x0.8 hardware I had and lots of loctite added:

Re: My Build Thread: Project "Rain Cloud"
Posted: Sun May 26, 2013 10:25 pm
by catapultkid
Looks awesome. Can't wait to see if running and reviews of the turbo spool time/power and what not.
Re: My Build Thread: Project "Rain Cloud"
Posted: Sun May 26, 2013 10:48 pm
by hEaT
catapultkid wrote:Looks awesome. Can't wait to see if running and reviews of the turbo spool time/power and what not.
Thanks, me too!
Replaced the upper hose with a new one. Dayco 71679. Specs for a lower hose on a 2.2 Toyota Camry, but fits perfect after trimming an inch off the thermostat side. It's a bit longer which is what I need for the shorter radiator.

Intake done:

Also, big help from Ray today with the wiring. Never done a relocate before so needed a hand with a lot of it. Came out nice, still need to make a box for the battery. I'll also make a more permanent mount for the fuse folder.

False firewall is back in. Wire runs out behind it with one of the vacuum lines:

New charging cable to replace my old one:

Re: My Build Thread: Project "Rain Cloud"
Posted: Mon May 27, 2013 11:02 pm
by hEaT
Overkill in its purest form, my battery tray.
Innocently tack'd together
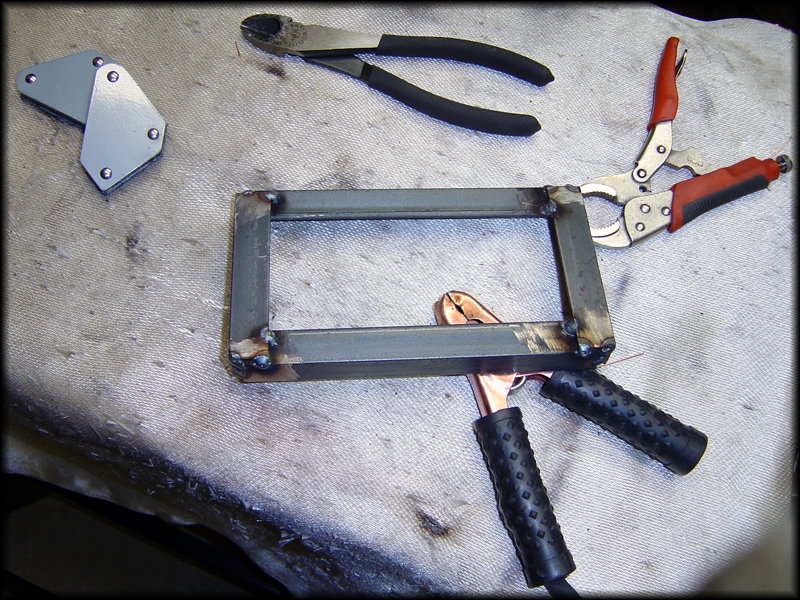
Battery fits, this is good

Now I need a way to mount it to the floor. I was orginally going to tie it into the shock brace, but I didn't like the position of the battery. I use the hatch a lot and it took up good, usable space. It also left the terminals exposed. Chose to bolt it to the floor; spare M8x1.25 10.9 hardware with three tabs.


In. Strap was just to test. I'll get a beefier strap before the car hits the road.

After admiring my handiwork, fuse popped on initial crank. Made maybe a half-dozens starts no problem, but I guess 200A is not enough...blah. Motivation for a mini-starter is growing since I'm hesitant to run more than a 200A fuse with 4ga wire. Also need to grab a nice positive terminal cover. It would be by chance anything makes it over there to hit the positive, but this is also a Merkur.
Re: My Build Thread: Project "Rain Cloud"
Posted: Tue May 28, 2013 5:13 am
by Ray
Mini starter time, joe. I'm actually surprised that the fuse let go -200a is a lot of juice.
And i agree - even a 200a is pushing it for 4ga. Actually you're probably over the recommended limit, but it's only a spike, not sustained.
Re: My Build Thread: Project "Rain Cloud"
Posted: Tue May 28, 2013 7:01 am
by hEaT
Ray wrote:Mini starter time, joe. I'm actually surprised that the fuse let go -200a is a lot of juice.
And i agree - even a 200a is pushing it for 4ga. Actually you're probably over the recommended limit, but it's only a spike, not sustained.
That's the advice I was looking for, thanks. Will do the mini-starter. I feel like 250A would be enough fuse, but then it's not doing jack to protect the wire during normal driving.
Wonder if I could step down to a 150A fuse (believe that's what the 4ga is rated for?) if I go with the mini-starter.
Re: My Build Thread: Project "Rain Cloud"
Posted: Tue May 28, 2013 9:35 am
by whitelx
Typically the starter cable is not fused for the reason you have already experienced. Huge amounts of current pass through for a short period of time. A battery can supply in excess of 600amps during starting. The correct way is to use two cables and a starter relay. Keep the 4 gauge and fuse for the alternator to charge the battery, but run a separate 4 or 2 gauge with a starter relay placed near the battery for the starter. With the relay at the battery, the long cable run is only energized during during starting. Much less risk with it being unfused. It is more weight.
You might be able to get away with a larger fuse for a while, but it will eventually blow over time.
Re: My Build Thread: Project "Rain Cloud"
Posted: Wed May 29, 2013 1:49 am
by In XS 7
I love this thread, beautiful job Joe.
Hey Joe, I have two questions: It's ok with you if I relocated my battery just like yours? and if so, where did you get that fuse and battery wires? (both, positive and negative). Thanks; keep posting, everything looks great.

I will wait till it is done to find out what wire gauge rate it's better and how many Amps for the fuse, but I want to know where I can get them, I want to get them from the same place if possible because you guys know better about quality and brands than me.