Anglin's Racer Build and History
I few posts got lost, so it's time to catch up. Here's the link picture that vanished:
I have one last part to draw before the assembly can be completed, screen shots taken, an FTP upload completed and a post made to share the kickass goodness with you. In the meanwhile, this should hold you over:
That's proof that the McMaster order came in today along with a few raw materials. I'll be getting weld inserts and some raw material Friday, then we're just a few machining tasks away from a completed product.
Anglin email: - anglin at mc2racing.com
www.mc2racing.com
www.mc2racing.com
I believe I have about three hours invested total in fitting this assembly together so that everything works right. It looks so cool when you move stuff around. Anyway, thanks for being patient. I've been talking about this project since the beginning of the year and showing very little.
Remember, the goal of this design was to come up with a set of components that solves a problem. As it stands, all previous compression strut suspensions mount the compression struts where the anti-roll bar (sway bar) normally goes. As a result, you either have to lose the ARB or you have to affix brackets forward of the front suspension - Group A style. This suspension design includes a bracket that mounts to the place where the stock ARB bolts and incorporates both the compression strut and the ARB mounts into one. The rod ends on the inner portion of the track control arm and at either end of the compression strut allow for camber and caster adjustment, respectively. But wait, there's more.
We have two stock-style front ARB options for tuning the front suspension balance - stock (26 mm) and Cosworth (28.5 mm). This design gives those options as well. In addition to being able to set the front ARB stiffness to either stock- or Cosworth-equivalent ARB stiffnesses, there are also 4 points of adjustment in between those values. That's a total of 6 choices of anti-roll bar "sizes." If I really wanted it, I could also get an anti-roll bar that had the same stiffness as the super-rare 32 mm front ARB like the one someone posted for sale recently that was priced deep into the 4-figure price range. If I really, really wanted it, I could have at my disposal a range of front ARB stiffnesses as low as equivalent to 24.5 mm or as high as 32 mm.
So, there you have it folks...
- front suspension with rod ends and spherical bearings instead of rubber or polyurethane bushings
- fully adjustable front suspension with
-- camber
-- caster
-- toe
-- AND an adjustable anti-roll bar setup that lets you go from stock to Cosworth stiffess with ease
No modification to the chassis is required. After I bolt it on for the test phase, I can remove it and put the stock suspension back on the car.
And now for the pictures...
Anglin email: - anglin at mc2racing.com
www.mc2racing.com
www.mc2racing.com
Complete setup:
Close up of the detail of the left side components:
Front view:
Front 3/4 shot showing all the components:
Close up of the detail of the left side components:
Front view:
Front 3/4 shot showing all the components:
Anglin email: - anglin at mc2racing.com
www.mc2racing.com
www.mc2racing.com
- DPDISXR4Ti
- Site Admin
- Posts: 14831
- Joined: Wed Jan 08, 2003 11:40 pm
- Location: New York
screw in, adj. ball joint so we can change the roll center?
1986 XR4Ti - 294rwhp/315ft-lbs
1992 Mustang 5.0 notch - 434rwhp/445ft-lbs
http://www.youtube.com/user/whitelx
1992 Mustang 5.0 notch - 434rwhp/445ft-lbs
http://www.youtube.com/user/whitelx
Excellent idea, but. It would probably just be a better idea to include a stud that goes from the outer TCA spherical bearing to the spindle that has a length that moves the roll center to a new location. All of the components are at specific angles to maximize the range of motion. A roll center adjustment would eat into some of that carefully designed range of motion.whitelx wrote:screw in, adj. ball joint so we can change the roll center?
As far as price is concerned... let us get through testing first. There will likely be some small design changes that come out of testing. That link I put up a few posts back is an example of how stuff changes as the design develops. We had no intentions to make a design like that originally. We were going to use a simplier solution, but design requirements made the simple solution one that just didn't work.
Hopefully testing will show that the monetary investment in these components is worthwhile.
Anglin email: - anglin at mc2racing.com
www.mc2racing.com
www.mc2racing.com
- ALConfederate
- Level 4
- Posts: 373
- Joined: Thu May 29, 2008 10:40 pm
- Location: Hueytown, AL
- Contact:
Heck, man, for something like this, if you have to ask you can't afford it.chadbratt wrote:What's the price we would be looking at?
I'll be watching this with interest myself. I've still got a few issues to deal with on mine, but the first area I have targeted for improvement is my suspension. I want a Merkur that handles like it's on rails.
Dave M.
'89 XR4Ti "The Black Death"
('cause it's black and spends a lot of time dead...)
'89 XR4Ti "The Black Death"
('cause it's black and spends a lot of time dead...)
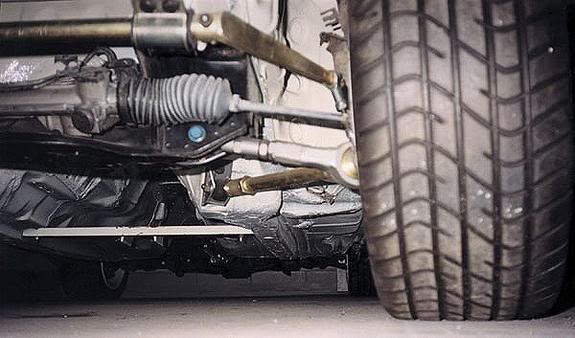
Yeah. The stock ARB connected directly to the stock TCA. Now it connects below. The link is about 3 inches long. There's about 9 inches from the TCA to the ground. That leaves about 6 inches (give or take the decimals from each of these measurements) between the centerline of that ARB link to the ground. Since the end of the ARB moves up and down with the tire, it's not as though contact with the ground is going to be something that the owner has to get used to.Garret wrote:it looks like the sway bar part will be a lot closer to the ground that before.
Testing should be done by the beginning of June. Once we have some performance data on the improvement over the stock configuration, we'll gauge interest then.
Anglin email: - anglin at mc2racing.com
www.mc2racing.com
www.mc2racing.com
- DPDISXR4Ti
- Site Admin
- Posts: 14831
- Joined: Wed Jan 08, 2003 11:40 pm
- Location: New York
Any left-over angle you want to sell? If not, what's the source? I need to get my carbon hood done as well.anglin wrote:Well, that hood is finally going onto the car. I had to build a set of carbon hinge brackets that are epoxied to the hood first. Okay, so I bought the raw carbon angle and then modified it to fit my application.
Care to save me the research time?anglin wrote:Here's the hinge brackets after the epoxy has set. The amount of research in picking the right epoxy and prepping for bonding is gross.
I was thinking about using one of those mono shock props, as used on some Audis and Volvos (possibly others). I've noticed in the junkyard that they wear with age and don't hold the original hoods up any more - the most worn one would probably be ideal for a 5 lb carbon hood. I imagine the weight of these (whatever it is), would be unacceptable to "Dr. WeightIsTheEnemy".anglin wrote:I still have to make a carbon hood prop rod support (and a carbon prop rod while I'm at it
And yes, I'm fully aware that I'm replying to a 3 year-old post!
Brad
The source is out of business, unfortunately. It was a great supplier. I have about 3 feet of 2 inch by 2 inch angle, but I might have to horde it for future projects. How much do you need?DPDISXR4Ti wrote:Any left-over angle you want to sell? If not, what's the source? I need to get my carbon hood done as well.
I think I have a 'tube' of the epoxy I used left. If not, I'll poke around my receipts. Just remove the outer layer of epoxy from the hood with some 240 grit and clean thoroughly.DPDISXR4Ti wrote:Care to save me the research time?
Anglin email: - anglin at mc2racing.com
www.mc2racing.com
www.mc2racing.com