Alrighty, my FTP is working now and I've got a handful of pictures uploaded regarding the anti-roll bar (sway bar) brackets and bushings. Please review the following material for content and accuracy.
There are two different styles of anti-roll bar brackets and bushings that bolt to the XR4Ti. Each bushing and bracket style is a matched set and forcing "part A" into "hole B" will likely render some unintended results (excessive wear, undue noise, and possibly altered function of the anti-roll bar).
The "early" style has rounded shoulders on the outside edges of the bushing and the bracket has a matching profile (I don't have a picture of the bracket right now - can anybody email a picture to me for addition to this FAQ). I've only seen the early brackets in black-painted stamped steel.
The "late" style has pointed shoulders on the outside edges of the bushing and the bracket it appropriately clearanced for these shoulders. Additionally, there is a centering ridge on the centerline radius. I've only seen the late brackets in zinc-plated stamped steel.
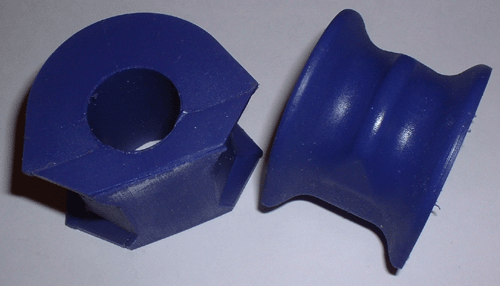
In the following picture, the late bushing is on the left (purple, Powerflex) and the early bushing is on the right (black, Rapido polyurethane).

The following picture shows the late bracket and its Ford part number.

The following picture shows the late bracket and the late bushing (Powerflex). (The yellow bushings to the right are Powerflex strut tower bushings.)

The following picture shows the side profile of the late bushing/bracket assembly and the late bracket itself.


My thread is being used as a FAQ


