Rebuilding an XR4TI

Documenting your big project with photos/videos? Have photos/videos to share of anything Merkur related? Place your links to photos and videos here. Please - Merkurs and Merkur-related pictures only. Cosworths welcome!!
Carlisle and event related pictures are to be placed in the relevant section under 'Events'.
Merkur Club web site
cmanreinhart
Level 1
Level 1
Posts: 93
Joined: Tue Jan 28, 2014 1:26 pm
Location: Michigan

Rebuilding an XR4TI

Post by cmanreinhart »

Hello all! Now I know I already posted a thread posted a thread regarding my build, but it just didn't turn out on how I liked it. So this new thread will be documenting the rebuild and all the things I decide to do to my XR. So that maybe one day if and when I go to sell it I have all the proof on what things I did to the car.(But hopefully I will never have to)

First things first I guess... I picked the car up in mid-to late December of 2013 as a project since it would be my first car. Before I bought this car I looked at several BMW e30's and what not but idk I always liked the XR more since it had turbo and the unique German Ford styling... But I wouldn't turn 16 until the following November. So I had some time to get it running and what not.

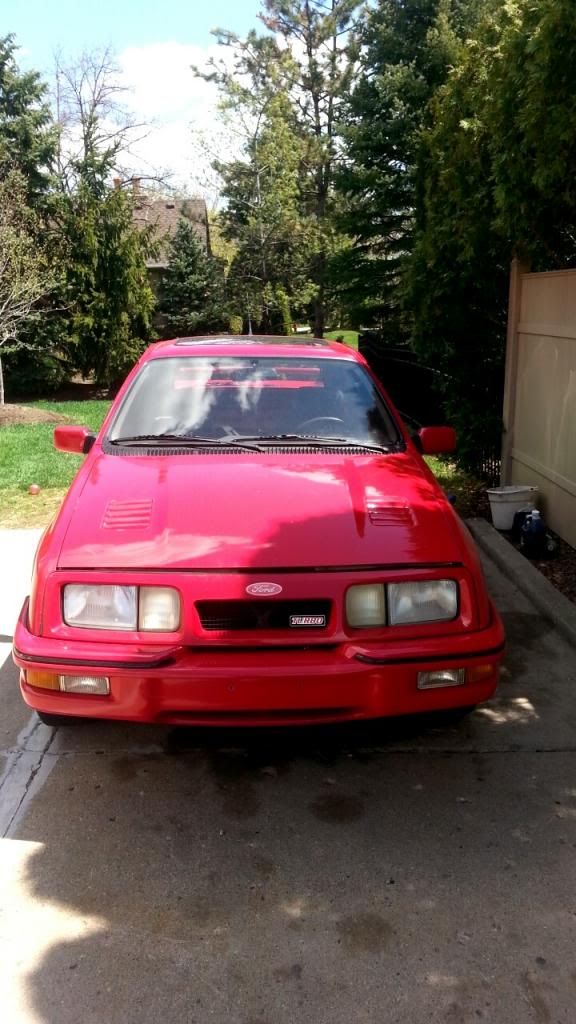
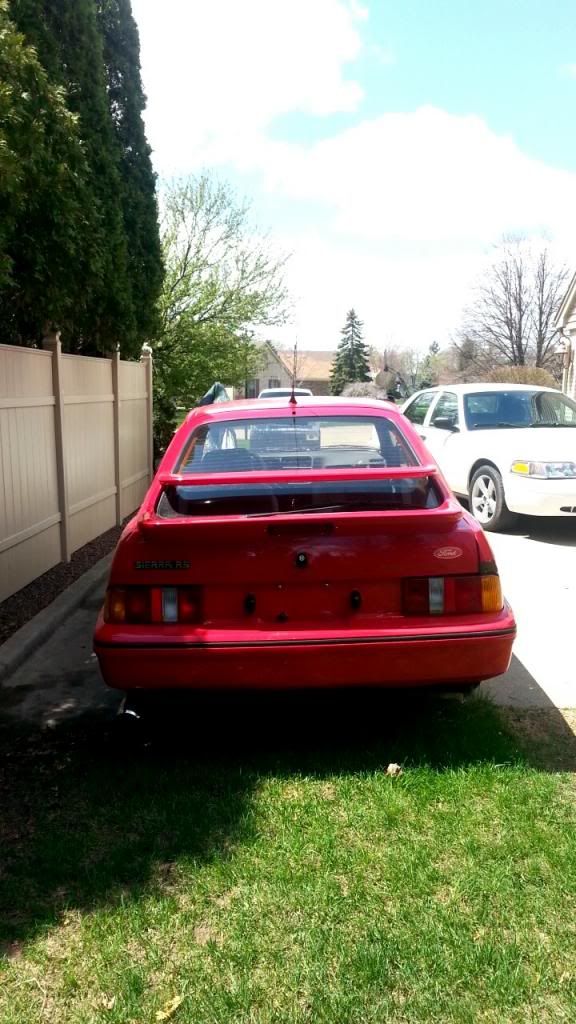
Some Pics of the car after I bought it:
Image

Image
-Conner
cmanreinhart
Level 1
Level 1
Posts: 93
Joined: Tue Jan 28, 2014 1:26 pm
Location: Michigan

Re: Rebuilding an XR4TI

Post by cmanreinhart »

So few weeks after I purchased the car I began pull the Cylinder Head off to inspect it and what not since the guy I bought it from said it had a bad timing belt which I would later find out was aka for a cracked cylinder head....

Image

And after about a month of searching for cylinder head I finally found one on craigslist out of a turbo-coupe. And hey what do ya know it came with a freshly re-built turbo!!
Image

Now I don't have any pictures of the short-block since when I bought it, it had tiny micro cracks in it but the good thing was is that the cylinder head was in good condition. My Plan was with this re-build was to just to freshen up the gaskets and replace all the piston rings and bearings etc. Since I didn't have too much money for it since after all I'm still a kid haha. But here are some pictures of the short-block after I painted it put new bearings and ring in and got the block machined since it was warped in some places 6-thou.

Image
Image
-Conner
User avatar
nathankershaw
Level 5
Level 5
Posts: 683
Joined: Wed Dec 03, 2008 3:11 am
Location: North Hollywood

Re: Rebuilding an XR4TI

Post by nathankershaw »

Very nice.

Looks like you'll have a good foundation for fun when it's back together.
1987 Merkur XR4Ti. T5 swapped. GAZ gold coilovers. Custom rear strut brace. Polybushed everything. Mustang ten hole wheels. Mercury Tracer front bumper.
SilST3
Newbie
Newbie
Posts: 24
Joined: Wed Jul 23, 2014 2:11 pm
Location: Manassas, VA

Re: Rebuilding an XR4TI

Post by SilST3 »

looks good!
cmanreinhart
Level 1
Level 1
Posts: 93
Joined: Tue Jan 28, 2014 1:26 pm
Location: Michigan

Re: Rebuilding an XR4TI

Post by cmanreinhart »

nathankershaw wrote:Very nice.

Looks like you'll have a good foundation for fun when it's back together.
SilST3 wrote:looks good!
Thanks!
-Conner
cmanreinhart
Level 1
Level 1
Posts: 93
Joined: Tue Jan 28, 2014 1:26 pm
Location: Michigan

Re: Rebuilding an XR4TI

Post by cmanreinhart »

So I know I haven't updated in a while but about a couple of weeks ago I did a mild port on the cylinder head (mainly cleaning up the bowls and polishing it) Then after that I got it machined flat ( the shop said the took about 6 tho off so that's a total of about 12 tho taken off between the block and head which will boost my compression :wink: ) Then assembled the head with the following parts:
-Ranger Cam & Roller Finger Followers
-All new exhaust valves (since the old one where rough and thermal cycled to many times)
-Fidanza adjustable cam gear

Image
Then ordered a new Felpro gasket kit threw the head gasket with a little RTV on and torqued the head on.


Image

Still debating if I should polished the raised lettering or leave it the wrinkled black....
Image
-Conner
User avatar
merkurdriver
Level 8
Posts: 6365
Joined: Tue Jan 21, 2003 4:29 pm
Location: Northeast Ohio
Contact:

Re: Rebuilding an XR4TI

Post by merkurdriver »

Looking good! 8)
User avatar
Esteban
Level 7
Level 7
Posts: 1980
Joined: Wed Mar 24, 2010 2:07 am
Location: San Diego

Re: Rebuilding an XR4TI

Post by Esteban »

I hope you installed hardened exhaust seats.
cmanreinhart
Level 1
Level 1
Posts: 93
Joined: Tue Jan 28, 2014 1:26 pm
Location: Michigan

Re: Rebuilding an XR4TI

Post by cmanreinhart »

merkurdriver wrote:Looking good! 8)
Thanks Mike I appreciate it!
Esteban wrote:I hope you installed hardened exhaust seats.
Thanks Estonian, But no I did not that being because I thought that by putting hardened seals in that it would be more prone to cracking because I would have a thinner cast iron surface between the seat and the water jacket on a head that's already known to crack. Plus as long as I dont run it to hard I think ill be fine.

Thanks,
- Conner
-Conner
MerkManTN
Newbie
Newbie
Posts: 31
Joined: Tue May 13, 2014 10:59 am

Re: Rebuilding an XR4TI

Post by MerkManTN »

.......
Last edited by MerkManTN on Wed Sep 17, 2014 8:30 pm, edited 2 times in total.
User avatar
John Brennan
Level 8
Posts: 11630
Joined: Wed Jun 18, 2003 4:19 pm
Location: Scottsdale, AZ "Summer Is Coming"

Re: Rebuilding an XR4TI

Post by John Brennan »

I think the VC looks good as is. :headbang
This is my car, and these are my people!
2015 Fiesta ST
2020 Edge 2.0 Ecoboost
MercMike
Level 3
Level 3
Posts: 230
Joined: Mon Oct 08, 2012 11:25 pm

Re: Rebuilding an XR4TI

Post by MercMike »

16 ??? Cool ... boost is addictive ... Our cars love to be operated in "loaded" state.
But you have a good chassis to learn on.. It you lift mid corner you change the rear camber and it can come around on you.
But .. that can be fun at slower speeds.
We are looking forward on your progress.. :D
'85 XR
cmanreinhart
Level 1
Level 1
Posts: 93
Joined: Tue Jan 28, 2014 1:26 pm
Location: Michigan

Re: Rebuilding an XR4TI

Post by cmanreinhart »

I know its been a long long time since I updated in awhile, and I need to start updating more often. But ive been able to get quite a bit done on the XR over the past 2 months.

I ended up having some trouble with my flyweeeell and clutch mounting up together so if your interested on how that went that heres the link: viewtopic.php?f=30&t=28007 So what I ended up doing was ordering up a new flywheel from LUK since I had already bought a clutch from them thinking that it would solve the problem.... But no of course that never happens.. So I had to improvise and ended up taking off about 10mm of the fasteners and milled out the center of the flywheel.. kind of a hacked job but oh well.... a pic of my fine milling skills :lol:
Image
-Conner
cmanreinhart
Level 1
Level 1
Posts: 93
Joined: Tue Jan 28, 2014 1:26 pm
Location: Michigan

Re: Rebuilding an XR4TI

Post by cmanreinhart »

Alright so I think I should start up by saying ive been a serious slackers when it comes to updating this build. So I think my New Years resolution should be to update my build more often.

So I guess I'll let the pictures do most of the talking.

Image

Oh yeah and heres me putting in the engine haha. (My father was the one who made me take this picture)

Image

Alright so ill have to get more pictures of the engine installed and all that. But lately ive been having some thoughts on RallyCrossing the XR. Since its a cheap way of getting out, having fun and learning some car control skills.

-Conner
-Conner
cmanreinhart
Level 1
Level 1
Posts: 93
Joined: Tue Jan 28, 2014 1:26 pm
Location: Michigan

Re: Rebuilding an XR4TI

Post by cmanreinhart »

Ok so I dropped the fuel take about 2 weeks ago. Since who knows how old the gas is in there. I don't think Ill be able to reuse the tank though since I don't think I'll be able to get the sender out ( I sprayed WD40 on it and it just absorbed it like a sponge). So im think i of just getting a 15gal fuel cell and a in-line Walbro 255lph fuel pump but from the reviews on it says its very loud.
Image
-Conner
Post Reply