
Rebuilding an XR4TI

-
boost_is_fun
- Level 1

- Posts: 64
- Joined: Fri Jan 16, 2015 5:44 am
- Location: Provo, UT (In School) - Elizabeth CO (Home)
Re: Rebuilding an XR4TI
Merkur Midwest and Rapido have that gasket if you don't want to have to worry about part numbers. I got mine from merkur midwest for $50.
Connor
'89 XR 254000 miles. Stock (until spring, then poor college student mods begin)
'99 Audi B5 A4 2.8 v6 (Technically my dad's, but he doesn't drive it)
Since I'm a Noob, i'll put an apology for dumb questions down here. I'm 19 and completely self-taught
'89 XR 254000 miles. Stock (until spring, then poor college student mods begin)
'99 Audi B5 A4 2.8 v6 (Technically my dad's, but he doesn't drive it)
Since I'm a Noob, i'll put an apology for dumb questions down here. I'm 19 and completely self-taught
-
merkurdriver

- Level 8
- Posts: 6365
- Joined: Tue Jan 21, 2003 4:29 pm
- Location: Northeast Ohio
- Contact:
-
cmanreinhart
- Level 1
- Posts: 93
- Joined: Tue Jan 28, 2014 1:26 pm
- Location: Michigan
Re: Rebuilding an XR4TI
Sorry for the late reply, and thanks for the compliment on the build I appreciate it! I think I'll wait a little bit to change out the valve cover gasket just cause I'm just finishing up the engine and everything ( I did load it up though with a lot of RTV so that should help a little). And Yeah I'll get more picture for sure of the engine bay in the not to distant future. Oh and no we surprisingly did not get any of that crazy blizzard stuff that you guys got on the East Coast. But about 5days after you guys got your 30 +/- inches of snow we got about 18 inches... psshhh and they say are worlds going through global warming....2.3merkenjoyer wrote:That GT is super sexy... anyways, great job on the rebuild bud! I just turned 27 last weekend but I look 16 so... Enjoy it my friend, it speeds up, NO JOKE!
I have a 1989 Merk with 120,000 mi, did a similar build as you, engine jack, stand, lots of parts, all kinds of equipment sitting in my dads garage because of my addiction!I will post the whole build someday, it came out AWESOME! Oh, and it never ends with these cars, just so you know... worth the pride though! (sometimes I just sit in the car and marvel over how wonderful it is)
Do yourself a BIG favor and ditch that blue fel-pro rubber valve cover gasket and replace with updated gasket, which is rubber with metal reinforcement sandwiched in between. Its $50 but is reusable, last one you"ll ever buy. If you can't find the part # just message me. Look in FAQ section. The fel-pro gasket WILL leak oil, if not right from the start, eventually. Also, did you hone the cylinders before replacing piston rings? (dumb question but had to ask)
Now please post more pictures! Maybe even a video of the first start up!? Would love to see what that engine bay looks like now that the engines installed. Kick ass job dude!!
(2nd the PTFE paste on oil feed)
Btw, did you guys get any of the blizzard we got yesterday here in MA, 30"+ here, damn right I went for a drive!
-Conner
-
cmanreinhart
- Level 1
- Posts: 93
- Joined: Tue Jan 28, 2014 1:26 pm
- Location: Michigan
Re: Rebuilding an XR4TI
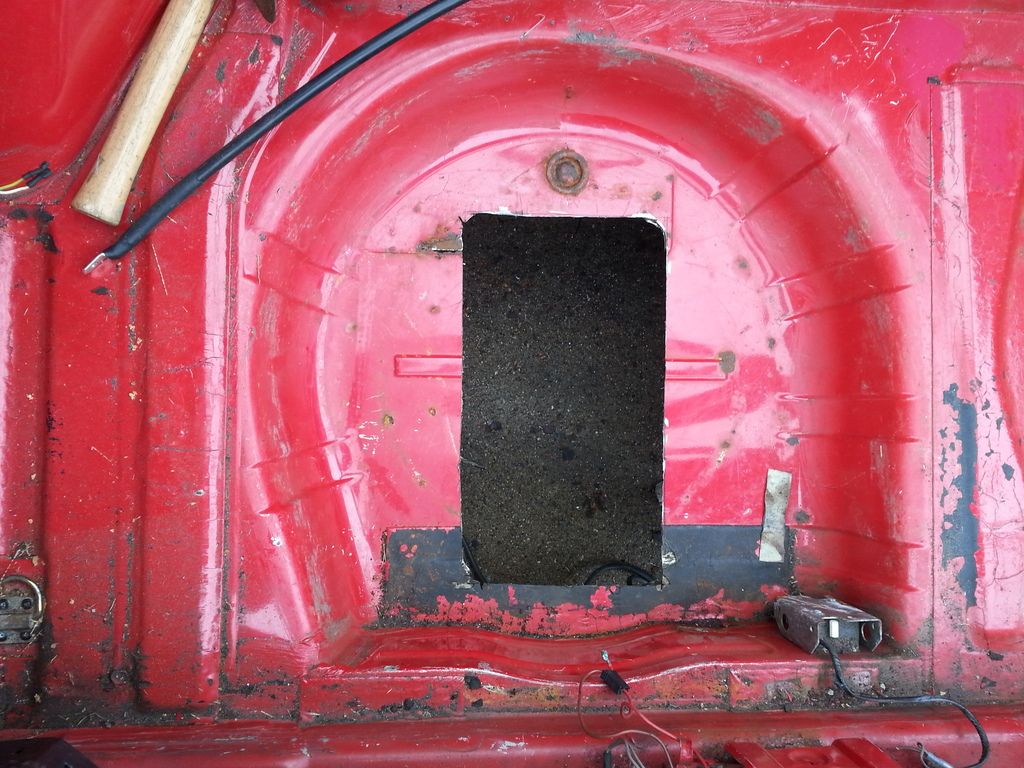
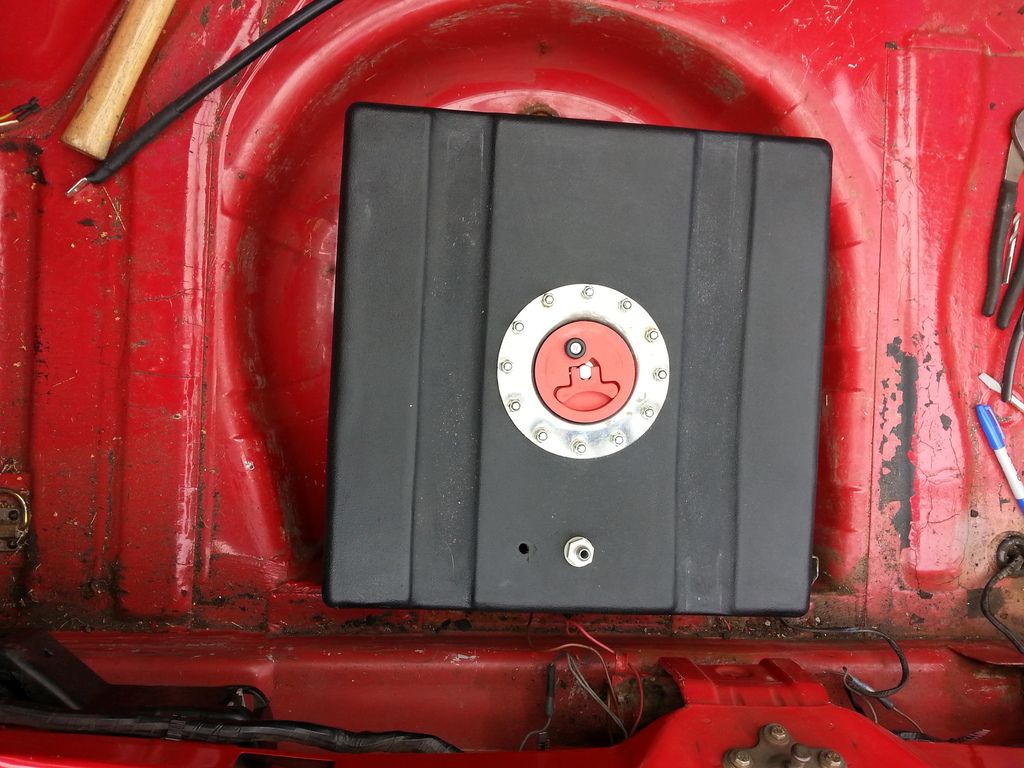
Alright so time for a little update... The other day I did pick up a 10 gallon fuel cell (its a little small but hey the price was right) since my gas tank was far to gone and need replacing. So what I ended up doing was cutting out out a portion of my spare tire well since the tank fit in there perfectly and to run my pick up line and what not. In hindsight I wish I didn't make the hole so big since I end up cutting into some undercarriage reinforcement.... Oh well im still learning. I was thinking about doing the John V style where you mount the fuel cell in between the two rear strut towers since its the safest spot and the weights over the rear axle but I still wanted to be able to put a back seat in.
Im yet to take pictures of everything else I did so more updates will come soon!
Im yet to take pictures of everything else I did so more updates will come soon!


-Conner
-
cmanreinhart
- Level 1
- Posts: 93
- Joined: Tue Jan 28, 2014 1:26 pm
- Location: Michigan
Re: Rebuilding an XR4TI
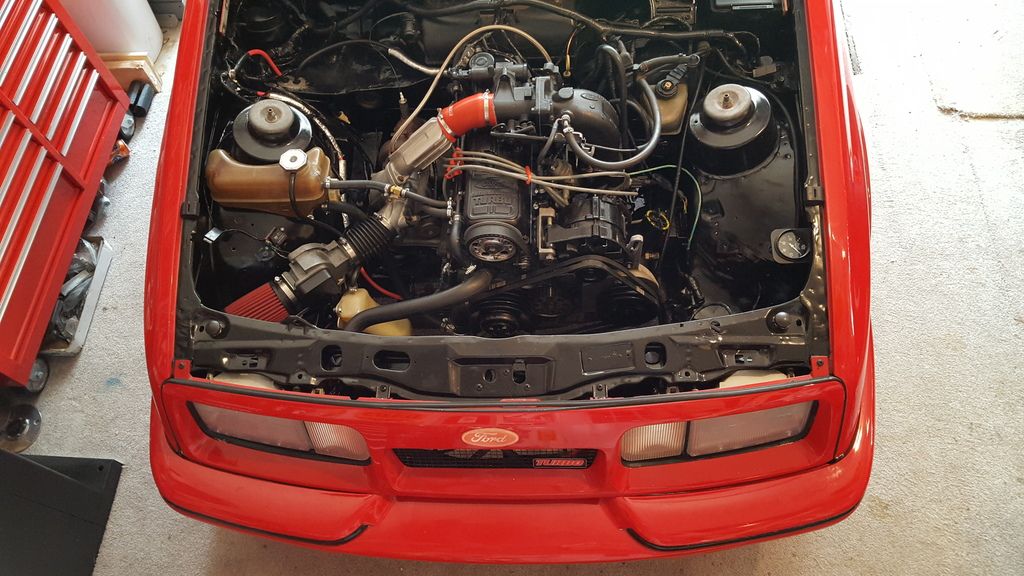
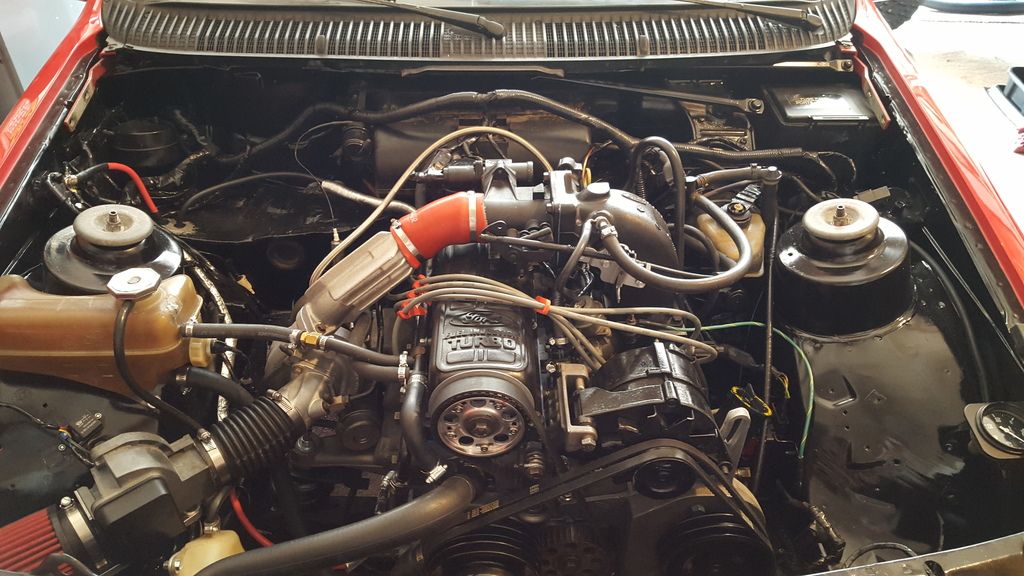
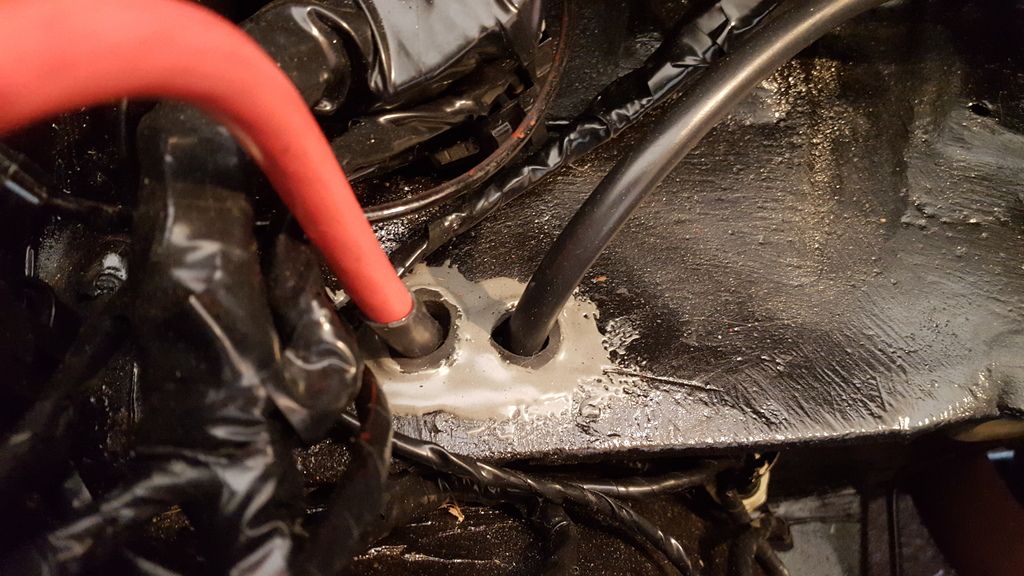
Update! Alright, so the car had its first start up about a month ago (April 15th). When I first got the car running it was blowing blue smoke like crazy..... Now I know a little blue smoking in the beginning is normal but it just kept smoking, so i ended up tracing the problem back to the turbo... I ended up pulling the turbo back off, inspecting it, and tearing it all down. What I initially thought the problem was, was that the turbo oil ring was bad (looks like a mini piston ring). I ended up preforming some oil leak pressure tests. Then I just cleaned living crap out of it... During cleaning it out I found some huge oil chunks in the drain side of the turbo that where about as big as a dime (causing the drain to clog and ultimately not allowing the oil to drain). I then threw it all back together and the car runs great! I guess the guys who rebuilt it forgot to clean it...
Anyways, here is some pics:
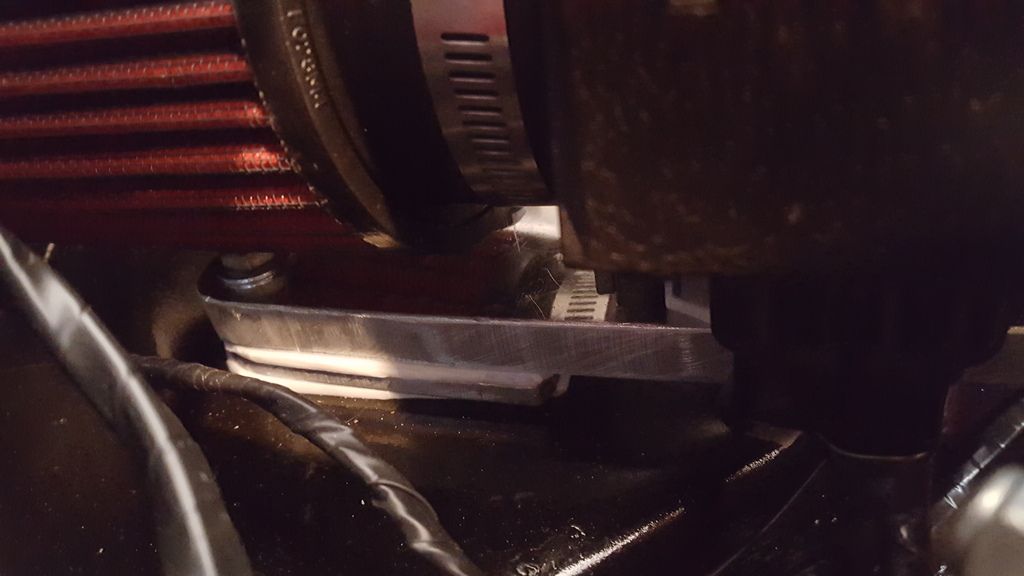
Also, I made a bracket to mount my VAM to:
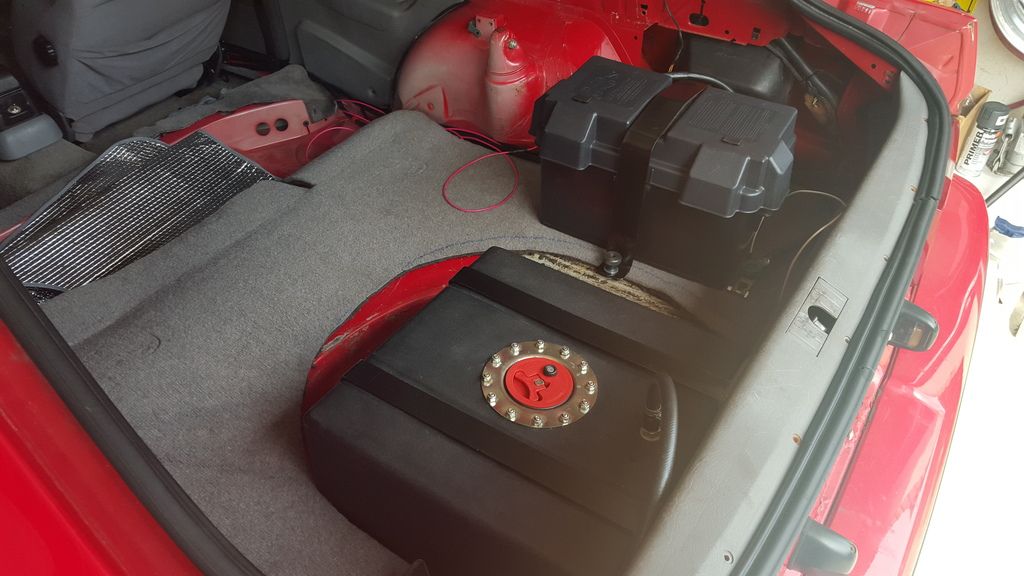
Relocated my battery to the back for better weight distribution and to keep it safe from the gurling heat of the turbo:
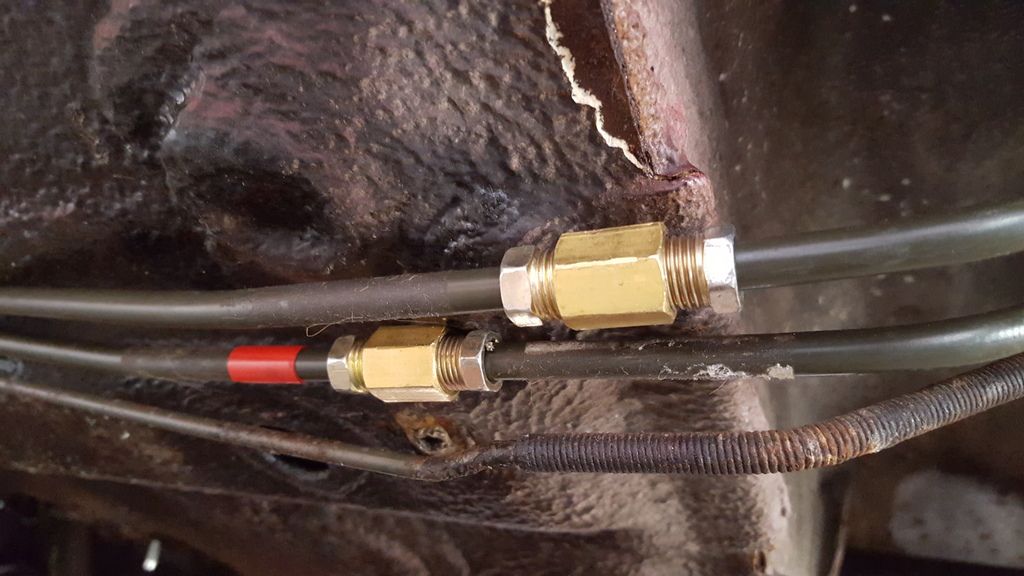
Also, I made all new fuel lines. I'm yet to still permanently mount up my inline fuel pump, I ended up splurging for a Walbro 255lph GSL392

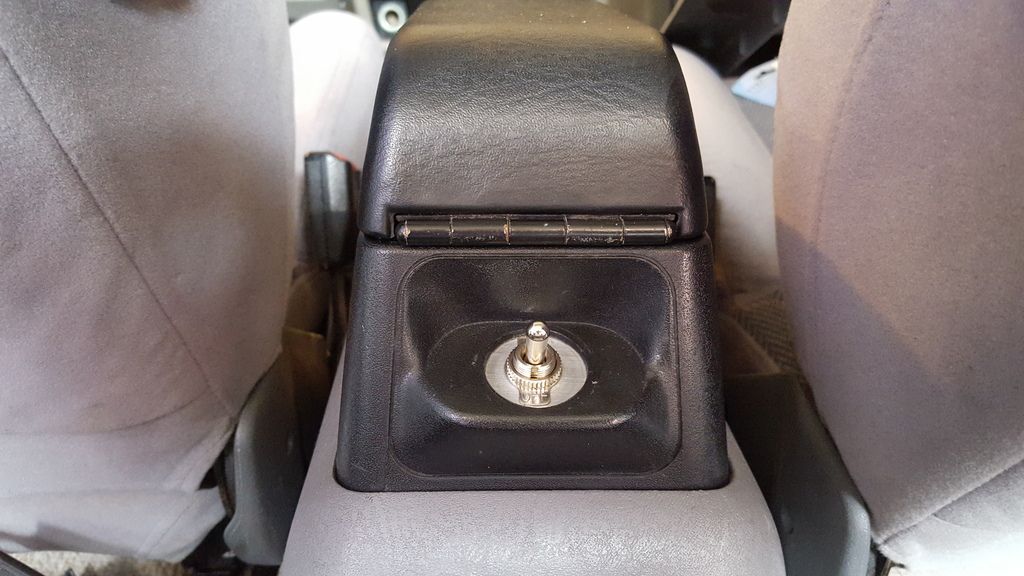
The Fuel Pump switch I made:
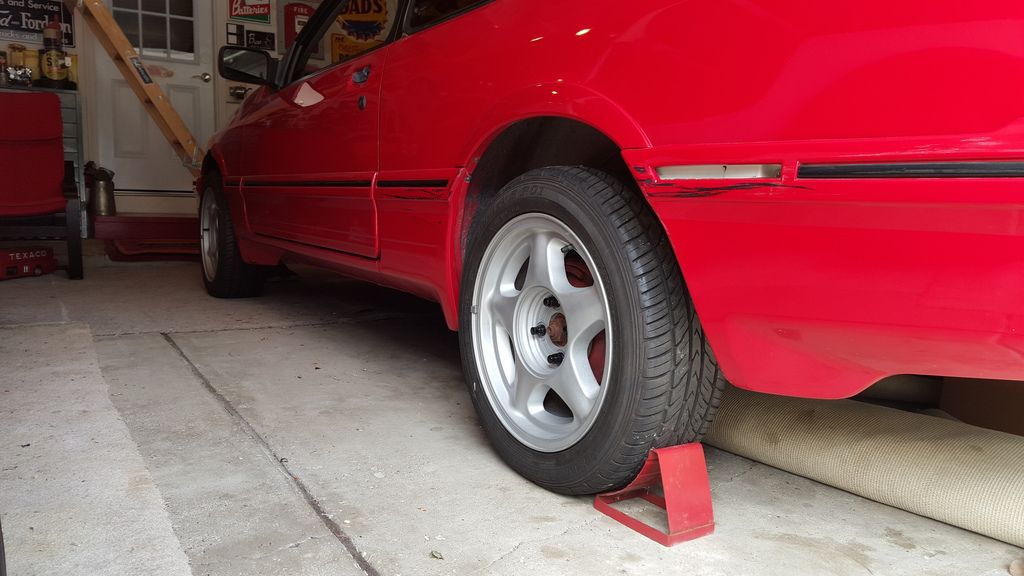
Also ended up scoring some Mustang Ponys for cheap along with finding some brand new cheapo Sumitomo 205/50/16 tires I found on craigslist for $100 More picture of these to come!
Anyways, here is some pics:


Also, I made a bracket to mount my VAM to:

Relocated my battery to the back for better weight distribution and to keep it safe from the gurling heat of the turbo:


Also, I made all new fuel lines. I'm yet to still permanently mount up my inline fuel pump, I ended up splurging for a Walbro 255lph GSL392


The Fuel Pump switch I made:

Also ended up scoring some Mustang Ponys for cheap along with finding some brand new cheapo Sumitomo 205/50/16 tires I found on craigslist for $100

-Conner

Re: Rebuilding an XR4TI
Great progress!!! 
Miguel.
89 XR4Ti Monique; Waking up a real "Night/Mare-Coor".
T5, NPR IC, PIMP ECU, Walbro 255, Dual piston BOV, Manual BC, 3" exhaust, One piece Aluminum drive-shaft, mc2 LSD, Boport 1.5 cam, Ported and polish head, big valves, 80# injectors, Bob's log, (soon HY35).
89 XR4Ti Monique; Waking up a real "Night/Mare-Coor".
T5, NPR IC, PIMP ECU, Walbro 255, Dual piston BOV, Manual BC, 3" exhaust, One piece Aluminum drive-shaft, mc2 LSD, Boport 1.5 cam, Ported and polish head, big valves, 80# injectors, Bob's log, (soon HY35).
-
cmanreinhart
- Level 1
- Posts: 93
- Joined: Tue Jan 28, 2014 1:26 pm
- Location: Michigan
-
boost_is_fun
- Level 1
- Posts: 64
- Joined: Fri Jan 16, 2015 5:44 am
- Location: Provo, UT (In School) - Elizabeth CO (Home)
Re: Rebuilding an XR4TI
Nicely done Conner! I'll have to start working on my XR so we can have a few young guys working on these old birds. First I have to fix my Audi's rear diff though. 
Your car looks sweet, can't wait to see some video of it running.
Your car looks sweet, can't wait to see some video of it running.
Connor
'89 XR 254000 miles. Stock (until spring, then poor college student mods begin)
'99 Audi B5 A4 2.8 v6 (Technically my dad's, but he doesn't drive it)
Since I'm a Noob, i'll put an apology for dumb questions down here. I'm 19 and completely self-taught
'89 XR 254000 miles. Stock (until spring, then poor college student mods begin)
'99 Audi B5 A4 2.8 v6 (Technically my dad's, but he doesn't drive it)
Since I'm a Noob, i'll put an apology for dumb questions down here. I'm 19 and completely self-taught

Re: Rebuilding an XR4TI
Or ditch the stock valve cover and get a stamped sheet metal one from an early 80s n/a 2.3. Painted black it looks nice (in my opinion, much nicer), and you never have to worry about over tightening and damaging the aluminum one again. I went through two stock valve covers before I went that route. Just sayin2.3merkenjoyer wrote: Do yourself a BIG favor and ditch that blue fel-pro rubber valve cover gasket and replace with updated gasket, which is rubber with metal reinforcement sandwiched in between. Its $50 but is reusable, last one you"ll ever buy. If you can't find the part # just message me. Look in FAQ section. The fel-pro gasket WILL leak oil, if not right from the start, eventually.
-
cmanreinhart
- Level 1
- Posts: 93
- Joined: Tue Jan 28, 2014 1:26 pm
- Location: Michigan
Re: Rebuilding an XR4TI
Thanks for the complement Connor I appreciate it! Yeah, you'll have to start working on yours; so like you said, we'll have a couple of younger guys working on these things, both with the same name! I figure your probably out already for summer vacation so you'll probably have more time to work on your Xr and fix the Audi's diff. By the way what are you going to college for? You seem more like the engineering type...boost_is_fun wrote:Nicely done Conner! I'll have to start working on my XR so we can have a few young guys working on these old birds. First I have to fix my Audi's rear diff though.
Your car looks sweet, can't wait to see some video of it running.
-Conner
-
cmanreinhart
- Level 1
- Posts: 93
- Joined: Tue Jan 28, 2014 1:26 pm
- Location: Michigan
Re: Rebuilding an XR4TI
Yeah, I know what valve cover your talking about I've seen them on N/A pintos and stuff. Its actually probably lighter than the stock XR valve cover at least from the looks of it, it looks lighter.bw_krupp wrote: Or ditch the stock valve cover and get a stamped sheet metal one from an early 80s n/a 2.3. Painted black it looks nice (in my opinion, much nicer), and you never have to worry about over tightening and damaging the aluminum one again. I went through two stock valve covers before I went that route. Just sayin
But yeah the Blue Fel-Pro gasket does kinda suck... Its kinda been walking around on me, so what I've been doing is just, loading it up with RTV where it looks like it might leak oil.
-Conner
-
boost_is_fun
- Level 1
- Posts: 64
- Joined: Fri Jan 16, 2015 5:44 am
- Location: Provo, UT (In School) - Elizabeth CO (Home)
Re: Rebuilding an XR4TI
How did you ever guess?cmanreinhart wrote:You seem more like the engineering type...
I'm studying mechanical engineering.
Connor
'89 XR 254000 miles. Stock (until spring, then poor college student mods begin)
'99 Audi B5 A4 2.8 v6 (Technically my dad's, but he doesn't drive it)
Since I'm a Noob, i'll put an apology for dumb questions down here. I'm 19 and completely self-taught
'89 XR 254000 miles. Stock (until spring, then poor college student mods begin)
'99 Audi B5 A4 2.8 v6 (Technically my dad's, but he doesn't drive it)
Since I'm a Noob, i'll put an apology for dumb questions down here. I'm 19 and completely self-taught
-
cmanreinhart
- Level 1
- Posts: 93
- Joined: Tue Jan 28, 2014 1:26 pm
- Location: Michigan
Re: Rebuilding an XR4TI
Man I'm good.... I'd like to go into Mechanical Engineering I'm just afraid the math will be the death of me. Although my fathers one and hes said hes never had to use calc and what not... I guess I just like designing stuff like through programs like SolidWorks.boost_is_fun wrote:How did you ever guess?cmanreinhart wrote:You seem more like the engineering type...
I'm studying mechanical engineering.
-Conner
-
cmanreinhart
- Level 1
- Posts: 93
- Joined: Tue Jan 28, 2014 1:26 pm
- Location: Michigan
Re: Rebuilding an XR4TI
I promised myself I would keep this thread up to date so hear goes nothing....
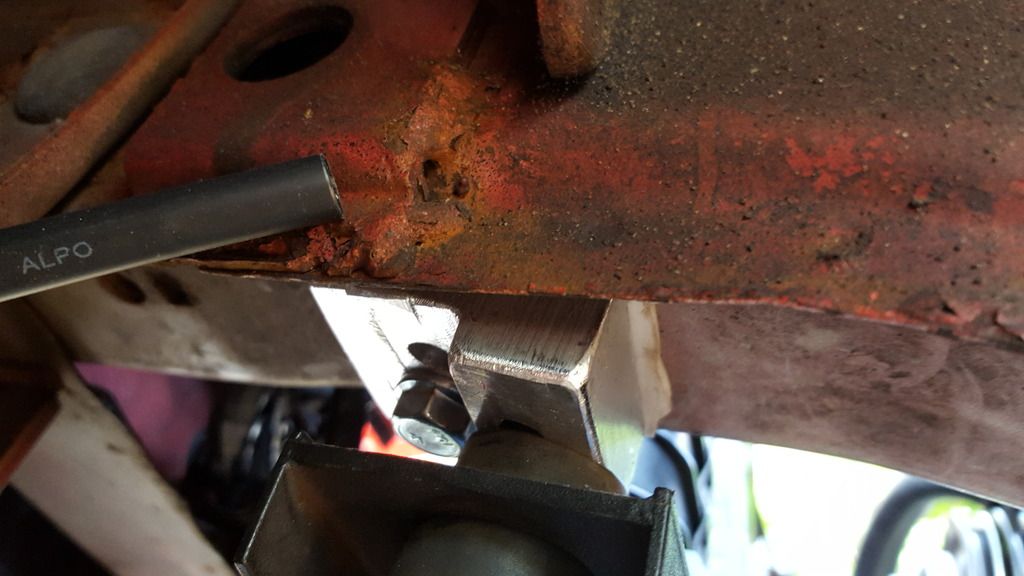
Alright so awhile back when installed my new fan on my radiator I fabed up and installed some new mounting brackets for my radiator that I made out of aluminum on my dads mill. Since the old ones where super crusty and heavy as bricks... The new ones I made made where more than less the weight.
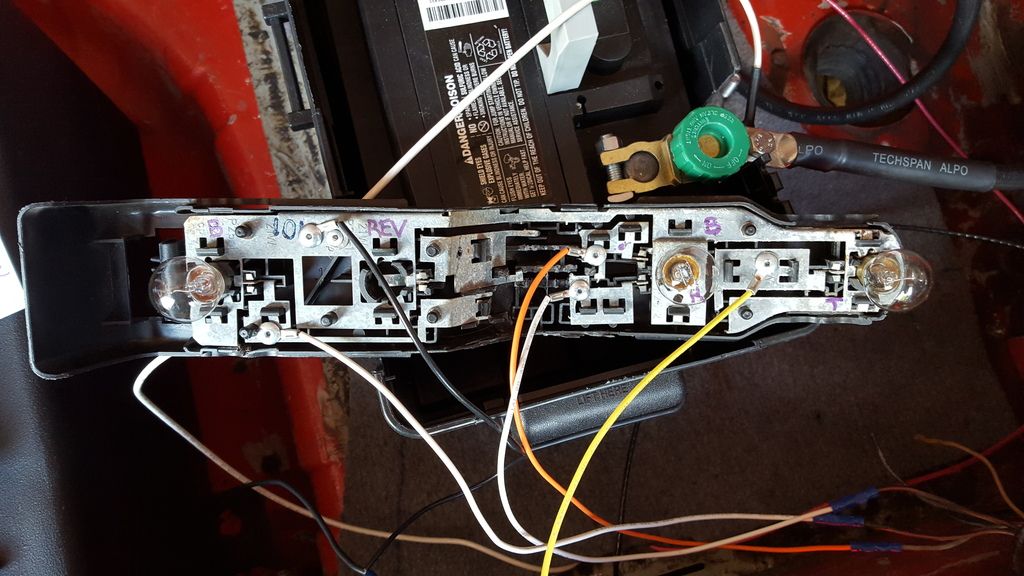
I also ended up rewiring my tail lights and just bypassing the termanial/connector as you can see in the picture below.... Since they where super crusty and shorting out. I ended up just riveting the wires to the tail light housing (kind of a rig but the stock design sucks...) Now its time to figure out the turn signals... Which don't work in the front or back...
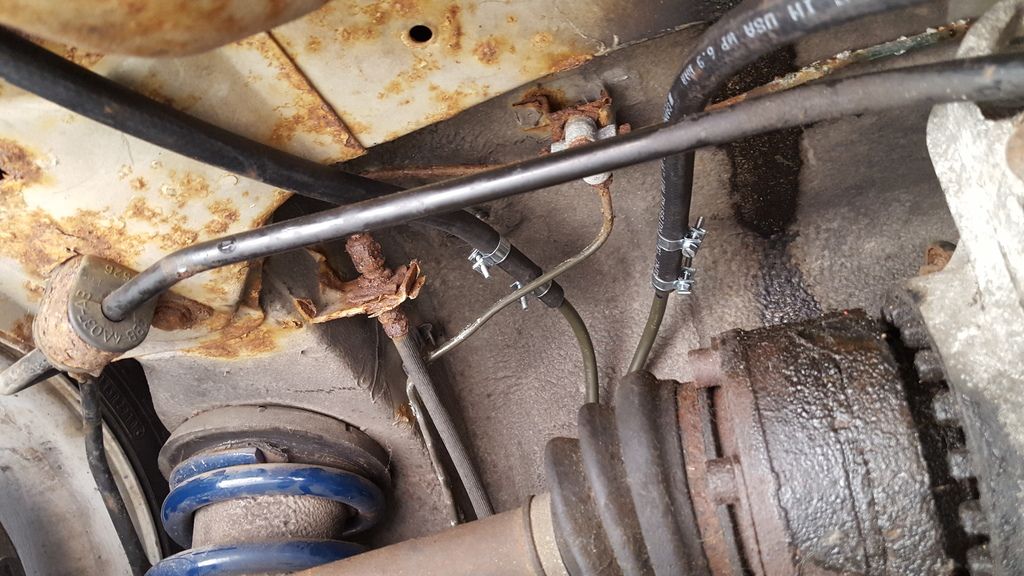
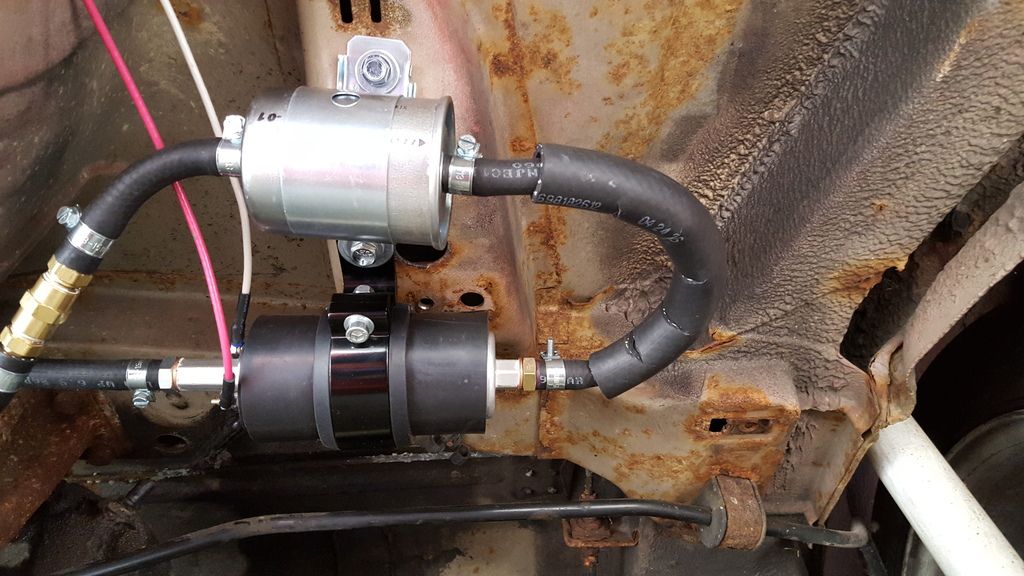
This is where I ended up mounting my fuel filter and pump.... My dad thinks the bend between the fuel filter and pump might be a little to tight and might restrict some fuel flow.... I think it looks fine but tell me what you guys think:
Alright so awhile back when installed my new fan on my radiator I fabed up and installed some new mounting brackets for my radiator that I made out of aluminum on my dads mill. Since the old ones where super crusty and heavy as bricks... The new ones I made made where more than less the weight.

I also ended up rewiring my tail lights and just bypassing the termanial/connector as you can see in the picture below.... Since they where super crusty and shorting out. I ended up just riveting the wires to the tail light housing (kind of a rig but the stock design sucks...) Now its time to figure out the turn signals... Which don't work in the front or back...

This is where I ended up mounting my fuel filter and pump.... My dad thinks the bend between the fuel filter and pump might be a little to tight and might restrict some fuel flow.... I think it looks fine but tell me what you guys think:

-Conner
-
cmanreinhart
- Level 1
- Posts: 93
- Joined: Tue Jan 28, 2014 1:26 pm
- Location: Michigan
Re: High School Drift Build
Alright.... I guess its time for me to up date this build thread.
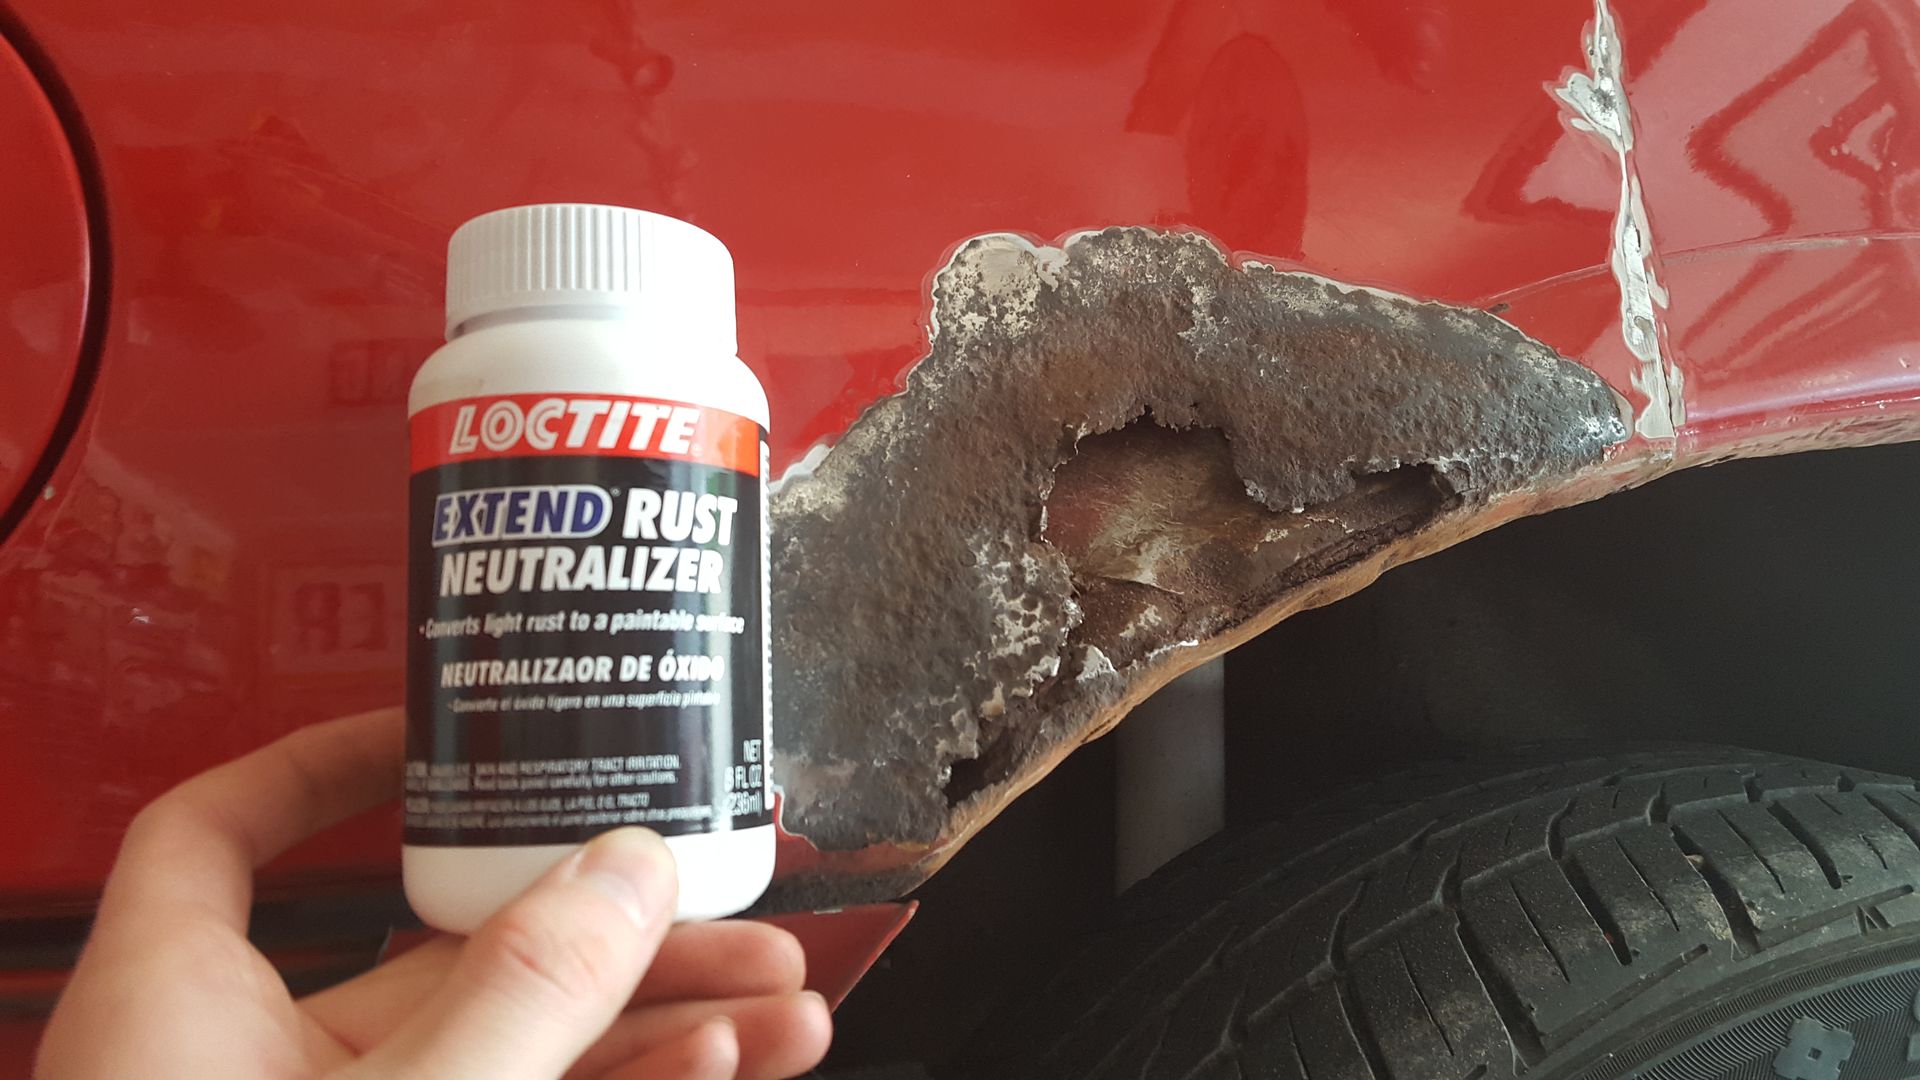
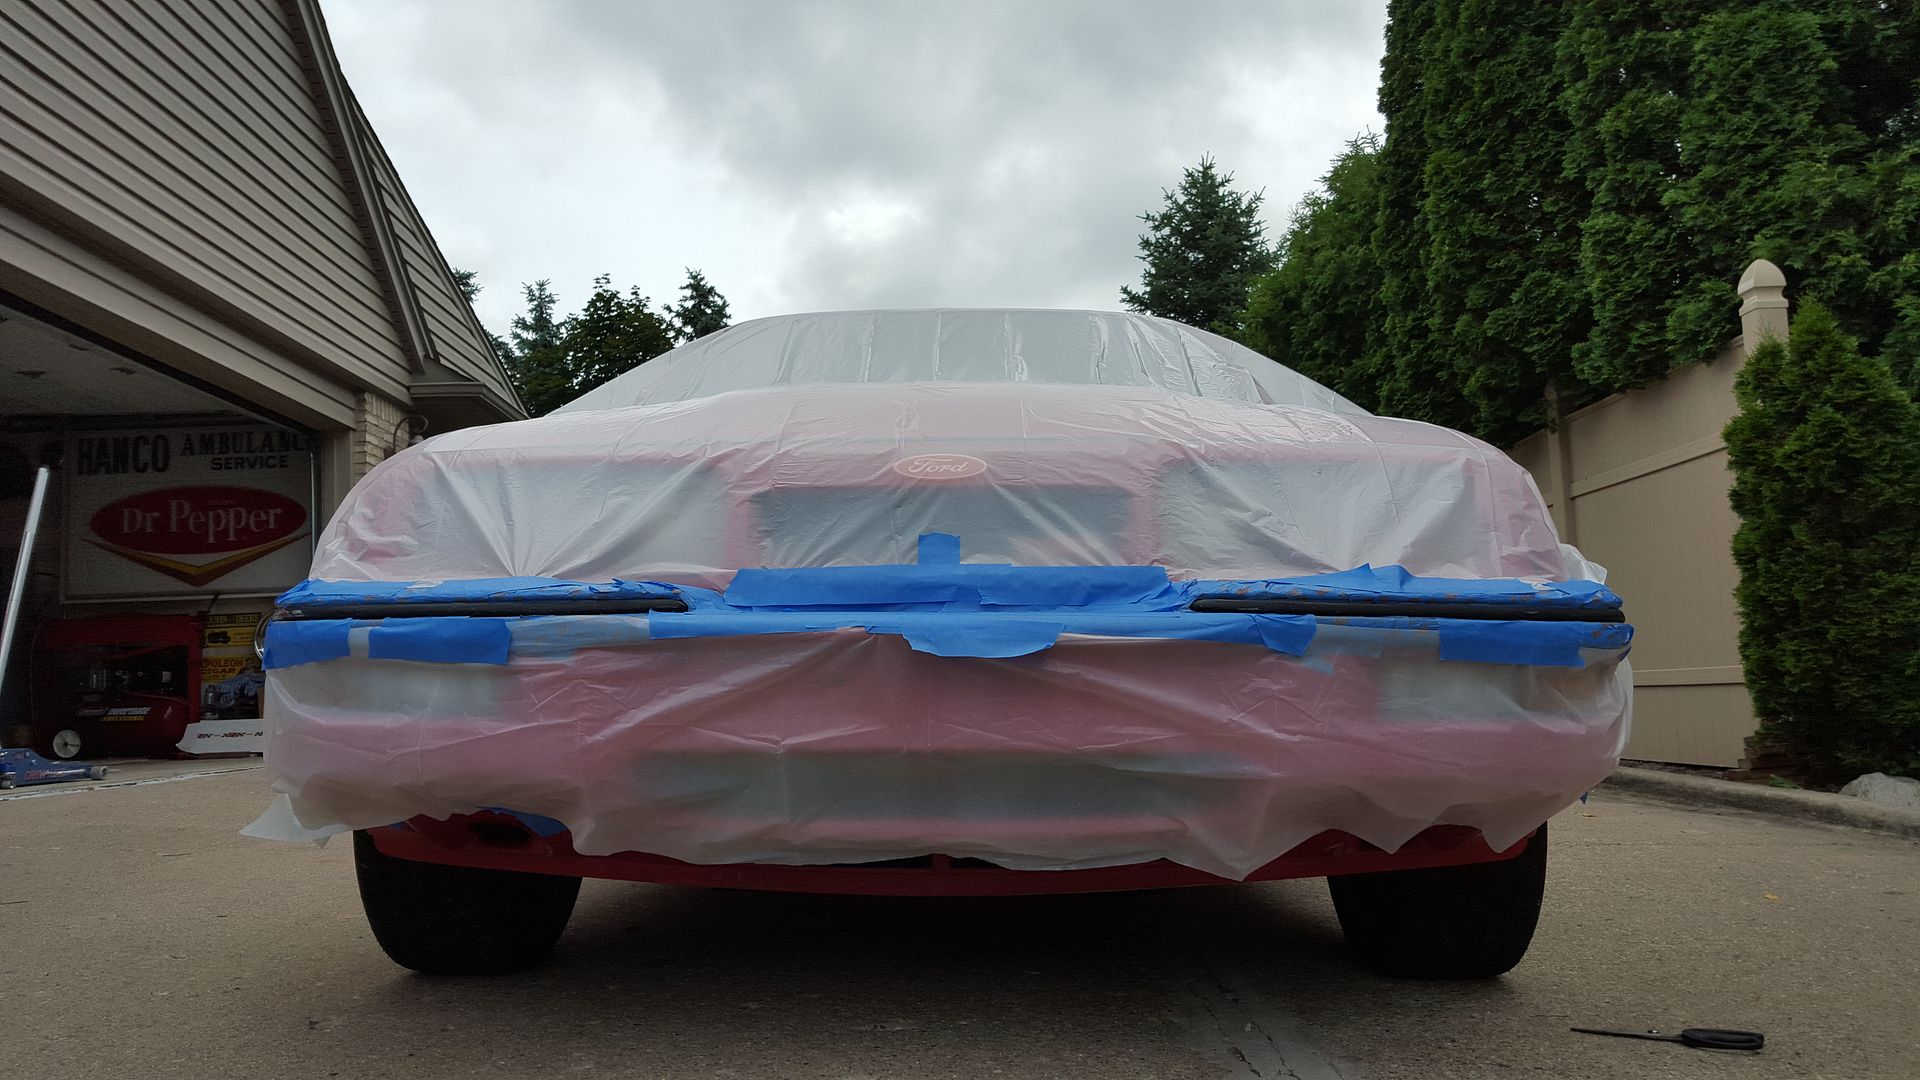
So about in the middle of the summer (July-ish) I decided to go on a painting/body work spree. Since I did have a fair amount of rust on the passenger side rear quarter panel as well on the rear hatch area where the tail lights are. Also one other little thing I did was paint the black striping on the front bumper, since it was kinda scratched up.
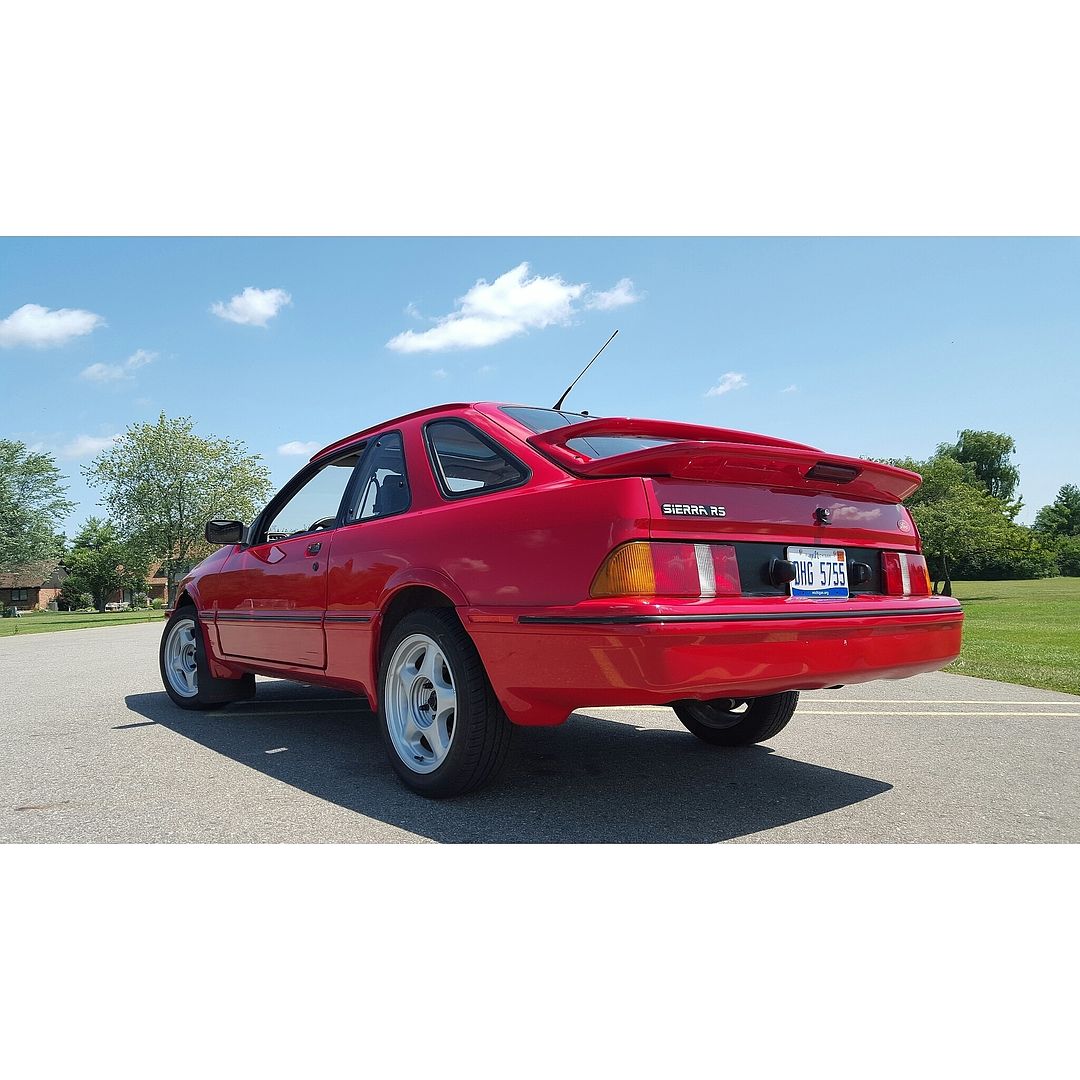
More updates to come shortly!
So about in the middle of the summer (July-ish) I decided to go on a painting/body work spree. Since I did have a fair amount of rust on the passenger side rear quarter panel as well on the rear hatch area where the tail lights are. Also one other little thing I did was paint the black striping on the front bumper, since it was kinda scratched up.


More updates to come shortly!
-Conner