worry not dear anglin - a garage is on the way. just need to sell this house to get it. and i agree about the paint - not only does it look extra fast (people often crawl under my car to judge how fast it is
"Ray's AKA demonfire's XR4Ti build up"

-
Ray

- Level 7

- Posts: 4338
- Joined: Sun Oct 24, 2004 10:40 am
- Location: CT, USA
hahha, thanks. actually that day it was nice out. 34 and sunny. 
worry not dear anglin - a garage is on the way. just need to sell this house to get it. and i agree about the paint - not only does it look extra fast (people often crawl under my car to judge how fast it is ) but it keeps the aluminum from cracking. it's MAGIC paint.
worry not dear anglin - a garage is on the way. just need to sell this house to get it. and i agree about the paint - not only does it look extra fast (people often crawl under my car to judge how fast it is
-Ray
1985 Ford F150 - Tow Missile
1985 Merkur XR4Ti -#141 CP "Miss Daisy"
2005 Subaru LGT
http://www.cartct.com
1985 Ford F150 - Tow Missile
1985 Merkur XR4Ti -#141 CP "Miss Daisy"
2005 Subaru LGT
http://www.cartct.com
-
Ray
- Level 7
- Posts: 4338
- Joined: Sun Oct 24, 2004 10:40 am
- Location: CT, USA
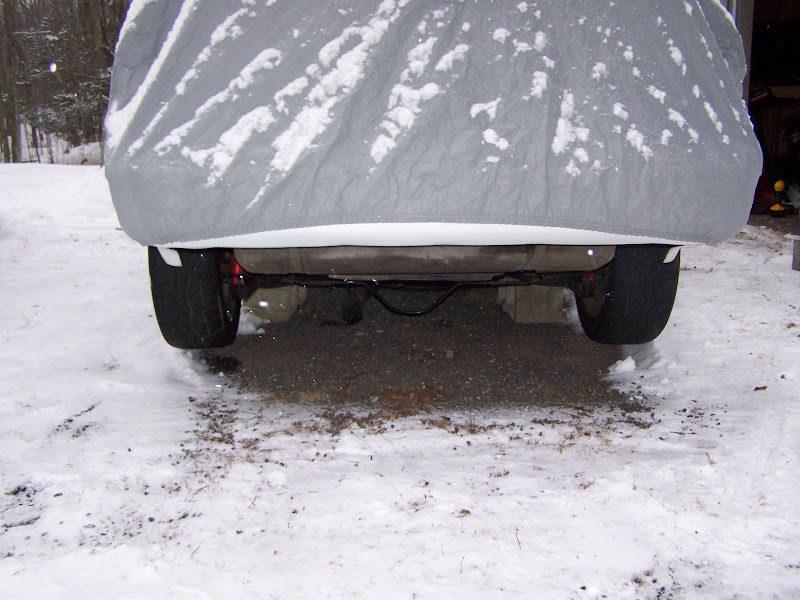
Wow. Snow. Again.
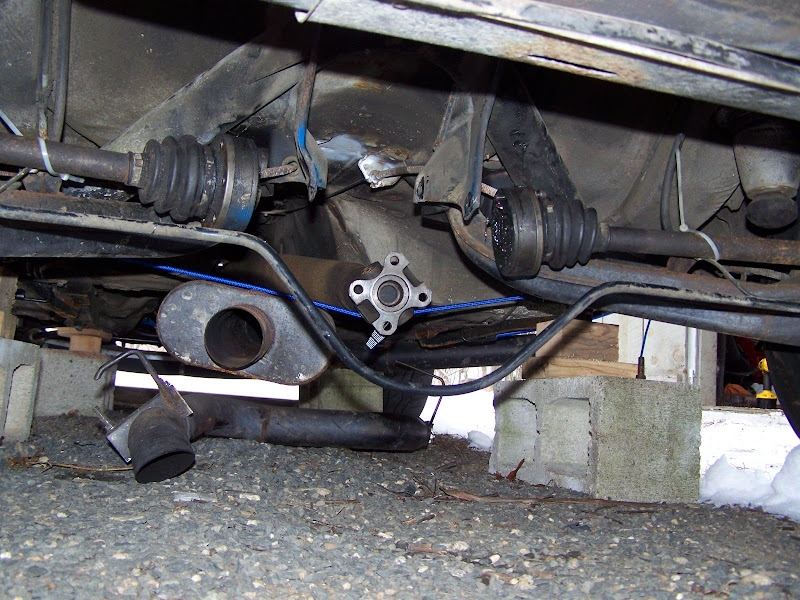
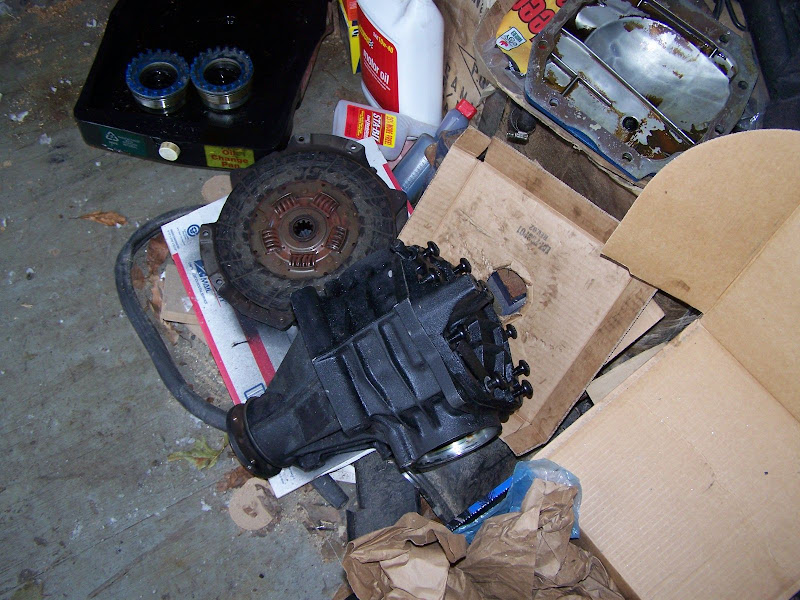
Pumpkin in the shed, view w/o
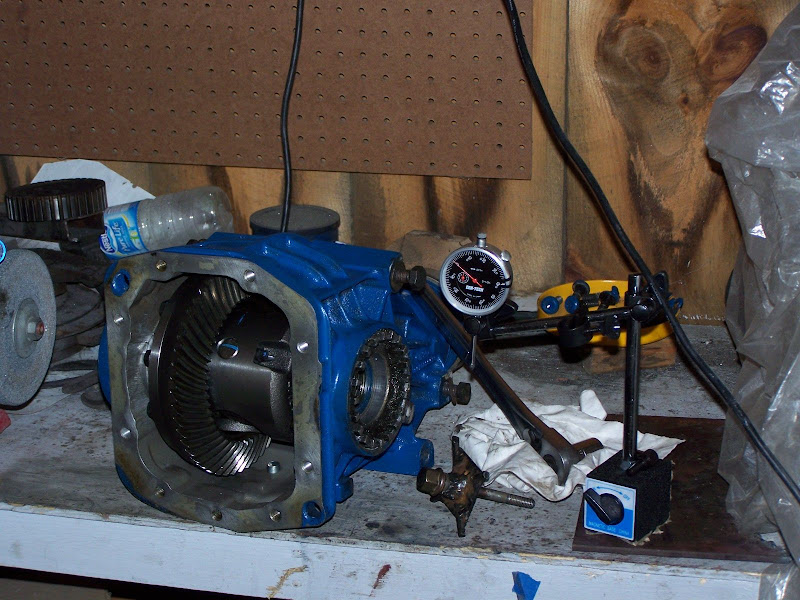
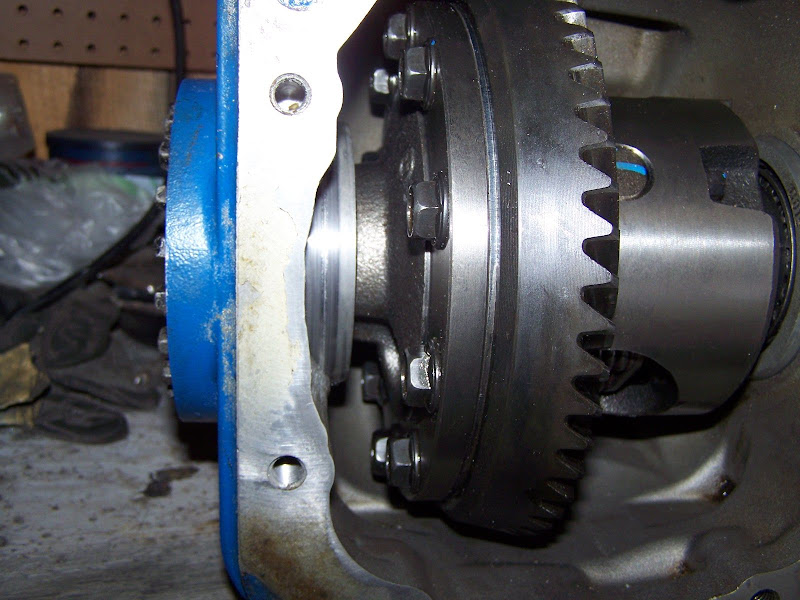
Eaton in, clearanced case, backlash about set (ended up at 0.006")
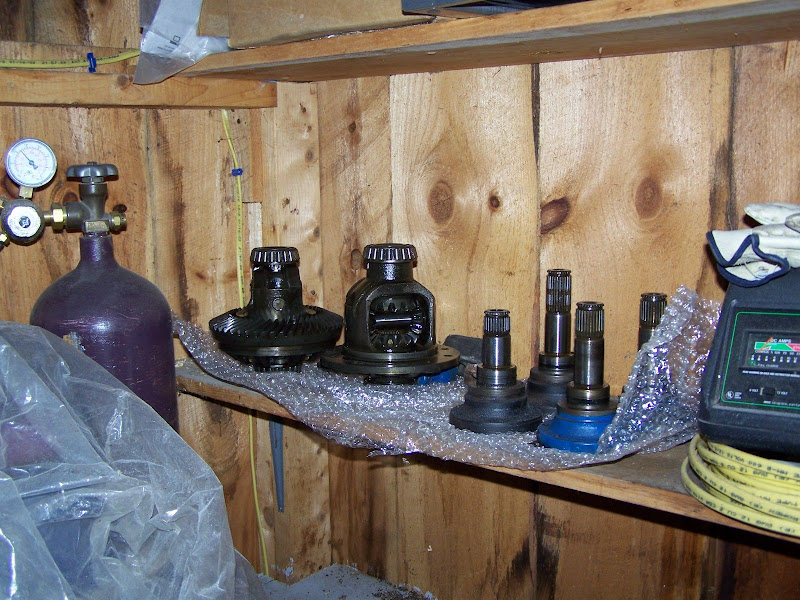
rackin' up the extra / spare parts now. (clutch is from my truck)
in. clearanced case. drain installed. (just to the right of the case is the tool i built for the side adjusters)

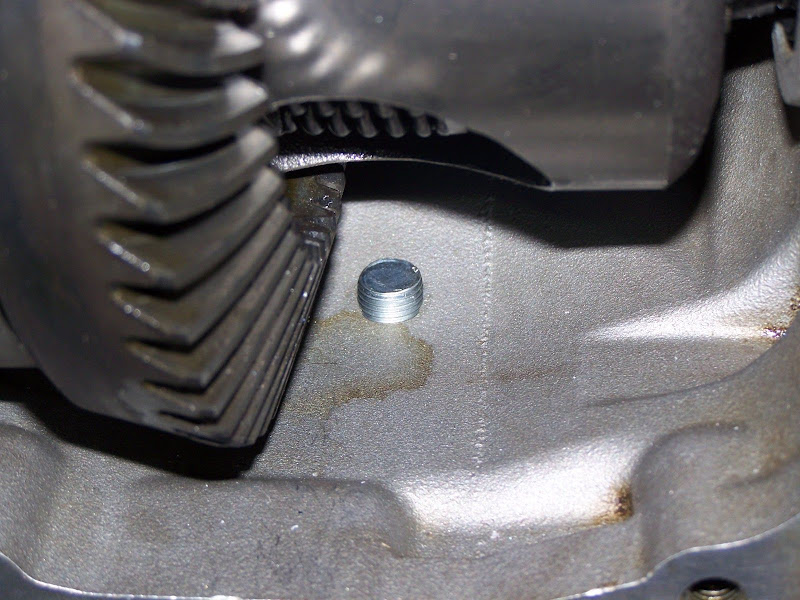
showing what had to be clearanced.
and to add some convienence, a drain plug
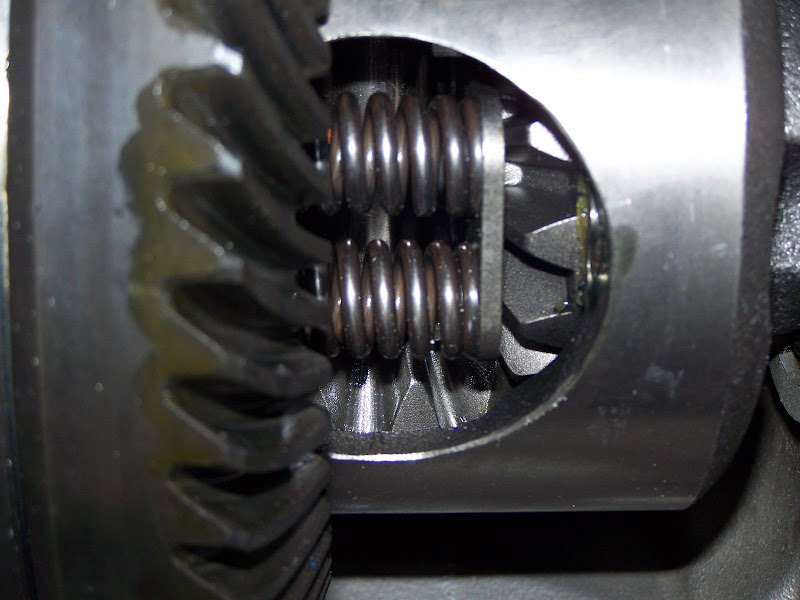
showing the springs and gears in the eaton:
special thanks to mc2racing for providing the rebuild service and pressing on the bearings. thanks to Joe (hEaT) for helping with getting this done.
Next up: rear disc conversion. I would have taken pictures of putting the diff back in, but when you're putting a diff back in a car, by yourself, in the snow, on gravel, taking pictures isn't really a priority. Anyway, it looks exactly the same as before, but with more better guts inside.
Pumpkin in the shed, view w/o
Eaton in, clearanced case, backlash about set (ended up at 0.006")
rackin' up the extra / spare parts now. (clutch is from my truck)
in. clearanced case. drain installed. (just to the right of the case is the tool i built for the side adjusters)
showing what had to be clearanced.
and to add some convienence, a drain plug
showing the springs and gears in the eaton:
special thanks to mc2racing for providing the rebuild service and pressing on the bearings. thanks to Joe (hEaT) for helping with getting this done.
Next up: rear disc conversion. I would have taken pictures of putting the diff back in, but when you're putting a diff back in a car, by yourself, in the snow, on gravel, taking pictures isn't really a priority. Anyway, it looks exactly the same as before, but with more better guts inside.
-Ray
1985 Ford F150 - Tow Missile
1985 Merkur XR4Ti -#141 CP "Miss Daisy"
2005 Subaru LGT
http://www.cartct.com
1985 Ford F150 - Tow Missile
1985 Merkur XR4Ti -#141 CP "Miss Daisy"
2005 Subaru LGT
http://www.cartct.com
-
DPDISXR4Ti

- Site Admin
- Posts: 15622
- Joined: Wed Jan 08, 2003 11:40 pm
- Location: New York
-
hEaT
- Level 7
- Posts: 3902
- Joined: Mon May 07, 2007 10:12 pm
- Location: USA
Out of our time working outside last night, I spent a good 15minutes in front of the wood stove thawing. We were debating taking pictures, but it was really cold and who wants to see a chunk of metal anywayDPDISXR4Ti wrote: I did some work in the unheated garage yesterday. After awhile, the cold just soaks up into your legs and torso. I came instead and stood next to the wood stove for the better part of forever.
I considered taking some pics, but opted out.
-
BeefFajitas
- Level 6

- Posts: 886
- Joined: Mon Jan 12, 2004 2:15 pm
- Location: MA
-
Grayson
- Level 7
- Posts: 1318
- Joined: Wed Jul 07, 2004 2:34 am
- Location: West Chester, OH
The pattern is indeed the same once you're done.
What's more concerning/interesting to me is that the case should be smacked around with a rubber mallet after initially setting the backlash, just in case there is a little bit of binding in the bearings after assembly. The backlash can then be double-checked, and adjusted if necessary. One time when I installed a Quaife diff I set the backlash perfectly, and the axle whined. I pulled it out, did everything the exact same way, and there was no whine. The difference? The bearings probably needed to settle in a way that rotating the ring gear won't fix. You either need to drive it (the slow method), or knock the case around with a mallet (the fast method).
What's more concerning/interesting to me is that the case should be smacked around with a rubber mallet after initially setting the backlash, just in case there is a little bit of binding in the bearings after assembly. The backlash can then be double-checked, and adjusted if necessary. One time when I installed a Quaife diff I set the backlash perfectly, and the axle whined. I pulled it out, did everything the exact same way, and there was no whine. The difference? The bearings probably needed to settle in a way that rotating the ring gear won't fix. You either need to drive it (the slow method), or knock the case around with a mallet (the fast method).

-
Ray
- Level 7
- Posts: 4338
- Joined: Sun Oct 24, 2004 10:40 am
- Location: CT, USA
My case was well aquainted with a rubber mallet - it didn't change the backlash for me at all.
-Ray
1985 Ford F150 - Tow Missile
1985 Merkur XR4Ti -#141 CP "Miss Daisy"
2005 Subaru LGT
http://www.cartct.com
1985 Ford F150 - Tow Missile
1985 Merkur XR4Ti -#141 CP "Miss Daisy"
2005 Subaru LGT
http://www.cartct.com
-
DSPXR4ti
- Level 7
- Posts: 1473
- Joined: Mon Mar 20, 2006 2:26 pm
- Location: San Jose, Calif.
Hey Ray,
Your rear disc set up is on the way should be there Monday (sorry for the delay)also make sure you break in the Eaton LSD by doing a figure 8 three times in the parking lot before you run it at an Autocross event, I was told this by my Diff. guy.
Ben
Your rear disc set up is on the way should be there Monday (sorry for the delay)also make sure you break in the Eaton LSD by doing a figure 8 three times in the parking lot before you run it at an Autocross event, I was told this by my Diff. guy.
Ben
85 DSP XR4ti, 2009 Solo 2 National Champion, burns muffler, 3in exhaust, Mc2 Full suspension, 325 hps & 328tqr, GMR Intake, Wilwood brakes, Eaton LSD, stand alone ECU. Working on being SM National Champion.
-
Ray
- Level 7
- Posts: 4338
- Joined: Sun Oct 24, 2004 10:40 am
- Location: CT, USA
Ben,
As of right now the car isn't doing anything other than sitting on blocks until spring rolls around. But i do remember what you told me for break in and i will try to approximate that the best i can.
Look forward to the rear brake bits. Might not get to that until spring, however.
As of right now the car isn't doing anything other than sitting on blocks until spring rolls around. But i do remember what you told me for break in and i will try to approximate that the best i can.
Look forward to the rear brake bits. Might not get to that until spring, however.
-Ray
1985 Ford F150 - Tow Missile
1985 Merkur XR4Ti -#141 CP "Miss Daisy"
2005 Subaru LGT
http://www.cartct.com
1985 Ford F150 - Tow Missile
1985 Merkur XR4Ti -#141 CP "Miss Daisy"
2005 Subaru LGT
http://www.cartct.com
-
Ray
- Level 7
- Posts: 4338
- Joined: Sun Oct 24, 2004 10:40 am
- Location: CT, USA
Snow Day!
Joe (hEaT) and i started this last night. We ended up realizing that harbor freight chop saws aren't that long lived, as mine lit on fire. After a quick trip to the 'depot, i picked up a 14" abrasive rigid chop saw (lifetime warranty). Cuts were SOOOO much easier and quicker.
Anyway, what did we start working on, you might ask? Well, if you remember my car has that side exit open downpipe. Since i'm a fiend for losing weight, i figured why not just axe the entire exhaust, and make it side exit only? hEaT will be running my old 3" exhaust with the side exit, and i'll be running this conglamation of cuts.
Anyway, if you're not aware, we got some snow (it's still snowing) and since my office is closed i figured i'd work on this project some more.
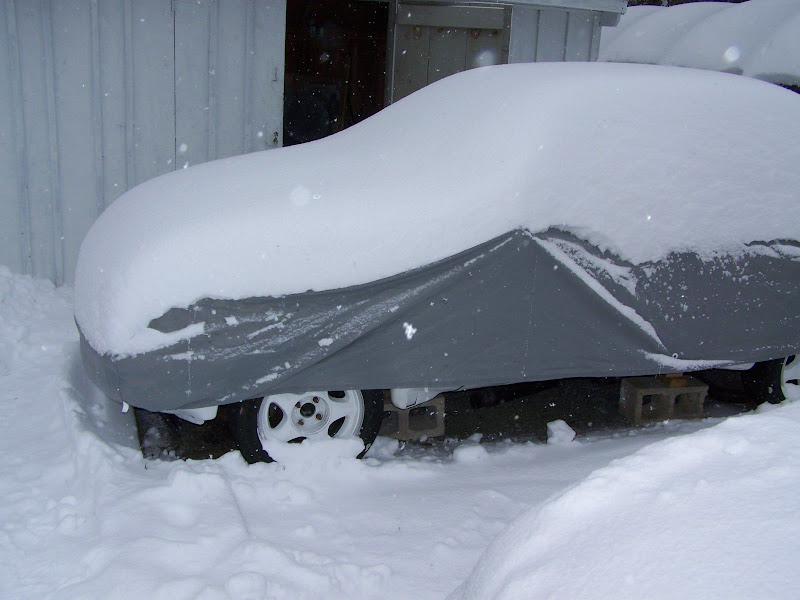
As always, the "it only snows on work on merkur days" picture
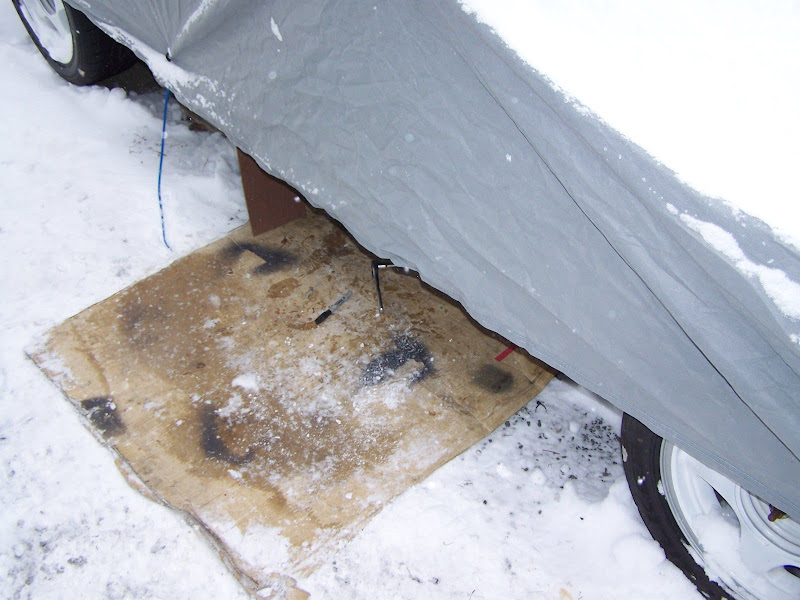
fun working environment. luckily that was only needed for test fit / mark / get the angle / etc. the rest of the work was done in my shed.
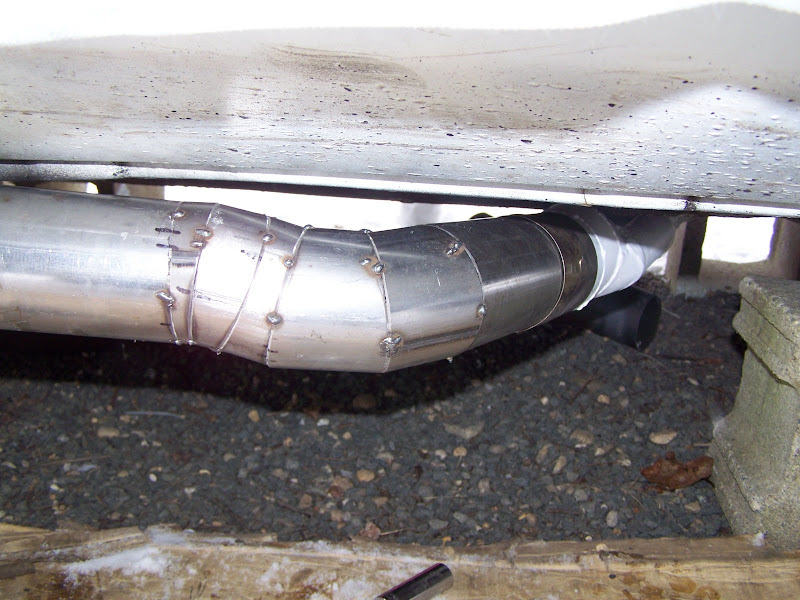
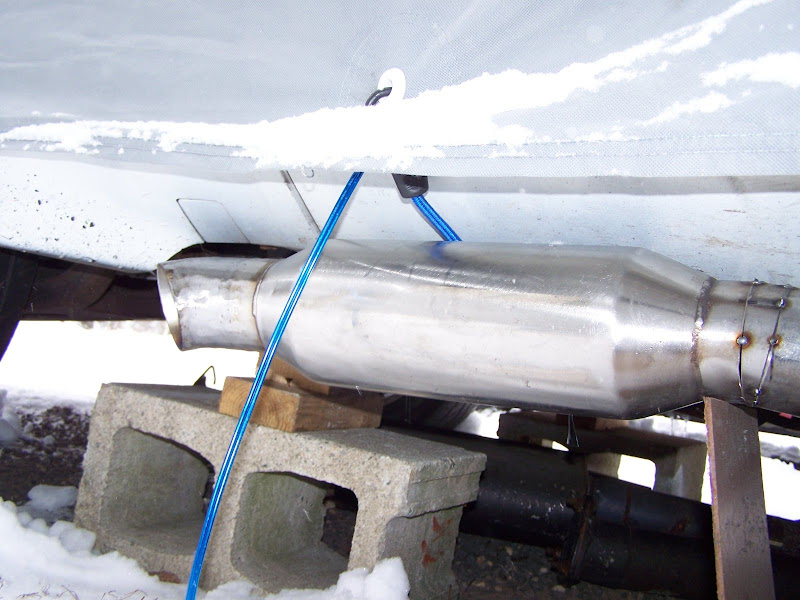
downpipe to a couple 15 degree bends (out, down, up, out) to the oval transition i built to go under the frame rail. 2" tubing split lengthwise with 2" sheet spacing it yields 7.14"^2. 3" tubing has a cross sectional area of 7.08"^2, so it's about right. to blend 3" round to the oval, sheet metal, welder, hammer... and repeat.
Anyway
and slightly out and up, then back to get it level...
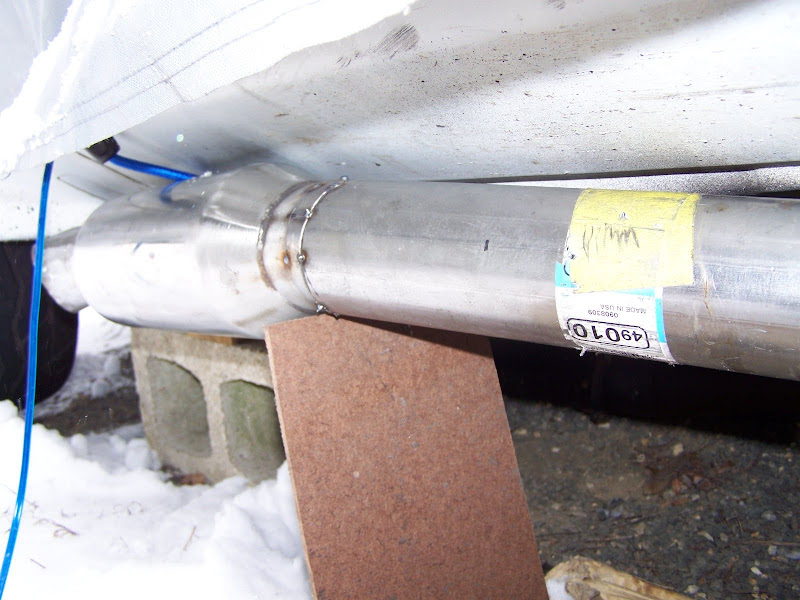
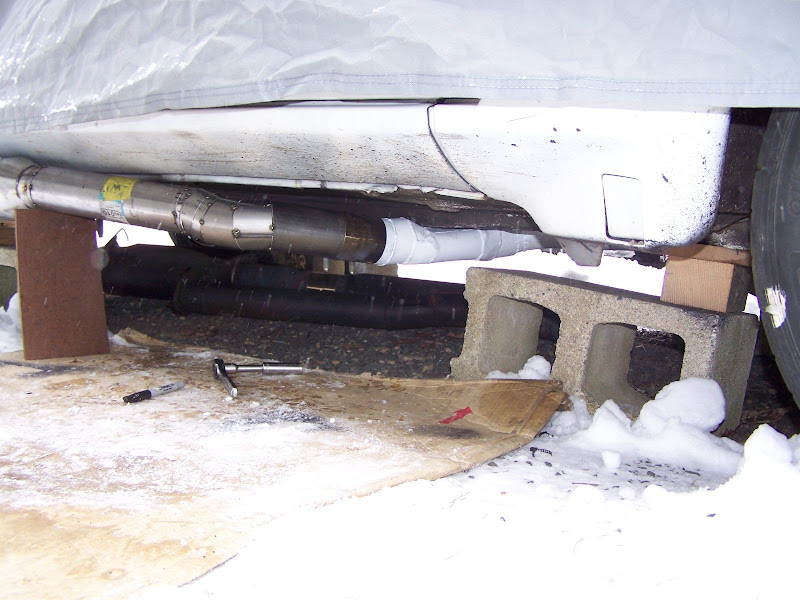
you can see how the down turn (again, three cuts with slight angles) is already ground out to be mostly smooth. it's not a show car but i figured i'd spend the extra 45 minutes grinding welds.
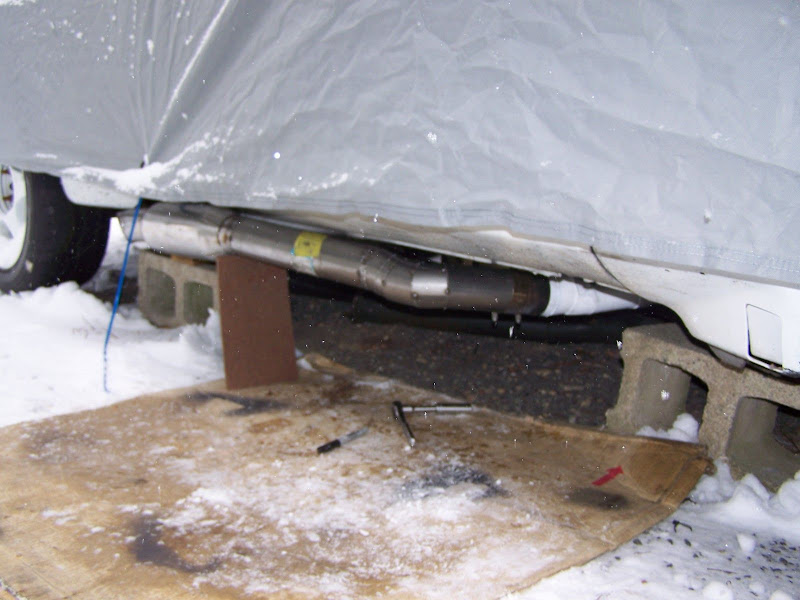
slightly blurry, but you get an idea of the amount of work that went into this
less blurry, showing the band clamp (for easy removal), oval, and most of the tubing.
To secure the rear portion of the exhaust i'm going to weld a bolt to the bottom (short bolt), then use some aluminum flat stock bent to go around the pinch and such, which will be secured to the floor pan. I might do this twice.
anyway, i masked off the resonator, precleaned, and painted the tubing flat white with VHT flameproof paint. To get an idea of the color, look at the oval transition.
next up - stainless braided brake lines and rear disc conversion (thanks to mike and ben)
Joe (hEaT) and i started this last night. We ended up realizing that harbor freight chop saws aren't that long lived, as mine lit on fire. After a quick trip to the 'depot, i picked up a 14" abrasive rigid chop saw (lifetime warranty). Cuts were SOOOO much easier and quicker.
Anyway, what did we start working on, you might ask? Well, if you remember my car has that side exit open downpipe. Since i'm a fiend for losing weight, i figured why not just axe the entire exhaust, and make it side exit only? hEaT will be running my old 3" exhaust with the side exit, and i'll be running this conglamation of cuts.
Anyway, if you're not aware, we got some snow (it's still snowing) and since my office is closed i figured i'd work on this project some more.
As always, the "it only snows on work on merkur days" picture
fun working environment. luckily that was only needed for test fit / mark / get the angle / etc. the rest of the work was done in my shed.
downpipe to a couple 15 degree bends (out, down, up, out) to the oval transition i built to go under the frame rail. 2" tubing split lengthwise with 2" sheet spacing it yields 7.14"^2. 3" tubing has a cross sectional area of 7.08"^2, so it's about right. to blend 3" round to the oval, sheet metal, welder, hammer... and repeat.
Anyway
and slightly out and up, then back to get it level...
you can see how the down turn (again, three cuts with slight angles) is already ground out to be mostly smooth. it's not a show car but i figured i'd spend the extra 45 minutes grinding welds.
slightly blurry, but you get an idea of the amount of work that went into this
less blurry, showing the band clamp (for easy removal), oval, and most of the tubing.
To secure the rear portion of the exhaust i'm going to weld a bolt to the bottom (short bolt), then use some aluminum flat stock bent to go around the pinch and such, which will be secured to the floor pan. I might do this twice.
anyway, i masked off the resonator, precleaned, and painted the tubing flat white with VHT flameproof paint. To get an idea of the color, look at the oval transition.
next up - stainless braided brake lines and rear disc conversion (thanks to mike and ben)
-Ray
1985 Ford F150 - Tow Missile
1985 Merkur XR4Ti -#141 CP "Miss Daisy"
2005 Subaru LGT
http://www.cartct.com
1985 Ford F150 - Tow Missile
1985 Merkur XR4Ti -#141 CP "Miss Daisy"
2005 Subaru LGT
http://www.cartct.com
-
BeefFajitas
- Level 6
- Posts: 886
- Joined: Mon Jan 12, 2004 2:15 pm
- Location: MA
-
Ray
- Level 7
- Posts: 4338
- Joined: Sun Oct 24, 2004 10:40 am
- Location: CT, USA
http://www.youtube.com/watch?v=zgbdDXmJ6Ao
still need to finish up the hangers and such, but here is the first fire up
still need to finish up the hangers and such, but here is the first fire up
-Ray
1985 Ford F150 - Tow Missile
1985 Merkur XR4Ti -#141 CP "Miss Daisy"
2005 Subaru LGT
http://www.cartct.com
1985 Ford F150 - Tow Missile
1985 Merkur XR4Ti -#141 CP "Miss Daisy"
2005 Subaru LGT
http://www.cartct.com
-
anglin
- Level 7
- Posts: 2456
- Joined: Thu Apr 22, 2004 3:20 pm
- Location: Hartford, CT
Uh, it wasn't snowing when you shot that video. What gives?
Good stuff, BTW. That's one of the most entertaining Merkur exhausts I've ever seen. Just need video of it doing more than idling now.
Good stuff, BTW. That's one of the most entertaining Merkur exhausts I've ever seen. Just need video of it doing more than idling now.
Anglin email: - anglin at mc2racing.com
www.mc2racing.com
www.mc2racing.com
-
hEaT
- Level 7
- Posts: 3902
- Joined: Mon May 07, 2007 10:12 pm
- Location: USA
-
Ray
- Level 7
- Posts: 4338
- Joined: Sun Oct 24, 2004 10:40 am
- Location: CT, USA
Anglin - it's freaking GORGEOUS out today. I washed the wife's car, the truck, the subaru, vacuumed and cleaned my wife's car's interior, and waxed them.
I will get to mounting hangers later. Joe if you want to stop by we can shoot one with more than just idling. It's rather tough to hit the throttle AND hold the camera
I will get to mounting hangers later. Joe if you want to stop by we can shoot one with more than just idling. It's rather tough to hit the throttle AND hold the camera
-Ray
1985 Ford F150 - Tow Missile
1985 Merkur XR4Ti -#141 CP "Miss Daisy"
2005 Subaru LGT
http://www.cartct.com
1985 Ford F150 - Tow Missile
1985 Merkur XR4Ti -#141 CP "Miss Daisy"
2005 Subaru LGT
http://www.cartct.com