Anglin - 2.32 seconds is pretty badass to make up in a few runs. how far behind Grayson were you?
Chad - yes. And it's fast. (turbo, slicks, etc.) The lambo doors are just for fun.
"Ray's AKA demonfire's XR4Ti build up"

-
Ray

- Level 7

- Posts: 4338
- Joined: Sun Oct 24, 2004 10:40 am
- Location: CT, USA
-Ray
1985 Ford F150 - Tow Missile
1985 Merkur XR4Ti -#141 CP "Miss Daisy"
2005 Subaru LGT
http://www.cartct.com
1985 Ford F150 - Tow Missile
1985 Merkur XR4Ti -#141 CP "Miss Daisy"
2005 Subaru LGT
http://www.cartct.com
-
anglin
- Level 7
- Posts: 2456
- Joined: Thu Apr 22, 2004 3:20 pm
- Location: Hartford, CT
After the first run I was 2.4 seconds behind. After the 6th run I was 0.9 seconds behind. My goal was to be within a second of him. That was in jeopardy until I realized I was going to finish 3rd if I didn't pick it up. The 2.3 second improvement is due entirely to lack of seat time. That was my first event, uh, 1092 days. We've got another event in two weeks. We'll see how that goes.demonfire wrote:Anglin - 2.32 seconds is pretty badass to make up in a few runs. how far behind Grayson were you?
Anglin email: - anglin at mc2racing.com
www.mc2racing.com
www.mc2racing.com
-
Ray
- Level 7
- Posts: 4338
- Joined: Sun Oct 24, 2004 10:40 am
- Location: CT, USA
lost brakes at the last autocross. which sucked. sam and i bled them out quite a bit last night... it happened after my codriver somehow was able to get both drivers side front and rear off the ground - when they came down, the rear came up (both tires) and the car just kind of hopped. he said it felt violent so i was hoping we just sucked some air. Bled it out several times, removed air, flushed the system fully again - it was most recently flushed in march of this year. anyway - no gain in pedal feel. pedal still went right to the floor.
So, of course, i have to use this as an excuse to 'upgrade' to the later style MC and booster. Getting the parts from rockauto - hopefully i dont get some NFG out of the box piece like i've read about here. My fingers are crossed.
Luckily, since my car is fairly "bare" minus the upgraded goodies, i was able to pull the MC and booster in about an hour - and it's my first time doing it. I still hate brake fluid.
For anyone who is doing this / about to do this; it's not nearly as bad as i thought. It's very straight forward. Granted, mine was easier as i have no carpet / soundproofing / and a whole slew of crap under the hood is removed already, so half of the steps in the manual weren't needed. Basically, just remove the strut tower brace, master cylinder brace, loosen the brake lines, remove them from the MC (and place a catch pan under the car), let the fluid drain out, remove the MC from the booster, the clip on the brake pedal, the two nuts holding the MC in, and pull out.
Questions:
does the later model MC have the same fittings for the brake lines?
same amount of feed holes for the brake lines?
same style reservoir in case the new unit doesn't come with one ?
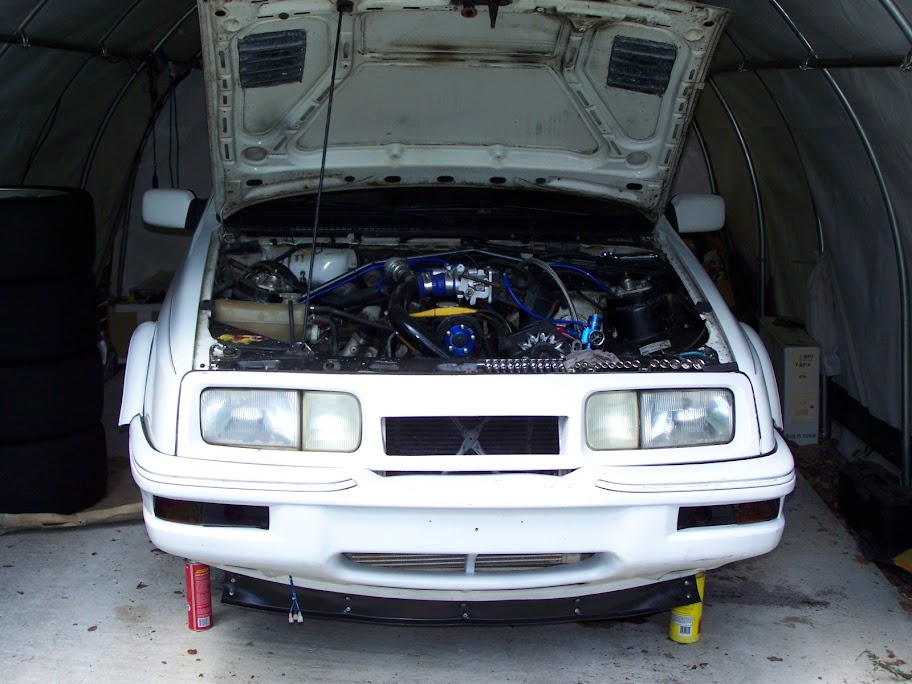
Anyway, couple pictures i just snapped.
Front of the car as it sits now (race tires stacked on the side)
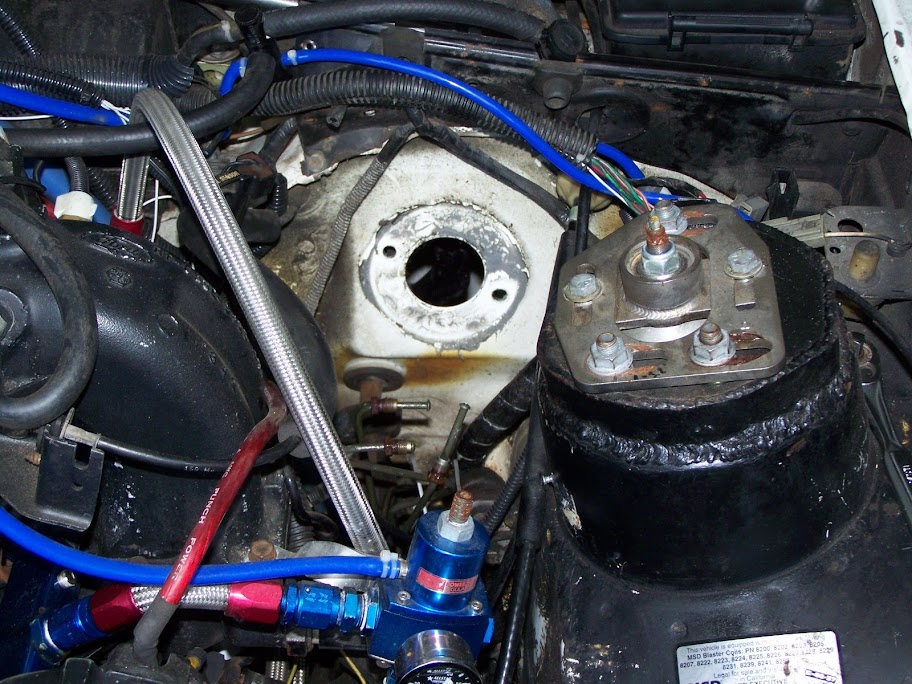
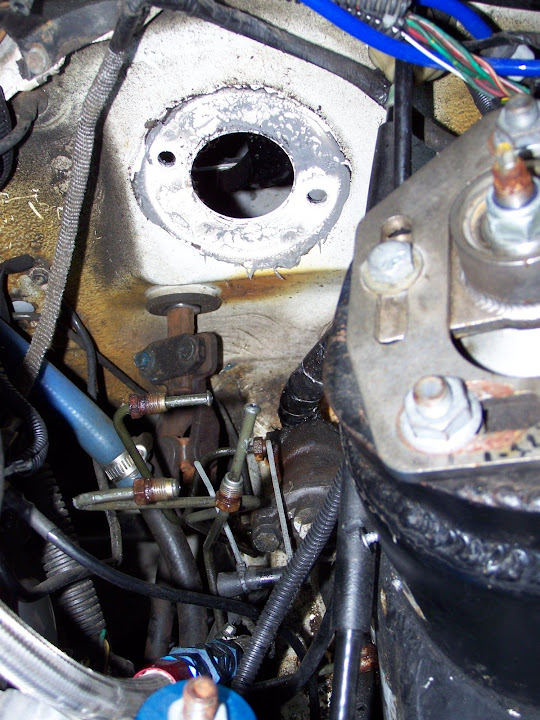
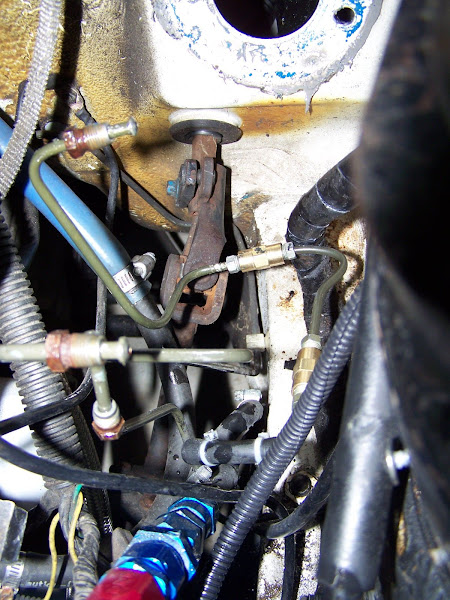
Master Cylinder / Booster removed. I later cleaned up that area a bit.
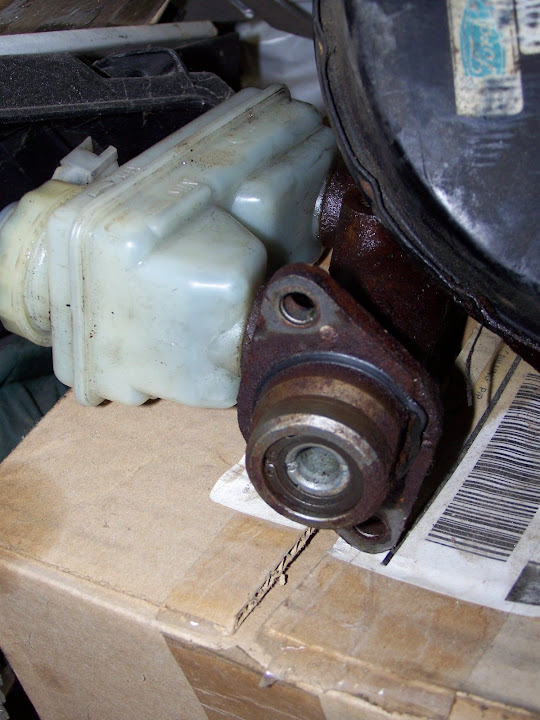
Booster (still works fine, but cant use it with the newer MC) and MC behind it. Stacked on boxes near other parts from random projects.
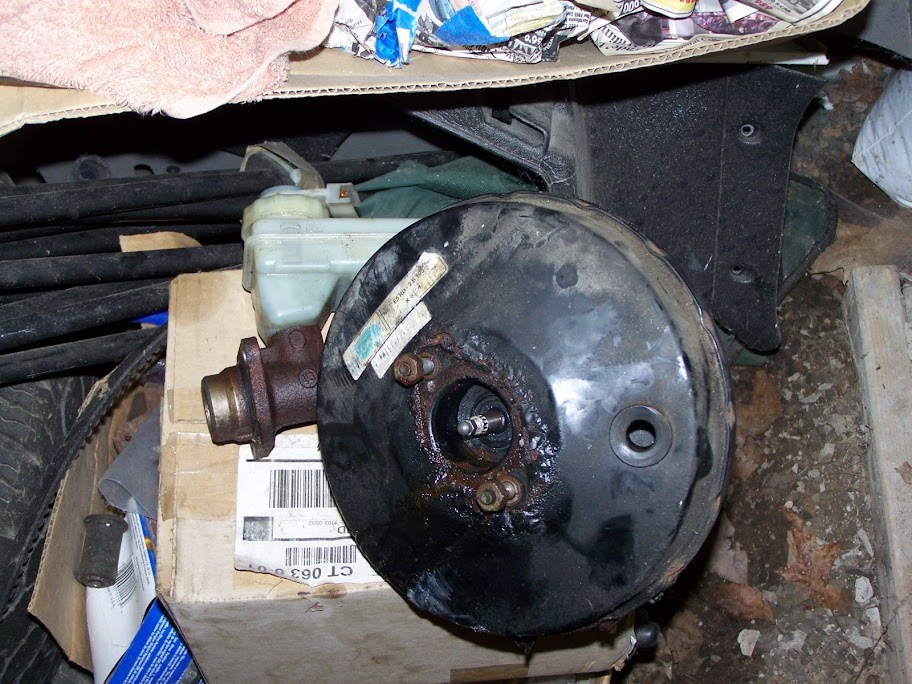
early style MC, failed. luckily still had enough brake immediately after failure to not stuff the car.
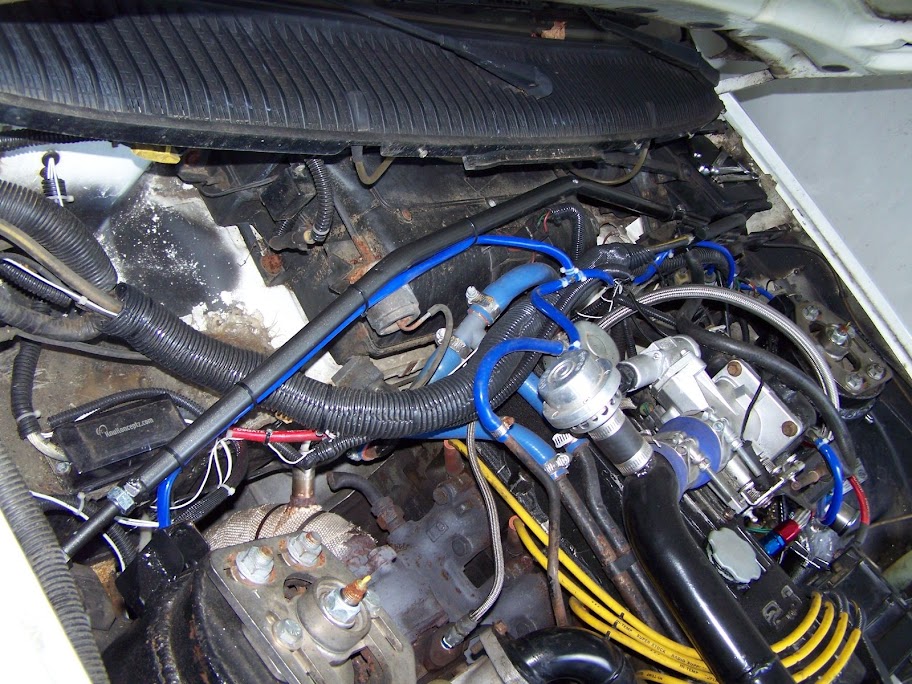
That strut bar i made - it's removed so that i could get clearance to get the booster out. you can see the little tabs i welded onto the strut towers to mount it. the blue line attached is the wastegate reference line.
random tech marks from autox (i do tech, and yes, i tech my car each time)
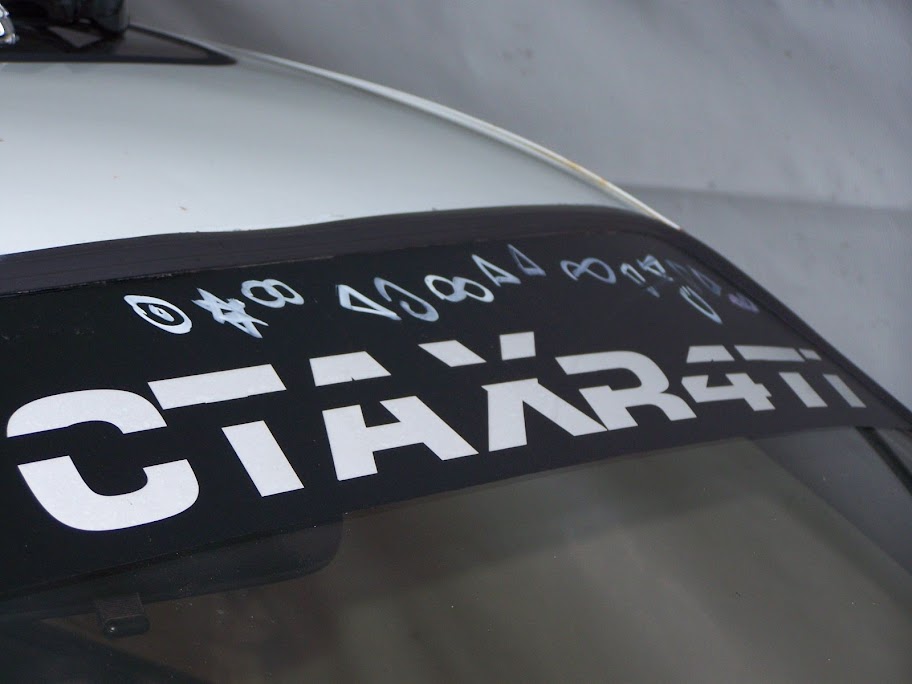
results from this season on the lower part of dash / glovebox. prior years on the upper. really only started collecting them last season.

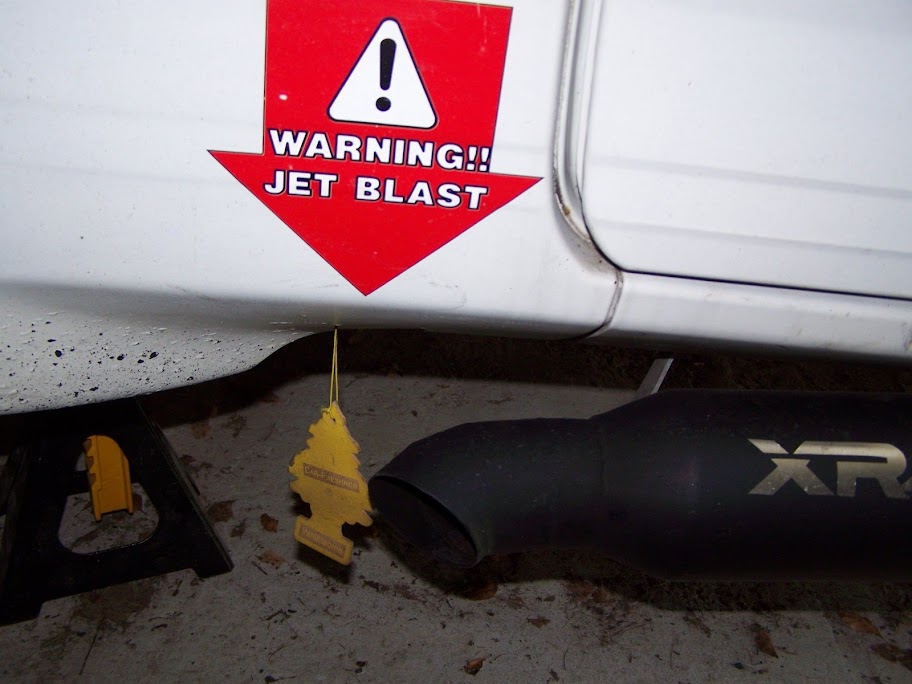
this is just funny - warning sticker for passengers so they dont burn their leg when they get out (doesn't always work); side exit; and sam put a tree on so that my car cleans the air as it drives!
i'll update when the new parts come in. i'm hoping for next week.
So, of course, i have to use this as an excuse to 'upgrade' to the later style MC and booster. Getting the parts from rockauto - hopefully i dont get some NFG out of the box piece like i've read about here. My fingers are crossed.
Luckily, since my car is fairly "bare" minus the upgraded goodies, i was able to pull the MC and booster in about an hour - and it's my first time doing it. I still hate brake fluid.
For anyone who is doing this / about to do this; it's not nearly as bad as i thought. It's very straight forward. Granted, mine was easier as i have no carpet / soundproofing / and a whole slew of crap under the hood is removed already, so half of the steps in the manual weren't needed. Basically, just remove the strut tower brace, master cylinder brace, loosen the brake lines, remove them from the MC (and place a catch pan under the car), let the fluid drain out, remove the MC from the booster, the clip on the brake pedal, the two nuts holding the MC in, and pull out.
Questions:
does the later model MC have the same fittings for the brake lines?
same amount of feed holes for the brake lines?
same style reservoir in case the new unit doesn't come with one ?
Anyway, couple pictures i just snapped.
Front of the car as it sits now (race tires stacked on the side)
Master Cylinder / Booster removed. I later cleaned up that area a bit.
Booster (still works fine, but cant use it with the newer MC) and MC behind it. Stacked on boxes near other parts from random projects.
early style MC, failed. luckily still had enough brake immediately after failure to not stuff the car.
That strut bar i made - it's removed so that i could get clearance to get the booster out. you can see the little tabs i welded onto the strut towers to mount it. the blue line attached is the wastegate reference line.
random tech marks from autox (i do tech, and yes, i tech my car each time)
results from this season on the lower part of dash / glovebox. prior years on the upper. really only started collecting them last season.
this is just funny - warning sticker for passengers so they dont burn their leg when they get out (doesn't always work); side exit; and sam put a tree on so that my car cleans the air as it drives!
i'll update when the new parts come in. i'm hoping for next week.
-Ray
1985 Ford F150 - Tow Missile
1985 Merkur XR4Ti -#141 CP "Miss Daisy"
2005 Subaru LGT
http://www.cartct.com
1985 Ford F150 - Tow Missile
1985 Merkur XR4Ti -#141 CP "Miss Daisy"
2005 Subaru LGT
http://www.cartct.com
-
michaelb
- Level 3

- Posts: 237
- Joined: Wed Sep 13, 2006 7:49 pm
- Location: CT, Torrington
-
Ray
- Level 7
- Posts: 4338
- Joined: Sun Oct 24, 2004 10:40 am
- Location: CT, USA
Okay, this is interesting. I decided to go pull the master cylinder /booster from my 2002 zx3 parts car to just see if i could make it fit the XR. While that's doable, the focus has the prop valves on the MC itself (removable) and also has 4 feeds, versus the merkurs 3. However, they both are 15/16" bore, so i was hopeful.
Get home, mic out both, and no, the booster from the focus is too big, and has 4 mounting bolts instead of 2... and the focus master has 0.477" or something too deep into the booster to fit. (but the diameter is the same for the booster fitting)
So, i decided to disassemble both. Upon doing so, i learned that a master cylinder is insanely simple. It's basically a snap ring, a piston with a spring, this has two seals, then that goes forward to another piston. Easy.
The merkurs seal was blown. I removed it. I then removed the focus seal - exact same frickin' part.
Swap focus seal to merkur seal, put back together. Take some spare brake line and spare fittings and some spare silicone tubing, and make a bench bleeding kit. Bench bleed the master - seems to be working okay, but the proof is in the pudding. Unfortunately, the only way to tell if this works is if you actually install it. So i go install it. In the interim, i decided to sand out and paint my factory booster ford blue (good luck?) and remove the prop valve to the rear brakes as i no longer have drums. That required cutting the m11 fittings off as i couldn't find the female to female m11 union, but that's okay because the factory setup is a bubble flare, not a double flare, like the unions need. So i go to the parts store, get the two female unions, a couple extra male m10 fittings, and a piece of line about 6" long. Cut, bend, double flare, and i no longer have a prop valve... which saved maybe 10-12oz (bonus points?)
Bleed the system, fully flush the fluid again, even tho it's only 2 days old...
And it works.
-Ray
1985 Ford F150 - Tow Missile
1985 Merkur XR4Ti -#141 CP "Miss Daisy"
2005 Subaru LGT
http://www.cartct.com
1985 Ford F150 - Tow Missile
1985 Merkur XR4Ti -#141 CP "Miss Daisy"
2005 Subaru LGT
http://www.cartct.com
-
Ray
- Level 7
- Posts: 4338
- Joined: Sun Oct 24, 2004 10:40 am
- Location: CT, USA
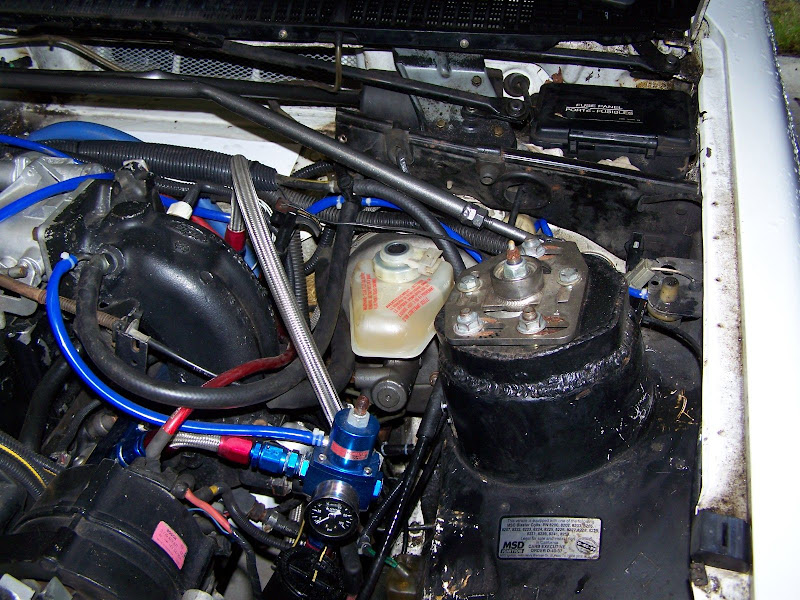
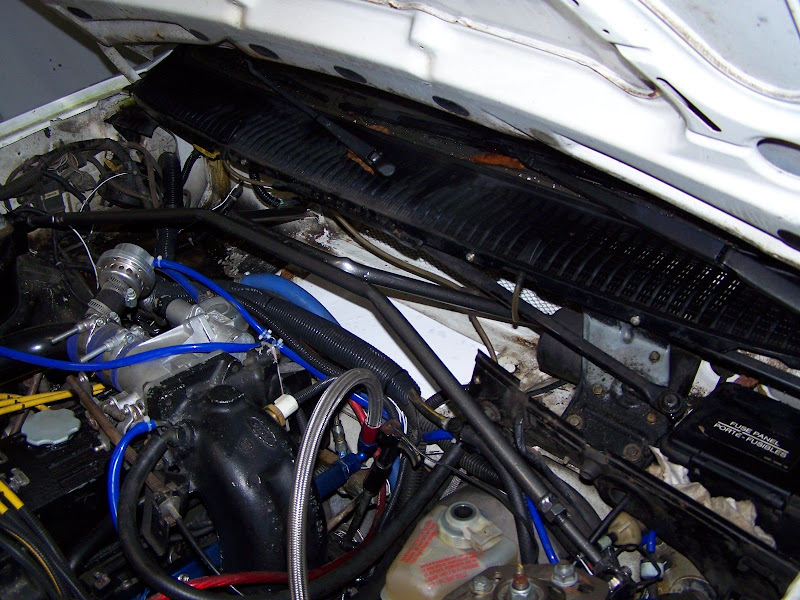
New booster / Master cylinder is in. Also removed the heater box / blower box, covered the holes with 20ga sheet and wire mesh (to allow some fresh air), and modified the strut brace I made a while back to tie into the firewall as well.
What you cant see is when i took the new booster out of the box, there was something rattling around inside. It looked like a valve - like from a motor, but was actually the rod that contacts the master. Just... loose in there. The washer snap ring type thing was also loose. After much frustration, we got it back in place. More on that later.
Anyway, some pics. Special thanks to Sam for coming over in this weather (it's pouring out) to work on the car with me.
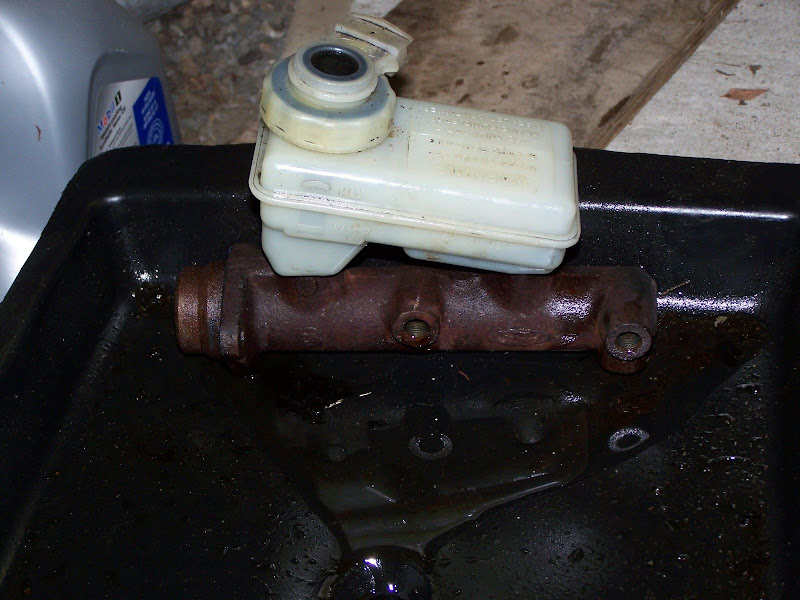
Here is the old master that i rebuilt with focus parts.
here is a size comparison of the old booster (i repainted it blue) and the later model booster.
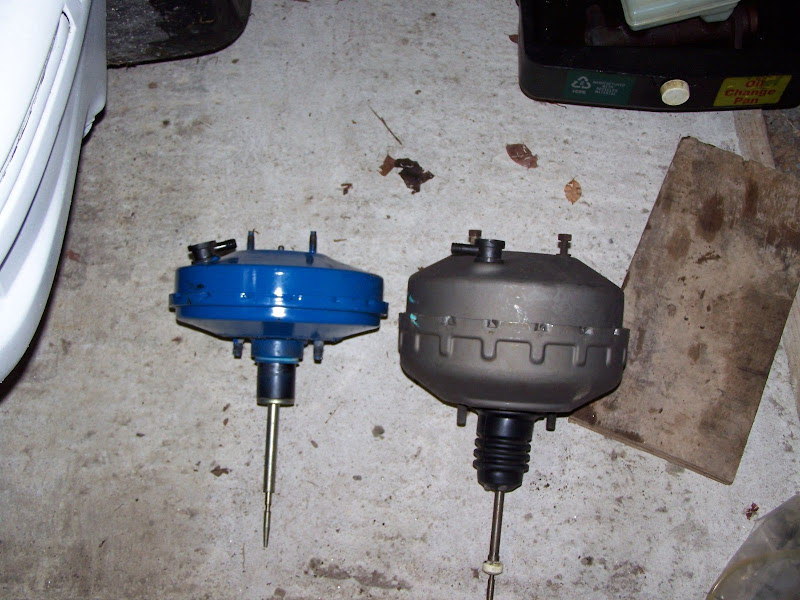
from the front
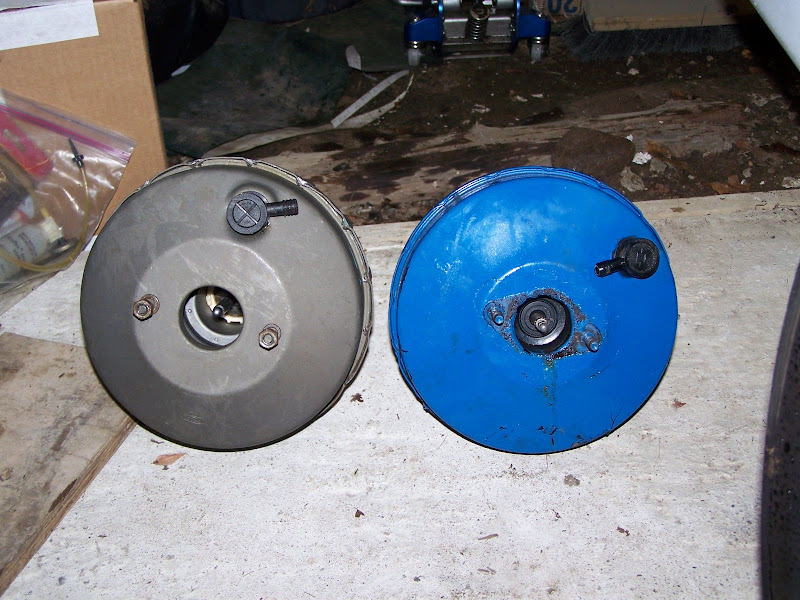
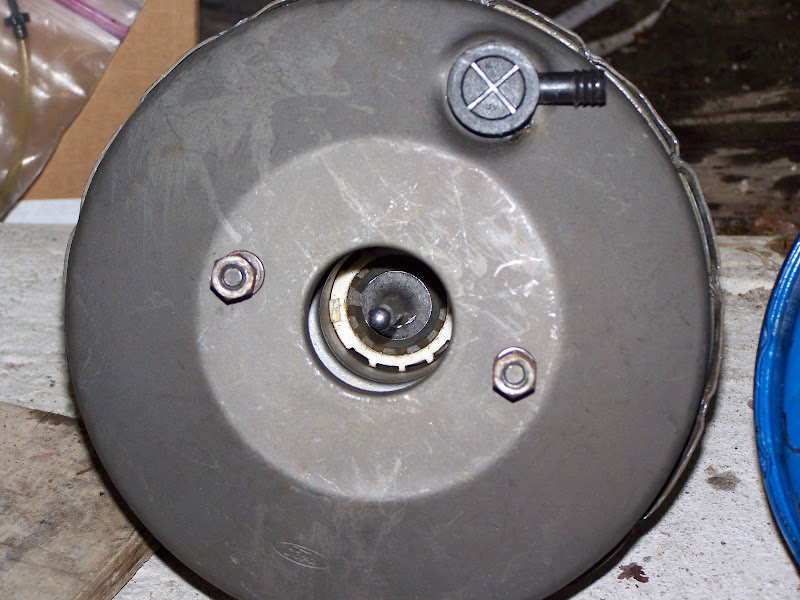
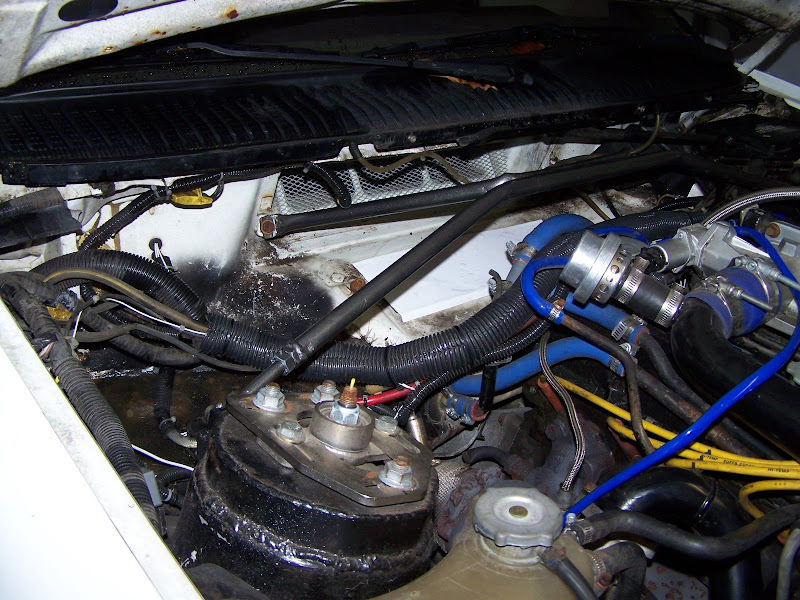
85/86 rod setup and bolt spacing:
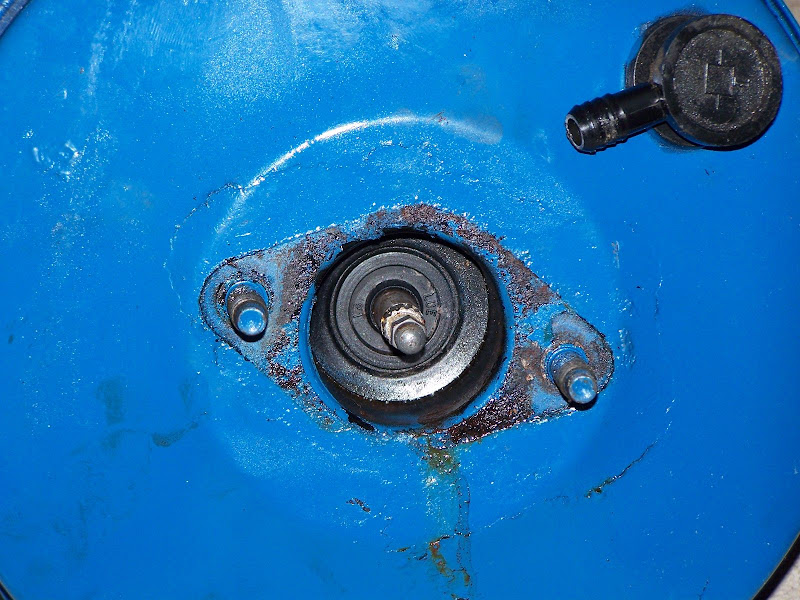
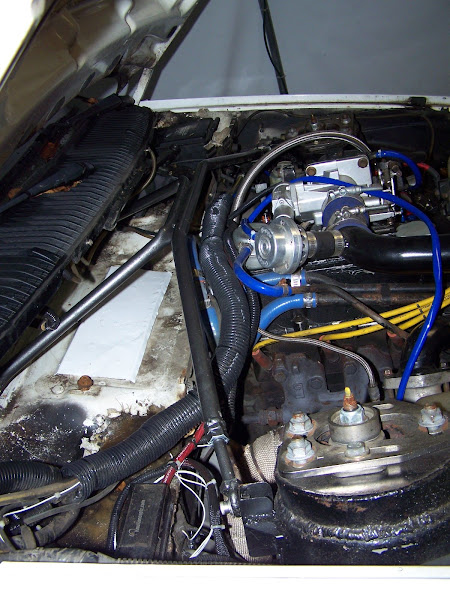
87-89 rod setup and bolt spacing, if you look around the base of the rod you can see the serrated washer snap ring thing. this decided to let go as we were fitting the new master cylinder, causing MUCH frustration as this thing took a while to get in place.
proportioning valve for the rear brakes removed, made the car much better with the disc rears.
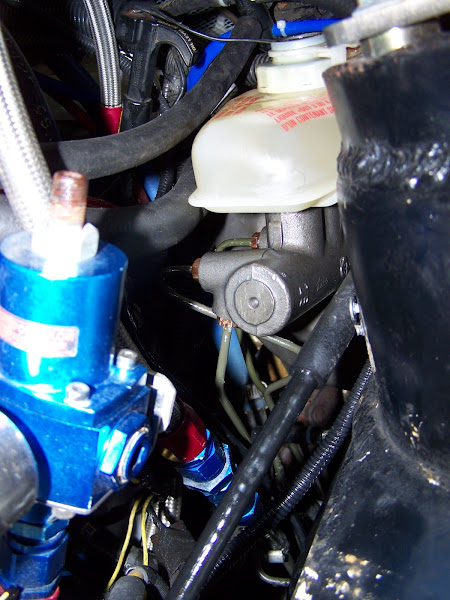
installed: takes up a lot more room now.
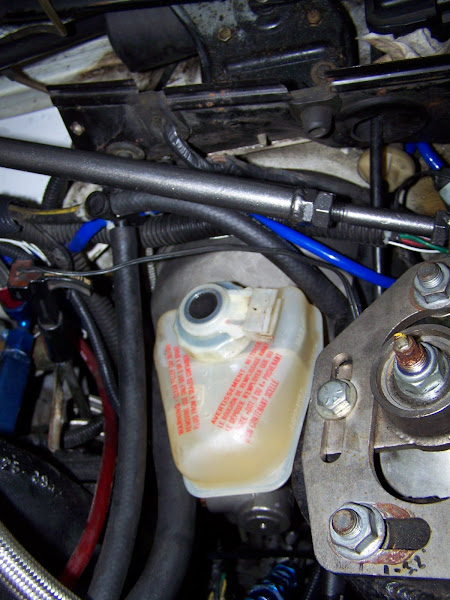
thanks to merkurdepot for the reservoir (new in box, ford part!)
still have to install my MC brace, hopefully fits since it was made for the other setup.
strut brace i made, heater box removed.
Car's still on stands right now (it's pouring rain and the car is the devil) - will be installing new hawk HPS pads later on.
Buying brakes for this car is amusing; it uses SVT focus rotors (front), 2003 mustang GT pads (front) and turbocoupe rear (or lincoln LS?)
What you cant see is when i took the new booster out of the box, there was something rattling around inside. It looked like a valve - like from a motor, but was actually the rod that contacts the master. Just... loose in there. The washer snap ring type thing was also loose. After much frustration, we got it back in place. More on that later.
Anyway, some pics. Special thanks to Sam for coming over in this weather (it's pouring out) to work on the car with me.
Here is the old master that i rebuilt with focus parts.
here is a size comparison of the old booster (i repainted it blue) and the later model booster.
from the front
85/86 rod setup and bolt spacing:
87-89 rod setup and bolt spacing, if you look around the base of the rod you can see the serrated washer snap ring thing. this decided to let go as we were fitting the new master cylinder, causing MUCH frustration as this thing took a while to get in place.
proportioning valve for the rear brakes removed, made the car much better with the disc rears.
installed: takes up a lot more room now.
thanks to merkurdepot for the reservoir (new in box, ford part!)
still have to install my MC brace, hopefully fits since it was made for the other setup.
strut brace i made, heater box removed.
Car's still on stands right now (it's pouring rain and the car is the devil) - will be installing new hawk HPS pads later on.
Buying brakes for this car is amusing; it uses SVT focus rotors (front), 2003 mustang GT pads (front) and turbocoupe rear (or lincoln LS?)
Last edited by Ray on Mon Aug 31, 2009 8:02 am, edited 1 time in total.
-Ray
1985 Ford F150 - Tow Missile
1985 Merkur XR4Ti -#141 CP "Miss Daisy"
2005 Subaru LGT
http://www.cartct.com
1985 Ford F150 - Tow Missile
1985 Merkur XR4Ti -#141 CP "Miss Daisy"
2005 Subaru LGT
http://www.cartct.com
-
whitelx

- Level 7
- Posts: 1211
- Joined: Mon Oct 06, 2003 3:01 pm
- Location: Riverside, CA
a lot of your pictures in the new post aren't working.
1986 XR4Ti - 294rwhp/315ft-lbs
1992 Mustang 5.0 notch - 434rwhp/445ft-lbs
http://www.youtube.com/user/whitelx
1992 Mustang 5.0 notch - 434rwhp/445ft-lbs
http://www.youtube.com/user/whitelx
-
Ray
- Level 7
- Posts: 4338
- Joined: Sun Oct 24, 2004 10:40 am
- Location: CT, USA
yeah this board does that it seems. if right click, show picture doesn't work here is the album:
http://picasaweb.google.com/raymond.covino/Misc#
the last 12 or so pics
http://picasaweb.google.com/raymond.covino/Misc#
the last 12 or so pics
-Ray
1985 Ford F150 - Tow Missile
1985 Merkur XR4Ti -#141 CP "Miss Daisy"
2005 Subaru LGT
http://www.cartct.com
1985 Ford F150 - Tow Missile
1985 Merkur XR4Ti -#141 CP "Miss Daisy"
2005 Subaru LGT
http://www.cartct.com
-
whitelx
- Level 7
- Posts: 1211
- Joined: Mon Oct 06, 2003 3:01 pm
- Location: Riverside, CA
Have you completed your brake conversion?
I am wondering how the pedal feel is with the Mustang GT dual piston PBR calipers, Focus SVT rotors, and the turbo coupe stuff in the rear is. i have the same setup going on my car soon. I also have the 88-89 master cylinder and booster, as well as the DG adapter to install one of the larger T-bird master cylinders if I choose.
I'm worried about the feel as well as the front to rear bias. I'll have an adj. prop valve, but those can only do so much.
1986 XR4Ti - 294rwhp/315ft-lbs
1992 Mustang 5.0 notch - 434rwhp/445ft-lbs
http://www.youtube.com/user/whitelx
1992 Mustang 5.0 notch - 434rwhp/445ft-lbs
http://www.youtube.com/user/whitelx
-
Ray
- Level 7
- Posts: 4338
- Joined: Sun Oct 24, 2004 10:40 am
- Location: CT, USA
yeah, it's complete but i haven't tested it on the road yet - pedal feel is moderately better than the 85/86 master - but you still have room to modulate the brakes (which in my opinion is a good thing). Maybe 2-4" of travel.
-Ray
1985 Ford F150 - Tow Missile
1985 Merkur XR4Ti -#141 CP "Miss Daisy"
2005 Subaru LGT
http://www.cartct.com
1985 Ford F150 - Tow Missile
1985 Merkur XR4Ti -#141 CP "Miss Daisy"
2005 Subaru LGT
http://www.cartct.com
-
xr4ti41028
- Level 2

- Posts: 145
- Joined: Fri Mar 21, 2008 12:19 am
- Location: Graham,wa
-
Ray
- Level 7
- Posts: 4338
- Joined: Sun Oct 24, 2004 10:40 am
- Location: CT, USA
Whole bunch of fittings. I dont even remember which ones now as that was a while ago. Just be careful; the cost of those russell connectors adds up fast.
-Ray
1985 Ford F150 - Tow Missile
1985 Merkur XR4Ti -#141 CP "Miss Daisy"
2005 Subaru LGT
http://www.cartct.com
1985 Ford F150 - Tow Missile
1985 Merkur XR4Ti -#141 CP "Miss Daisy"
2005 Subaru LGT
http://www.cartct.com
-
Ray
- Level 7
- Posts: 4338
- Joined: Sun Oct 24, 2004 10:40 am
- Location: CT, USA
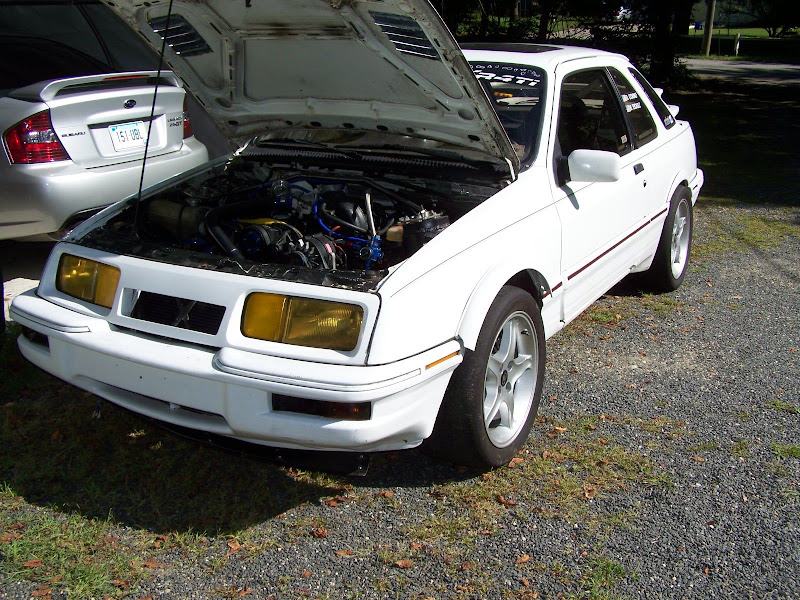
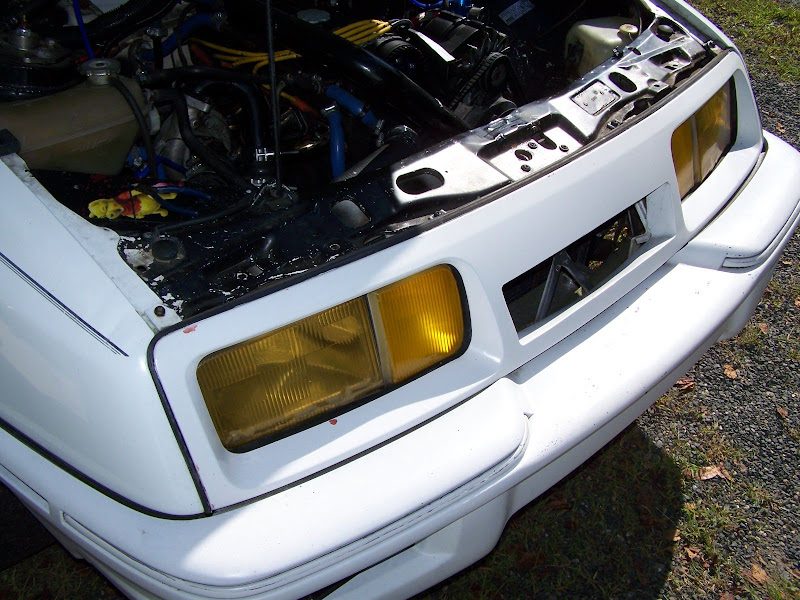
When towing, my truck sometimes kicks rocks out of the tread (i have a gravel driveway) which also sometimes just slam right into the car. While I can repaint the front bumper / grill easily enough, i did not want to crack a light. I have had the blue painters tape on the lights for a while, but decided (and since i had some extra laminex kicking around from other projects) i would do that.
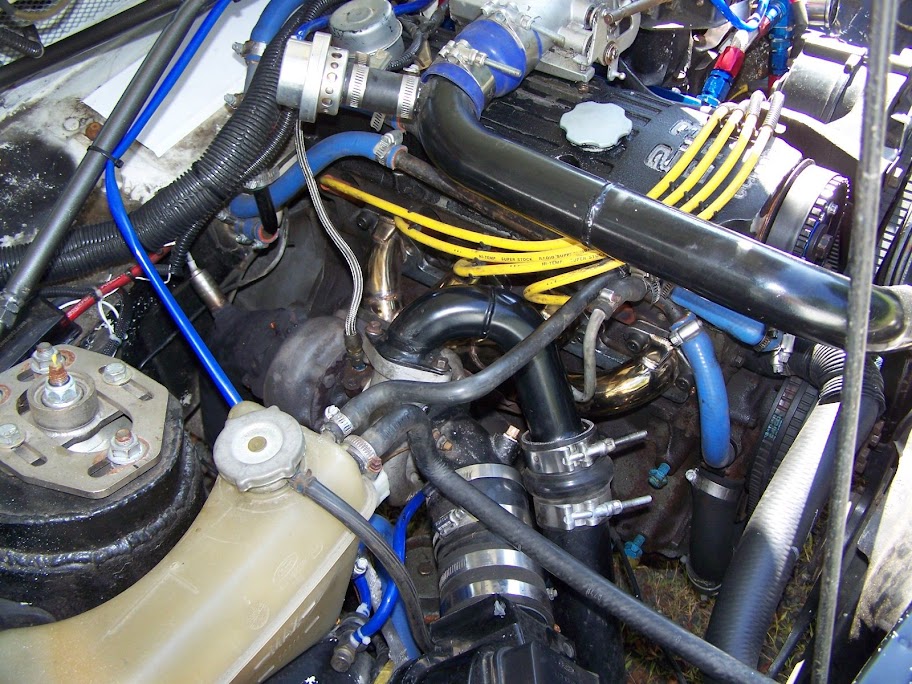
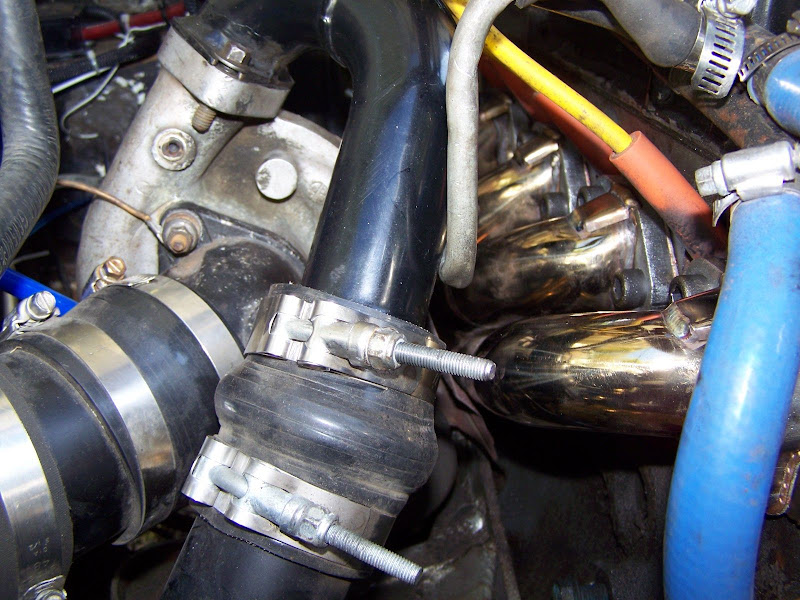
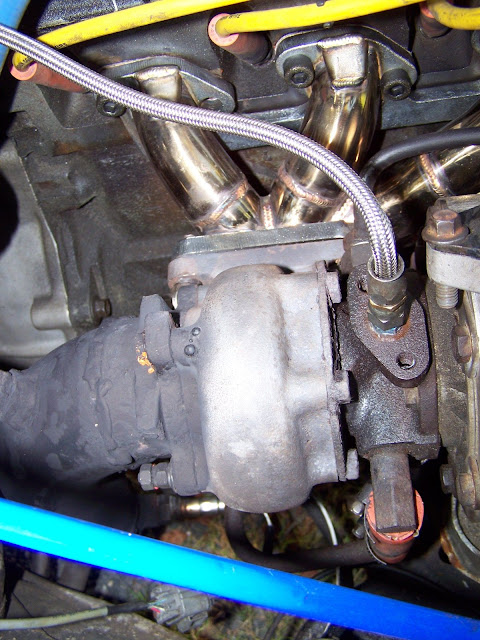
In addition, i installed the tubular turbo manifold. Good quality, but it sets the turbo about ".." <-- that much closer to the head. Not a big deal, except when your 3" downpipe already is "." <-- that close to the bellhousing. Only other complaint is the stupid freaking break by looking at them turbo to downpipe bolts. Turned a couple hour job into 8. Decided to put studs into the housing instead of bolts.
Was VERY glad to see i still have no shaft play side to side, or in / out.
Anyway, couple pictures.
Wet application still not dry enough to get all of the bubbles out, but here is an idea.
While i was at it, i removed the breather line to the turbo inlet. Going to just get a small filter for that, but for now, it hangs behind the valve cover. Small 1/4npt plug (i think, i had some kicking around, and that fit) took care of the hole.
Once i (finally) move i will be working on the garage, then working on the car. Hopefully get a chance to pull this motor and clean / repaint / etc the engine bay, swap in a fresher motor, and keep this one as a spare. Time will tell, right?
-Ray
1985 Ford F150 - Tow Missile
1985 Merkur XR4Ti -#141 CP "Miss Daisy"
2005 Subaru LGT
http://www.cartct.com
1985 Ford F150 - Tow Missile
1985 Merkur XR4Ti -#141 CP "Miss Daisy"
2005 Subaru LGT
http://www.cartct.com
-
Ed Lijewski
- Level 8
- Posts: 8920
- Joined: Thu Sep 04, 2003 5:53 pm
- Location: The Belly of The Beast