"Ray's AKA demonfire's XR4Ti build up"

Documenting your big project with photos/videos? Have photos/videos to share of anything Merkur related? Place your links to photos and videos here. Please - Merkurs and Merkur-related pictures only. Cosworths welcome!!
Carlisle and event related pictures are to be placed in the relevant section under 'Events'.
Merkur Club web site
User avatar
Ray
Level 7
Level 7
Posts: 4338
Joined: Sun Oct 24, 2004 10:40 am
Location: CT, USA

Post by Ray »

Was playing around a little with launch control.

No, it's not set like this normally :lol:

http://www.youtube.com/watch?v=HwO7apHyal0
-Ray
1985 Ford F150 - Tow Missile
1985 Merkur XR4Ti -#141 CP "Miss Daisy"
2005 Subaru LGT
http://www.cartct.com
DSPXR4ti
Level 7
Level 7
Posts: 1473
Joined: Mon Mar 20, 2006 2:26 pm
Location: San Jose, Calif.

Post by DSPXR4ti »

MMMMM.... have you tryed at an event yet?

Ben
85 DSP XR4ti, 2009 Solo 2 National Champion, burns muffler, 3in exhaust, Mc2 Full suspension, 325 hps & 328tqr, GMR Intake, Wilwood brakes, Eaton LSD, stand alone ECU. Working on being SM National Champion.
User avatar
Ray
Level 7
Level 7
Posts: 4338
Joined: Sun Oct 24, 2004 10:40 am
Location: CT, USA

Post by Ray »

Yessir, it results in a little wheelspin. I dont have it bark flame at events as no way will that meet the noise regulations.

Basically on, then feather out throttle for a little bit of a chirp and go. I dig it. :)
-Ray
1985 Ford F150 - Tow Missile
1985 Merkur XR4Ti -#141 CP "Miss Daisy"
2005 Subaru LGT
http://www.cartct.com
User avatar
Ray
Level 7
Level 7
Posts: 4338
Joined: Sun Oct 24, 2004 10:40 am
Location: CT, USA

Post by Ray »

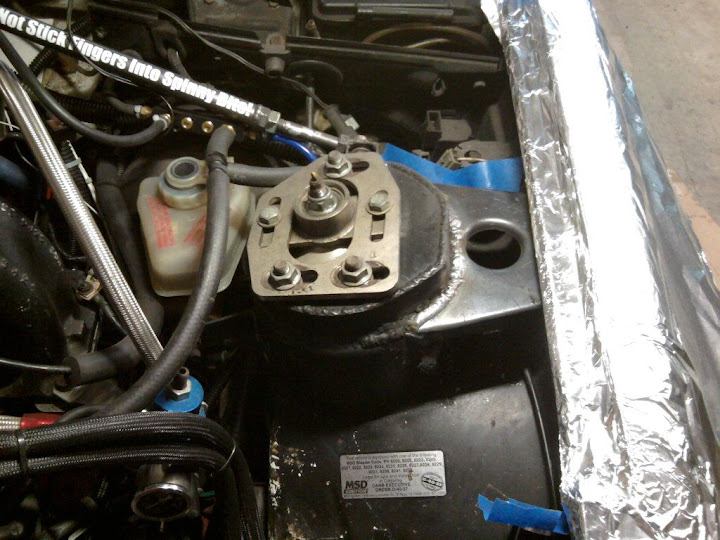
Decided to relocate my alternator to where the AC compressor used to be. Mike's out of stock on the kits, but i have a series of spacers and stuff to try and make my own. I figured, if i couldn't do it, i'd order mikes. Total time invested in the bracket and finding the right spacers was about 2 hours. This makes mike's kit a steal as it's all ready to bolt in.

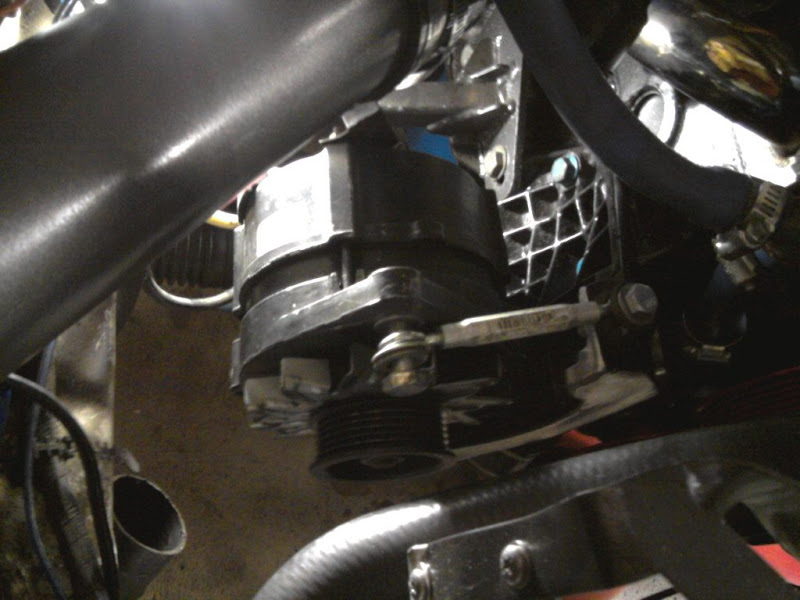
Took the stock AC compressor bracket, mocked up alternator, cut off bits that wouldn't fit, made spacers to position alt to where it needs to be and snug up. To appease Anglin, i drilled 3/8" holes btwn the ribs in the bracket (a total of 9, saving probably 0.1 oz of weight) to reduce weight.

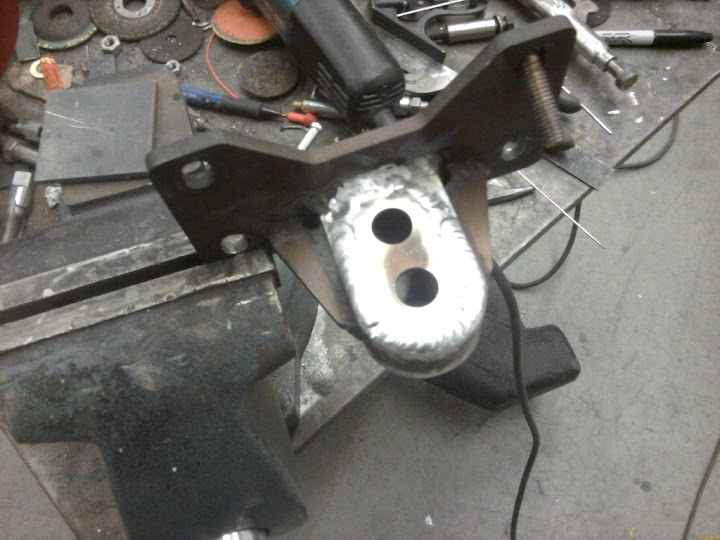
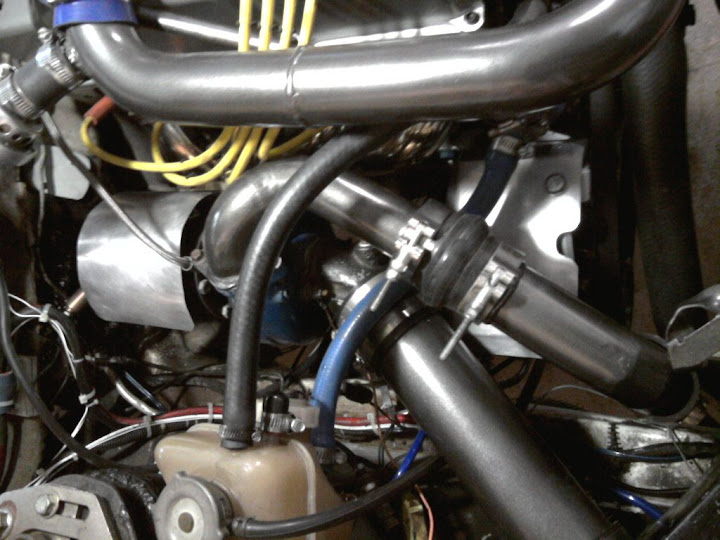
Went out and picked up a turnbuckle style rod end thingie. Used rubber washers to allow slight out of alignment, drilled and tapped bracket to hold retaining bolt. New belt (old belt has like 40 miles on it, ugh, but this requires a new length.)

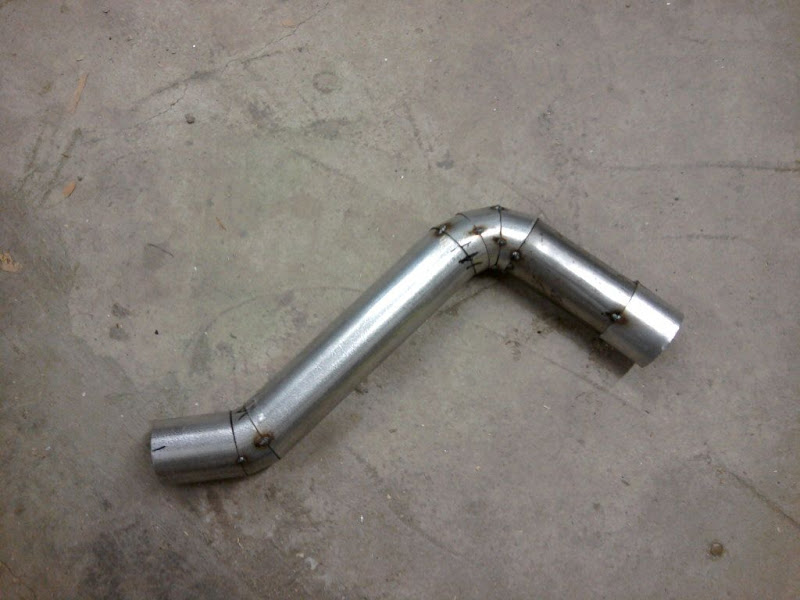
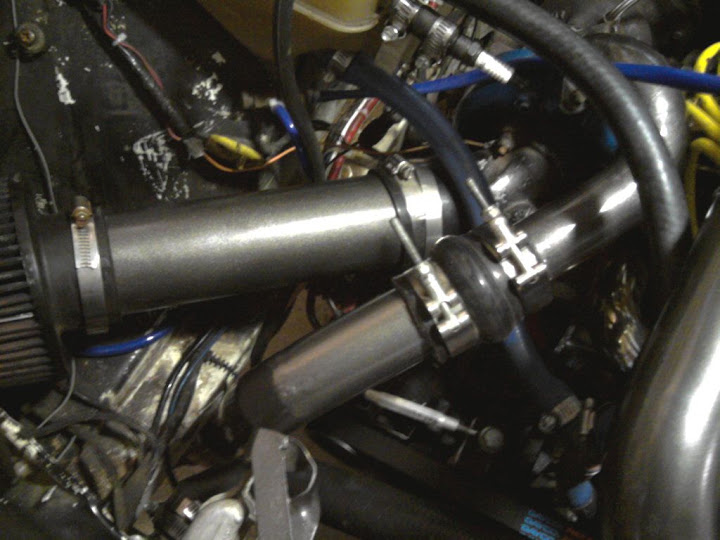
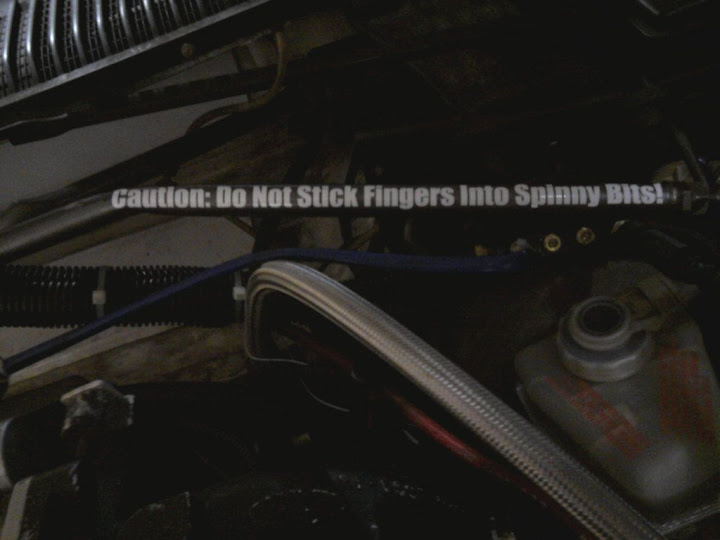
Had to then reposition upper radiator hose to allow fitment, then take turbo to FMIC tubing, cut the turbo outlet, reangle, and make a new turbo outlet to FMIC tube. next up is grind out the welds, look for any holes, reweld, then prep for paint. Then rewire to new alternator location.


New intake manifold will have the throttle body where the alternator was. Was a little more involved with this relo than i thought, but still, rather pleased with fitment. The fitment for the charge tubing is TIGHT since i'm using a non - above - the -radiator intercooler so i have to come down the side and in front of the alt. Weeee.

FWIW the 6 rib length is 60.5", while the V belt length for the same relo is 60". Odd. Anyway. Couple cell phone pics. Will get more after the install is... installed...

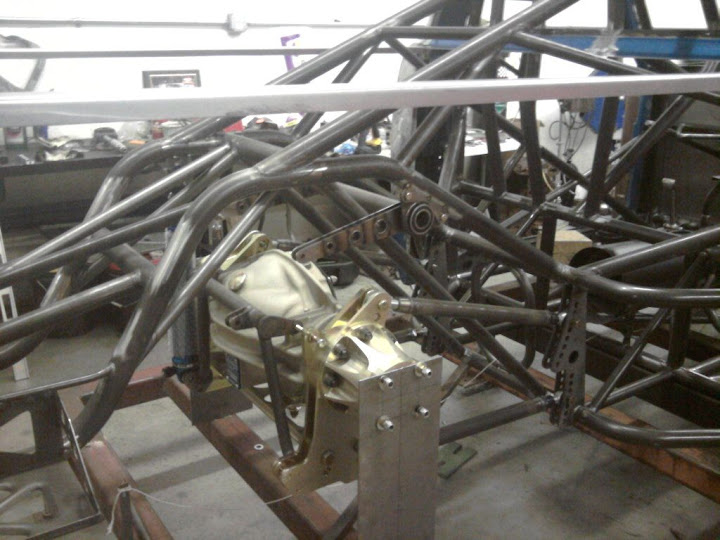
Final mockup of alternator, prior to rubber washers:

Image

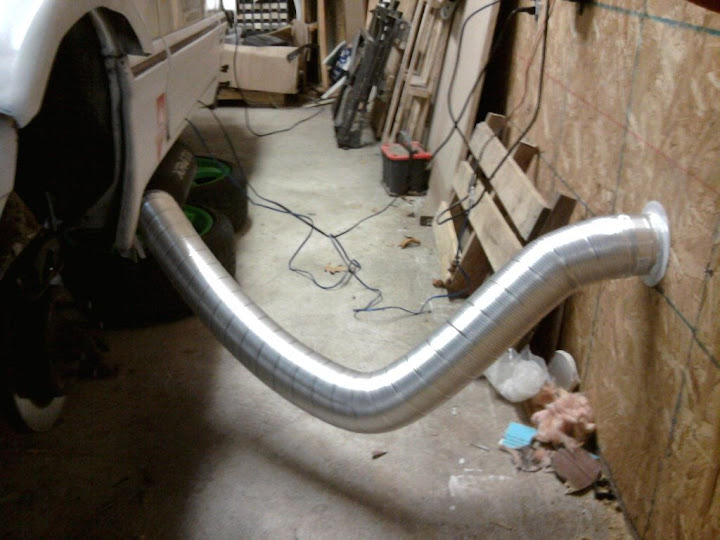
New charge tubing, before bead rolling and seam welding:

Image
-Ray
1985 Ford F150 - Tow Missile
1985 Merkur XR4Ti -#141 CP "Miss Daisy"
2005 Subaru LGT
http://www.cartct.com
User avatar
DPDISXR4Ti
Site Admin
Posts: 15622
Joined: Wed Jan 08, 2003 11:40 pm
Location: New York

Post by DPDISXR4Ti »

Why not just go with the '92 - '94 Ranger alternator and bracket?
Brad
User avatar
Ray
Level 7
Level 7
Posts: 4338
Joined: Sun Oct 24, 2004 10:40 am
Location: CT, USA

Post by Ray »

Because i had the parts lying around and only had to buy a single turnbuckle / belt?
-Ray
1985 Ford F150 - Tow Missile
1985 Merkur XR4Ti -#141 CP "Miss Daisy"
2005 Subaru LGT
http://www.cartct.com
User avatar
Ray
Level 7
Level 7
Posts: 4338
Joined: Sun Oct 24, 2004 10:40 am
Location: CT, USA

Post by Ray »

Dropped the rear end (again) yesterday with Adam's help. Seperated the control arms, and broke out the sanding wheel and welder. Installed the TSS fab reinforcement kit and made the rear end a solid mount. Need to find some stainless sleeves and a way to solid mount the diff since it's discontinued (mc2racing is working on a new design).

Self etched and painted the beam "titanium" which is the color of my valve cover, the beam brackets gunmetal, and i was INCHES from shooting the arms bright ford blue just to piss you off joe but i went with a satin black.

(pics are before control arm paint, actually before i finished the other arm)

Image

Image

Thanks Brad for the TSS kit. I had to modify it a tad to fit my application, but it should work on an otherwise stock vehicle with minimal grinding.


edit: heh! lime green and ford blue spirals = +20hp

Image
Last edited by Ray on Sun Jan 09, 2011 6:20 pm, edited 1 time in total.
-Ray
1985 Ford F150 - Tow Missile
1985 Merkur XR4Ti -#141 CP "Miss Daisy"
2005 Subaru LGT
http://www.cartct.com
User avatar
John Brennan
Level 8
Posts: 11630
Joined: Wed Jun 18, 2003 4:19 pm
Location: Scottsdale, AZ "Summer Is Coming"

Post by John Brennan »

How do you calculate exactly where that pulley needs to be positioned? I ask this, remembering an old 220D belonging to a girlfriend I had, mmm, thirty years ago, which had a misaligned accessory that kept chewing through belts and leaving us stranded in places like Tuba City, Arizona...
This is my car, and these are my people!
2015 Fiesta ST
2020 Edge 2.0 Ecoboost
User avatar
Ray
Level 7
Level 7
Posts: 4338
Joined: Sun Oct 24, 2004 10:40 am
Location: CT, USA

Post by Ray »

Straightedge off known point (crank or water pump) to alternator mocked up on stock bolt allows "sliding".

Take straightedge across face of crank pulley to face of alt pulley, take micrometer and measure spacing back from bracket; make spacer :)

Sounds more intense than it is. I happened to have some aluminum spacers laying around and it wasn't that time consuming.


edit: forgot to post installed picture of alt / relocated charge tubing. And yes, i removed the temporary mock up plug for the spare line off the degas tank :lol:

Joe (hEaT) gave me a few caps. It's installed and not nearly as fast but probably safer.


Image
-Ray
1985 Ford F150 - Tow Missile
1985 Merkur XR4Ti -#141 CP "Miss Daisy"
2005 Subaru LGT
http://www.cartct.com
hEaT
Level 7
Level 7
Posts: 3902
Joined: Mon May 07, 2007 10:12 pm
Location: USA

Post by hEaT »

Ray wrote:and i was INCHES from shooting the arms bright ford blue just to piss you off joe but i went with a satin black.
Aww, glad I was there in spirit :lol:


Looks great and is definitely giving me motivation to tear into mine ASAP.
User avatar
Ray
Level 7
Level 7
Posts: 4338
Joined: Sun Oct 24, 2004 10:40 am
Location: CT, USA

Post by Ray »

Got some more done today.

Front shock tower to fender braces welded in:

Image

Went to a friends shop as i do not have the ability to TIG aluminum in mine. Took the mc2racing diff mount and modified it a little to make it a rigid mount.

Image


Speaking of that guy... He's a pretty good fabricator. This is his new truck. He built everything. Not only that, he's one of the best body guys (bodywork, paint) i've ever met. I wish i had 1/10th of his skill.

Image

Rear
Image


Motor is over 1200hp (probably 1260 or so), shooting for 2200lbs with driver. Not only that, but he's starting to do his own carbon fiber molds. I anticipate visiting him again. He showed me a few things on TIG welding, i was surprised how similar it is to soldering wires. I am going to get some mild sticks for my TIG (which cant do AL) and practice. Inspiring visit. And yes, he drives the trucks.
-Ray
1985 Ford F150 - Tow Missile
1985 Merkur XR4Ti -#141 CP "Miss Daisy"
2005 Subaru LGT
http://www.cartct.com
User avatar
DPDISXR4Ti
Site Admin
Posts: 15622
Joined: Wed Jan 08, 2003 11:40 pm
Location: New York

Post by DPDISXR4Ti »

Ray wrote:Got some more done today.
Front shock tower to fender braces welded in:
While mine sits mocked up in place - haven't even ground the paint off yet. Glad somebody's making progress. :lol:
Ray wrote:Speaking of that guy... He's a pretty good fabricator.


Ya think? :P
Brad
User avatar
Ray
Level 7
Level 7
Posts: 4338
Joined: Sun Oct 24, 2004 10:40 am
Location: CT, USA

Post by Ray »

Yes, i do think. He should have a discovery show after him. :lol:

Have the day off so i made a couple heat shields out of some thin aluminum sheet.

I'm not sure the turbine housing one will hold up - but the alternator one should be good.

Image

I also started practicing steel TIG welding - man it's much more involved than MIG. I'm going to keep practicing. No, no pictures of THAT :lol:
-Ray
1985 Ford F150 - Tow Missile
1985 Merkur XR4Ti -#141 CP "Miss Daisy"
2005 Subaru LGT
http://www.cartct.com
User avatar
Ray
Level 7
Level 7
Posts: 4338
Joined: Sun Oct 24, 2004 10:40 am
Location: CT, USA

Post by Ray »

Since i have to work on my tune in the winter - and i'd rather not leave the door open because it's, well... winter, i decided to improvise.

Image

Admittedly, even tho it's a 4" tube it blows right off the car. Traditional dryer vent to a dryer vent with the flappy door thing on the wall. Going to need to either figure out a better way to attach to car, or get a real exhaust vent to the hole i cut in the building.
-Ray
1985 Ford F150 - Tow Missile
1985 Merkur XR4Ti -#141 CP "Miss Daisy"
2005 Subaru LGT
http://www.cartct.com
User avatar
Ray
Level 7
Level 7
Posts: 4338
Joined: Sun Oct 24, 2004 10:40 am
Location: CT, USA

Post by Ray »

forgot to upload these from my phone; courtesy of Omnispeedtuning...


Well, it's true.
Image


Seriously - dont do it!
Image


And of course, in memory of GaryK...
Image
-Ray
1985 Ford F150 - Tow Missile
1985 Merkur XR4Ti -#141 CP "Miss Daisy"
2005 Subaru LGT
http://www.cartct.com